We’ve gotten a LOT accomplished the past couple of days! I’m super proud of us! Continue reading
Camper DIY’s & Maintenance
3
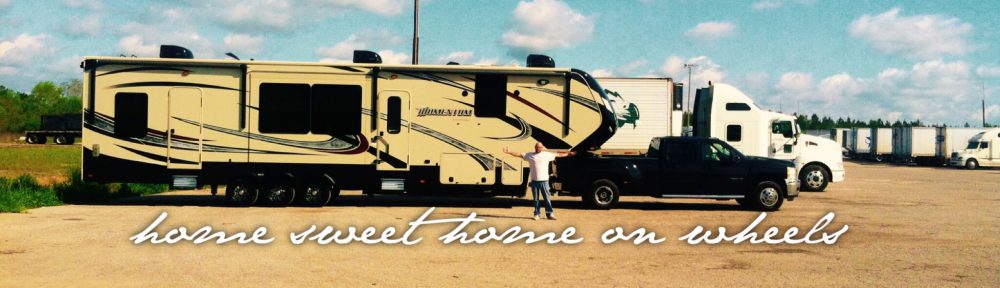
We’ve gotten a LOT accomplished the past couple of days! I’m super proud of us! Continue reading
Apparently February in Oklahoma City is the perfect time for outdoor DIY projects! 75 degrees! I’ll take it! Continue reading
Lately I’ve been joining lots of Facebook groups related to RVs and campers… RV Interior Ideas, Fulltime RVers, Grand Design Owners, etc… I’m not sure it’s such a good idea because now I have a WHOLE BUNCH of things I want to do to our camper! Continue reading
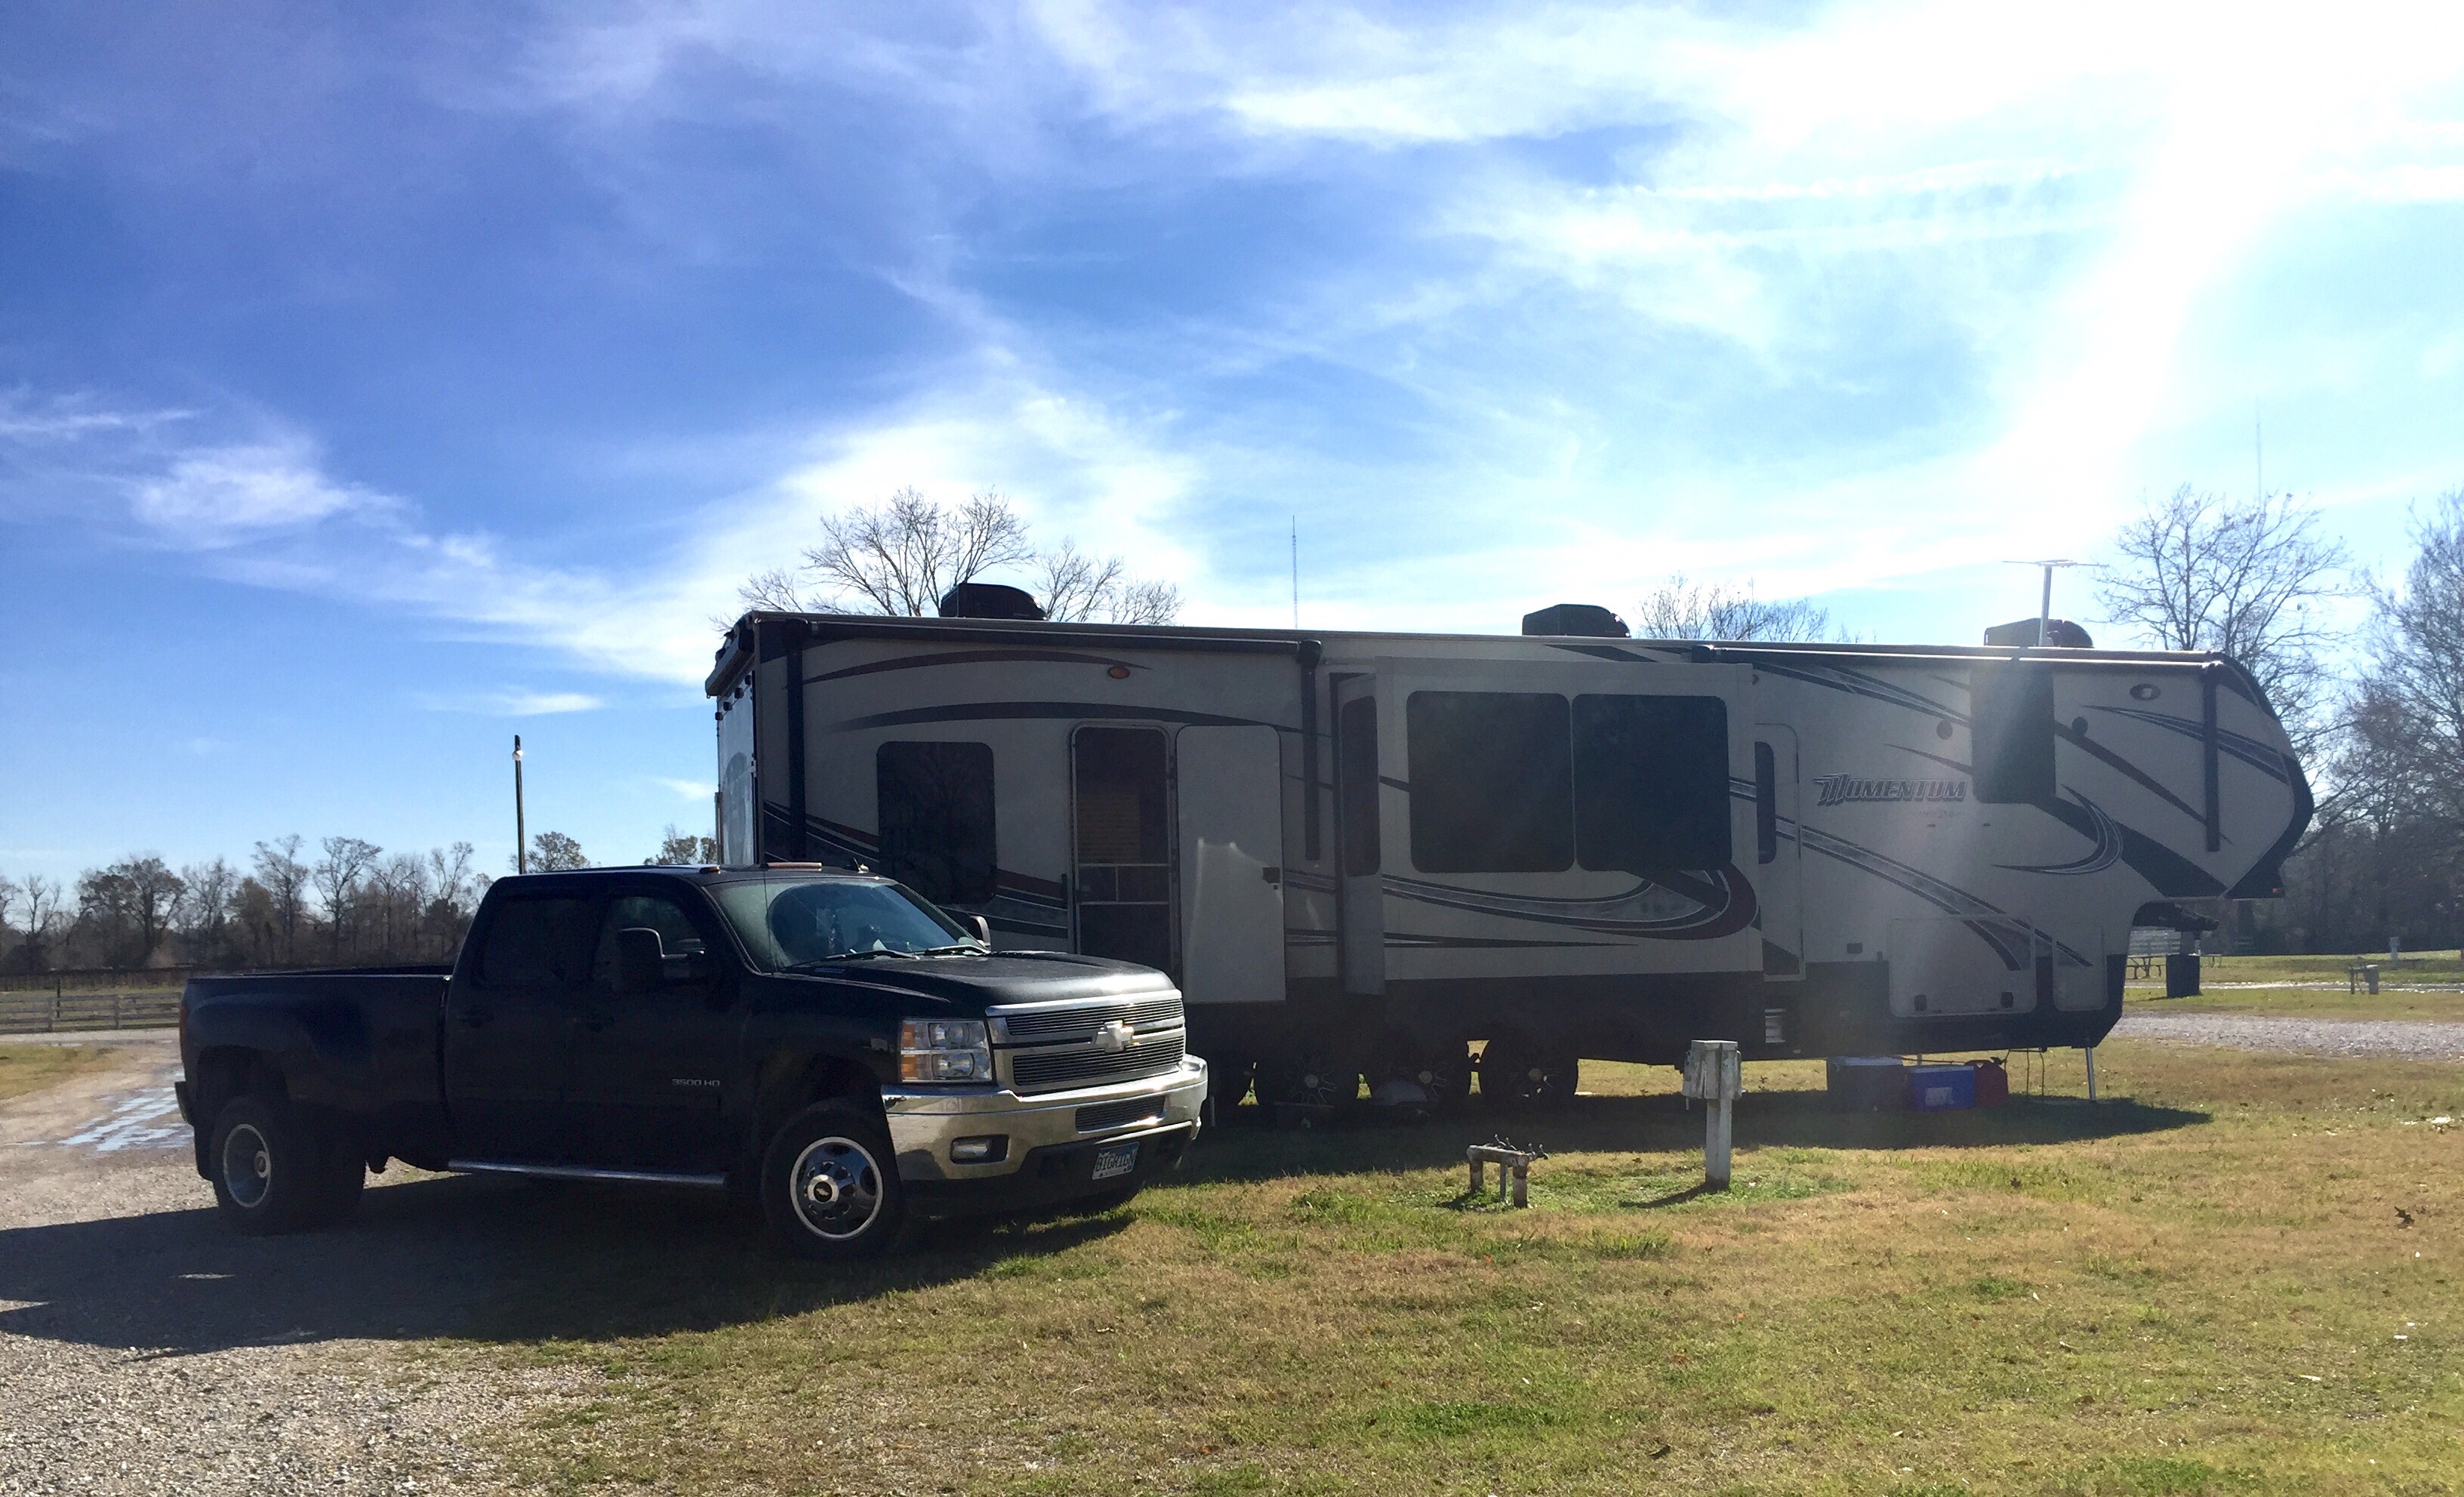
We’ve settled in to Farr Park RV Campground here in Baton Rouge and we’ve been loving the food!
 Sunday we went to Sammy’s Grill to have some much needed and missed boiled crawfish… Yum! Continue reading
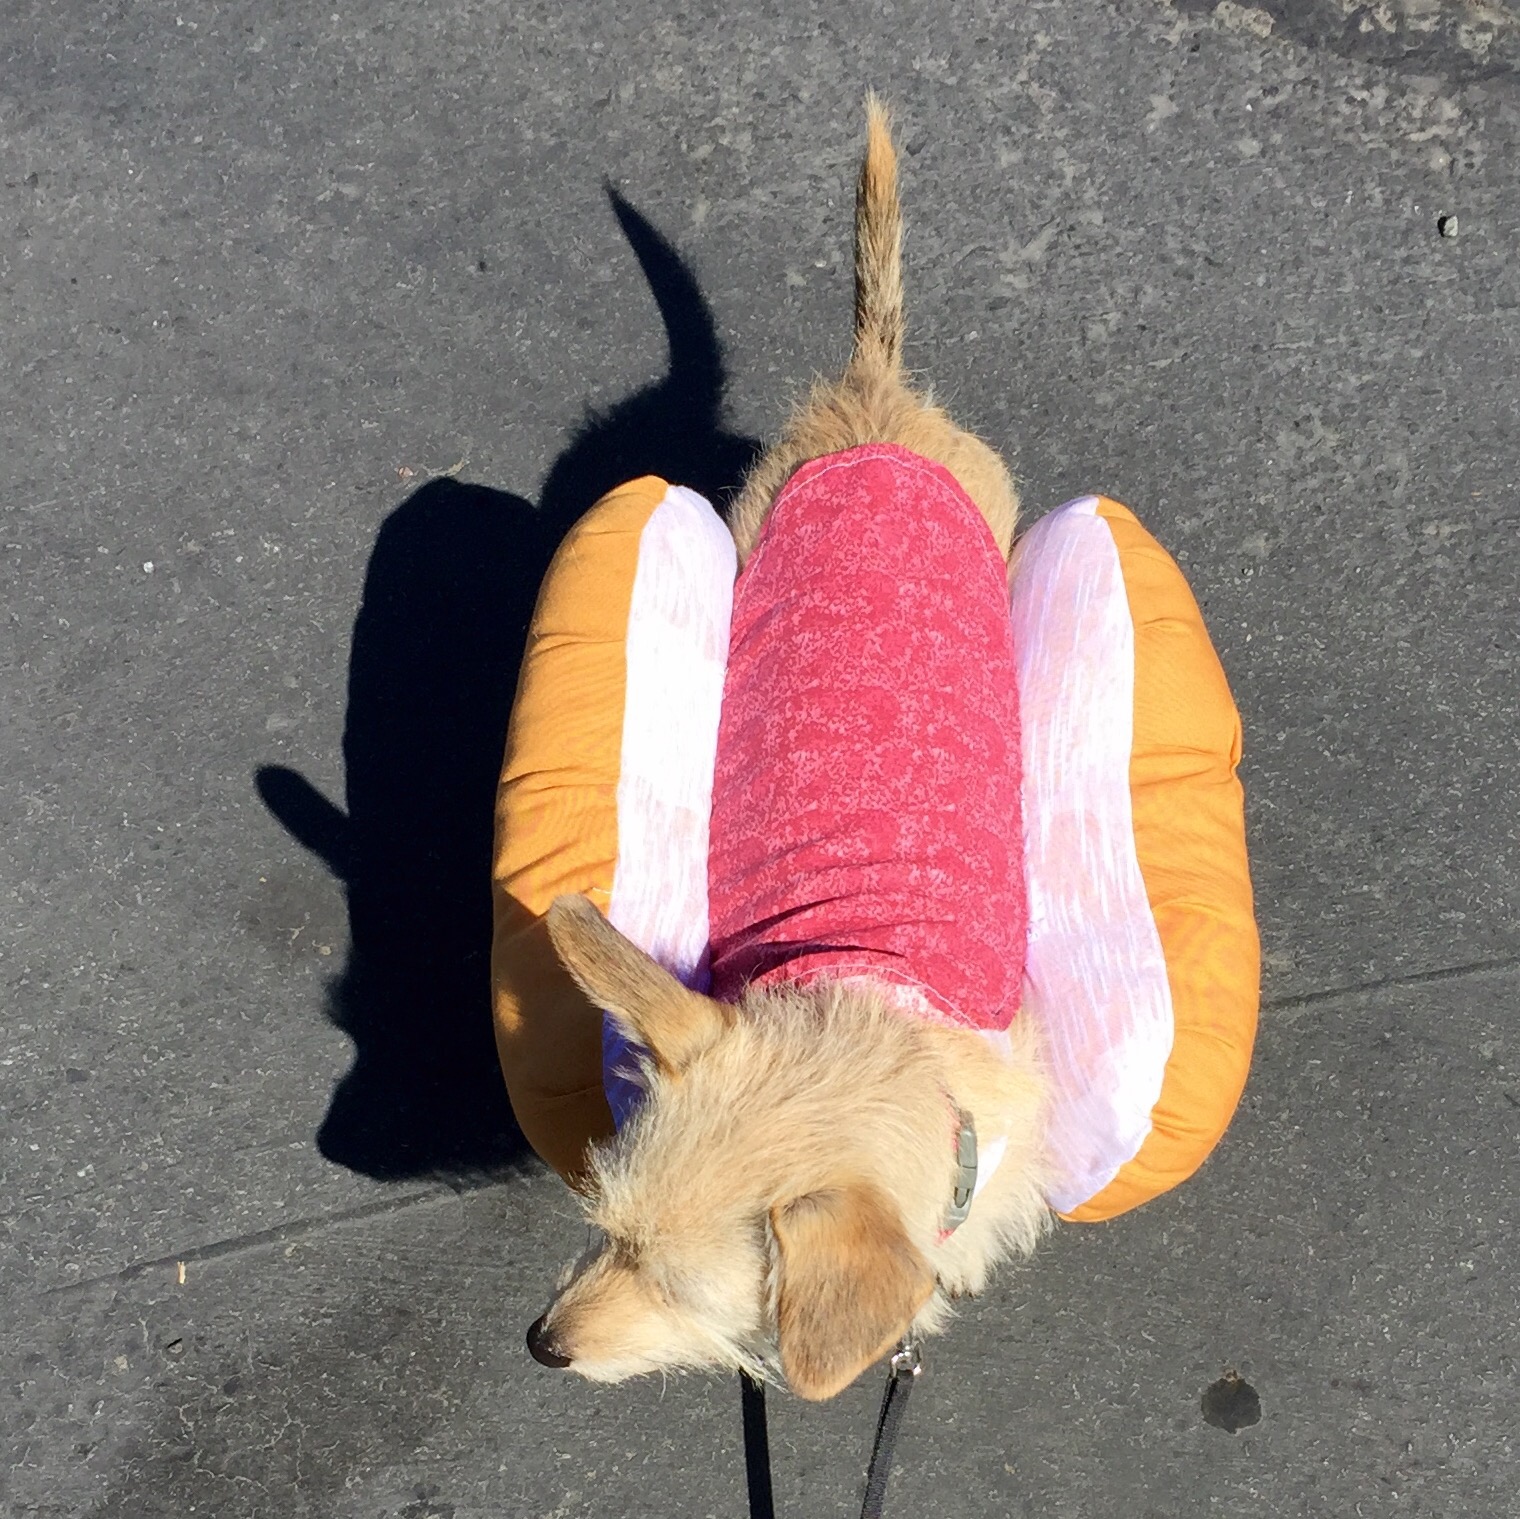
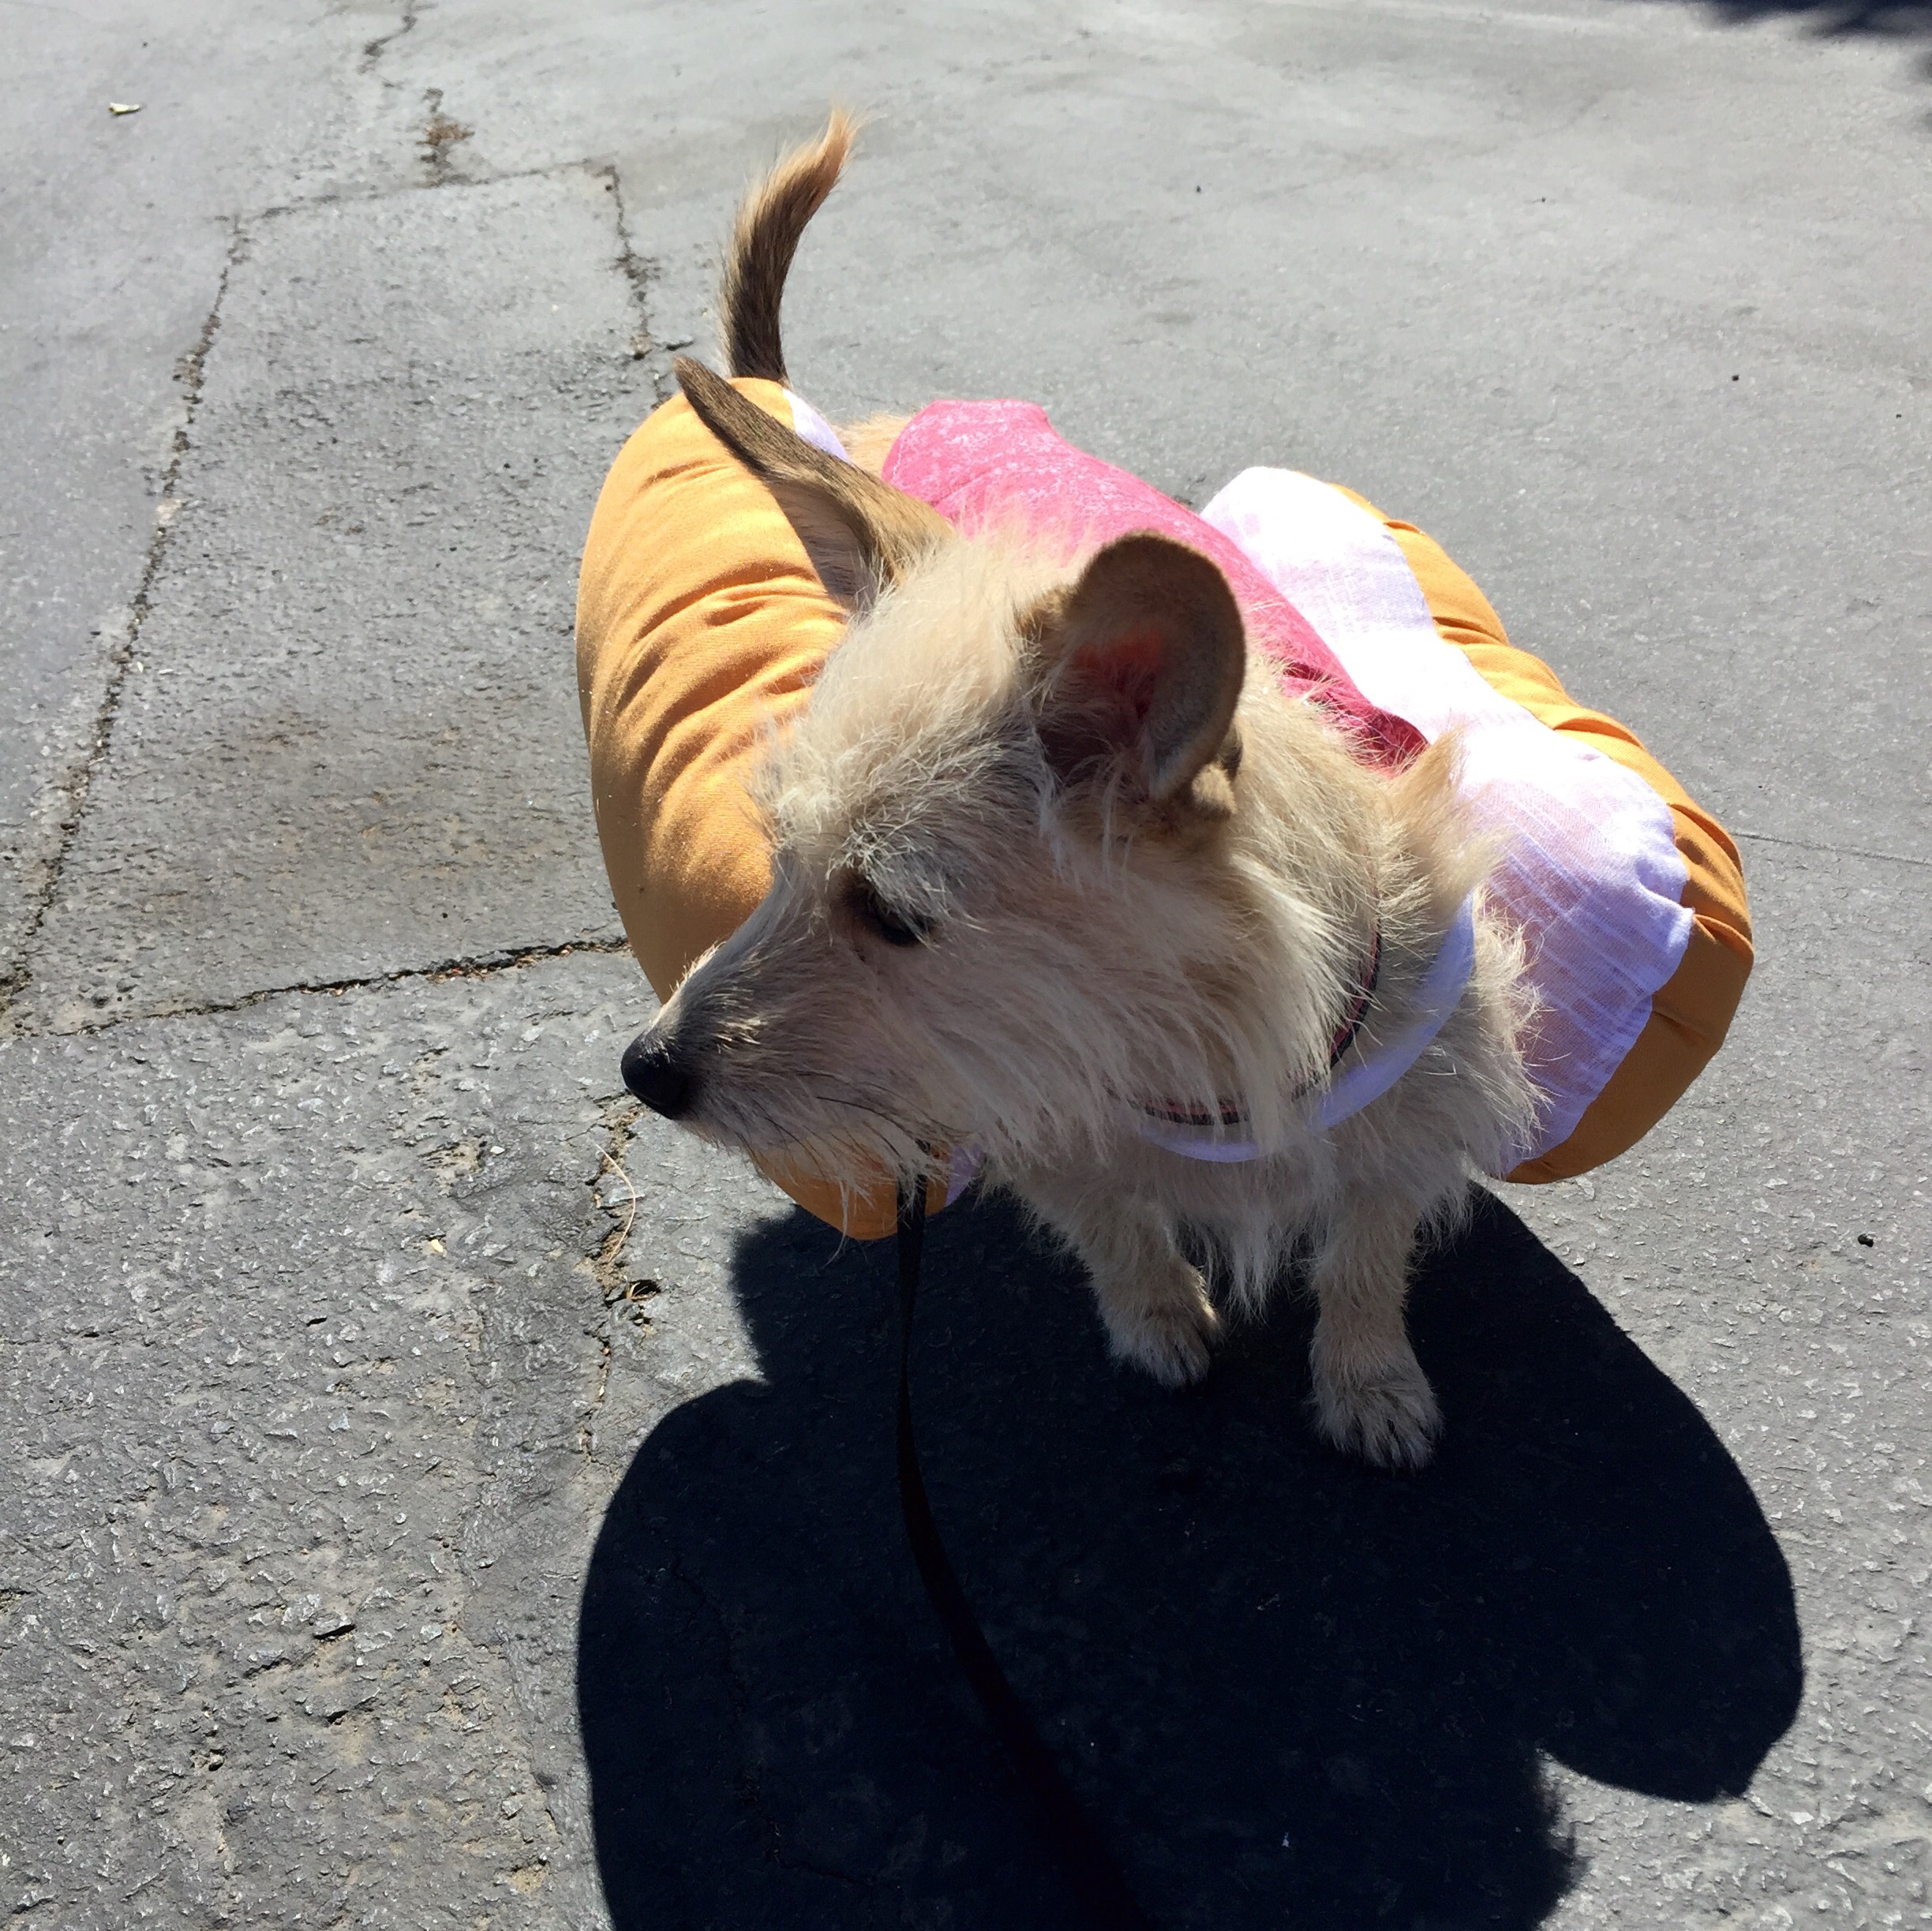
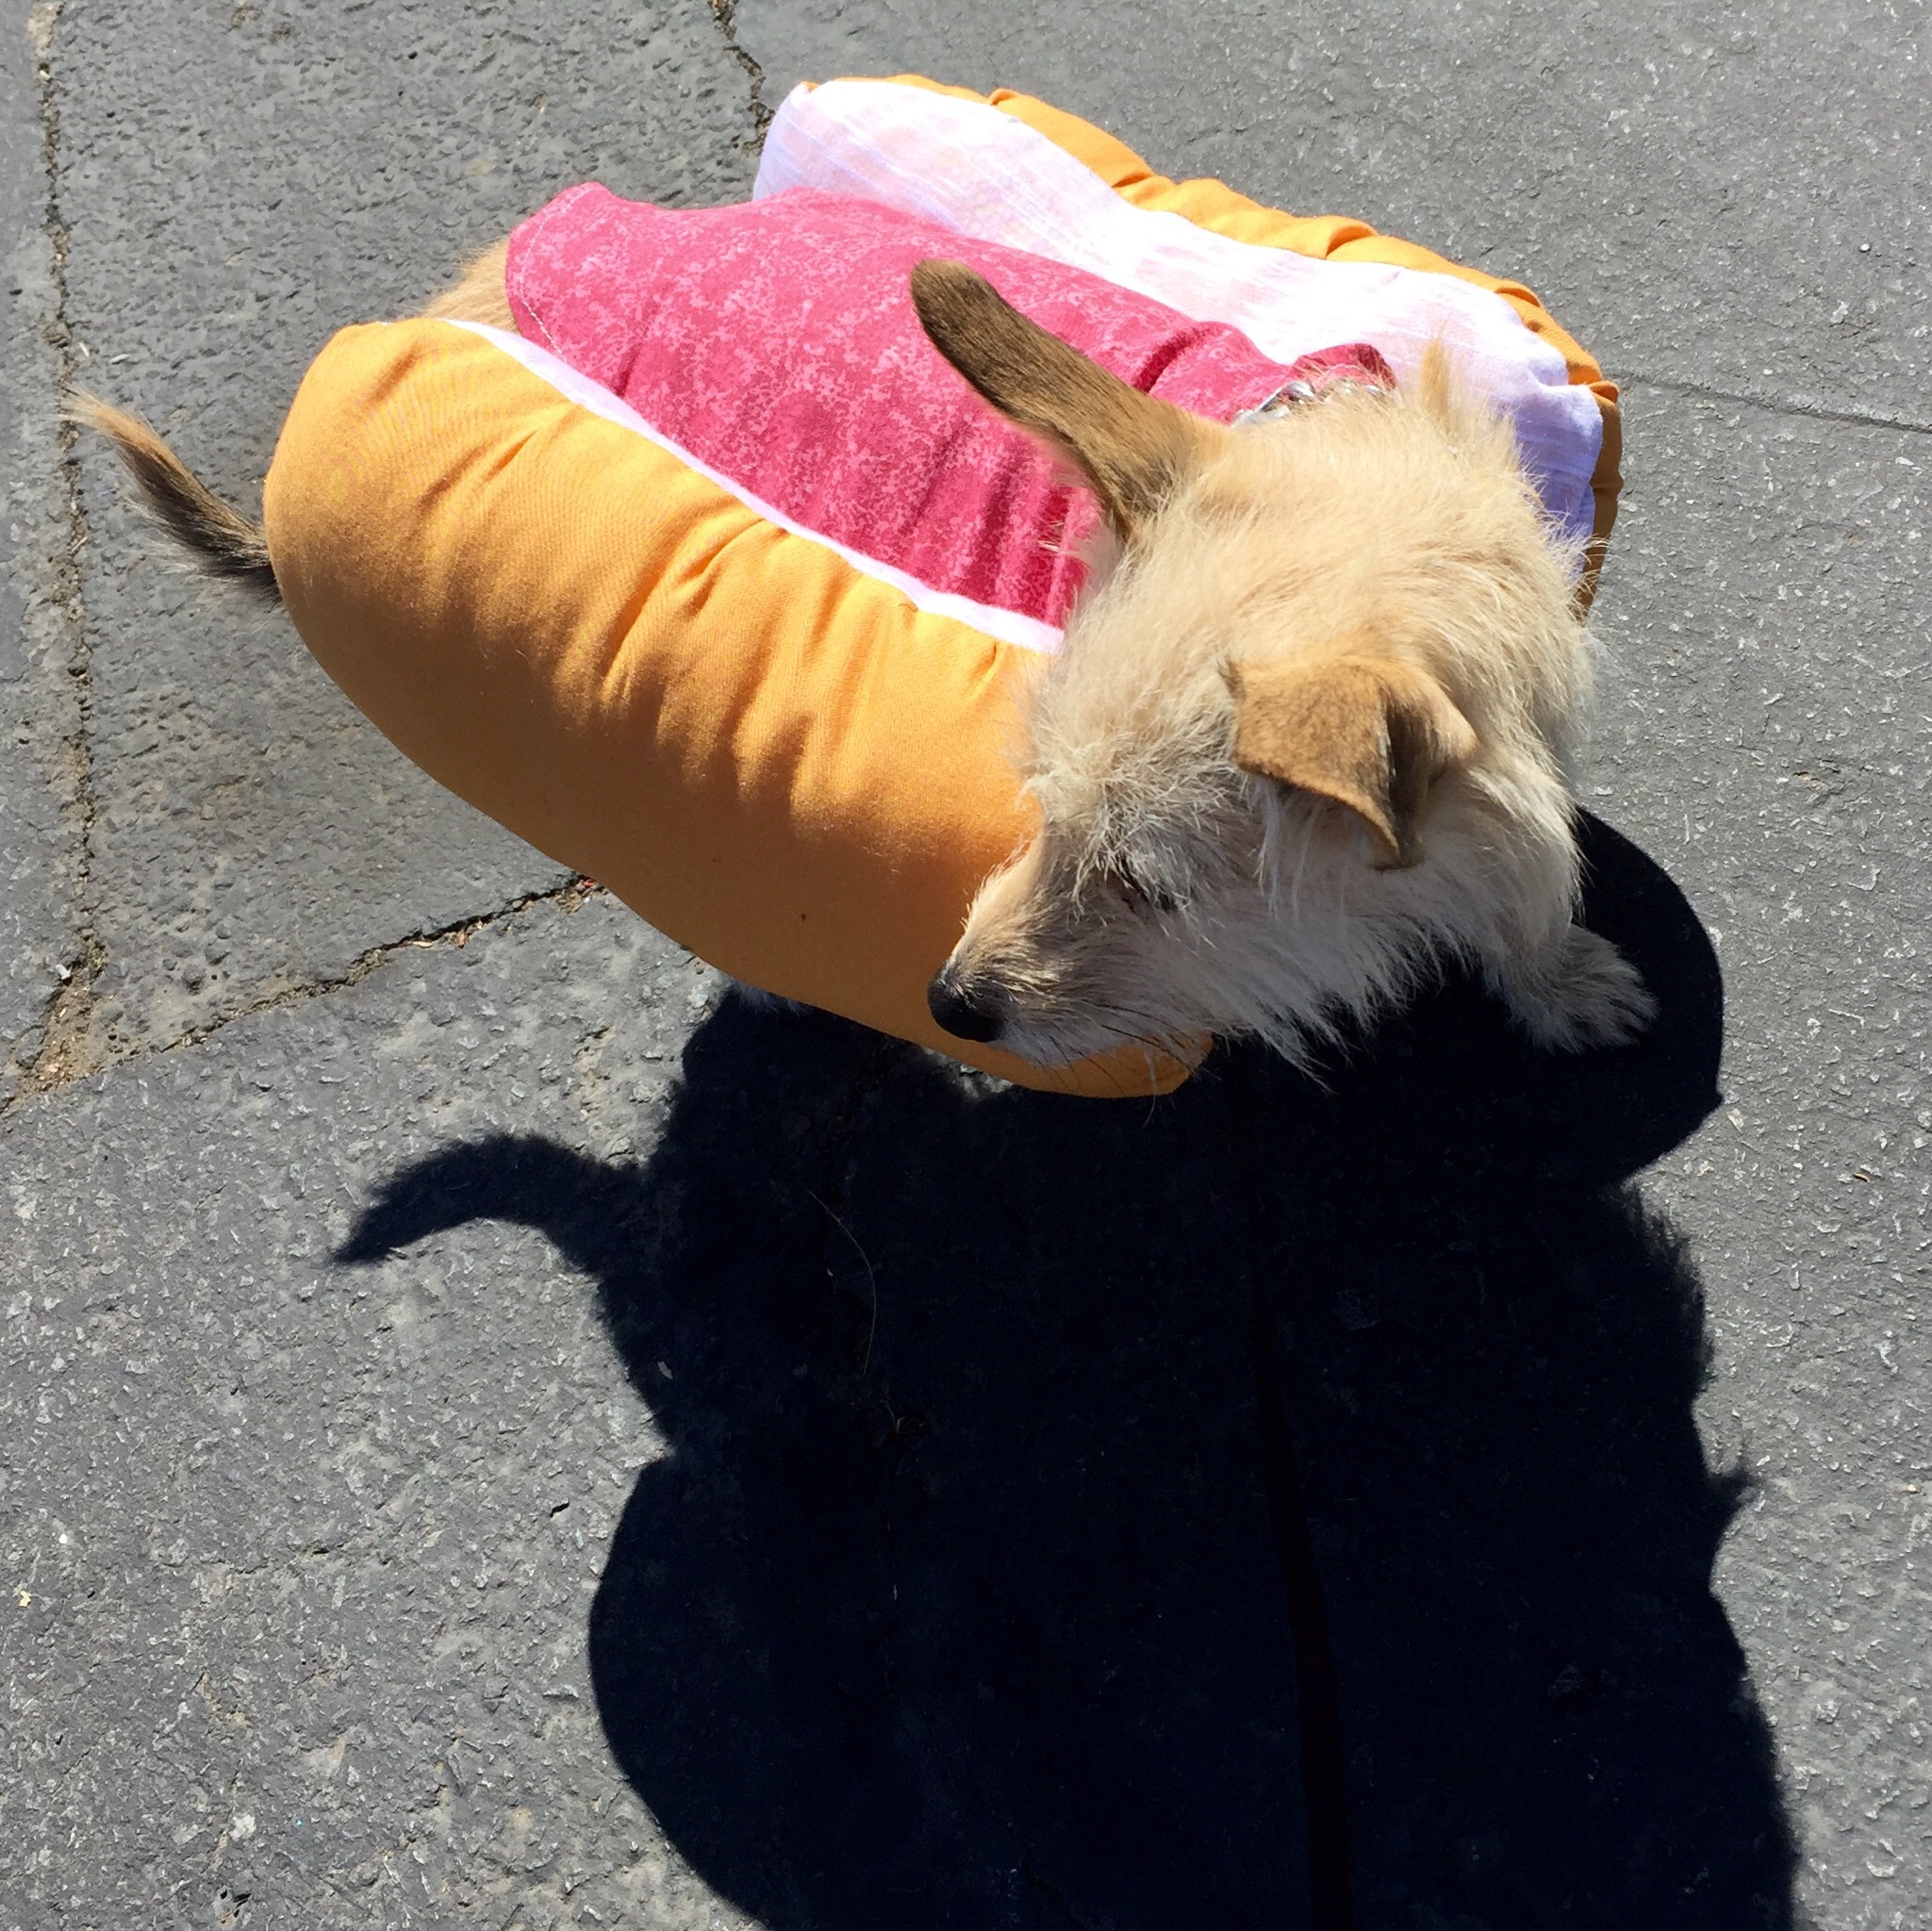
I love dressing up for Halloween, I love putting clothes on Charlie, and I love making things. All that adds up to…..
A Puppy Hot Dog Halloween Costume!!!
 Last year all three of us dressed up like “Redneck and Proud”/hillbillies/white trash/Earl and Joy from My Name is Earl type characters…
 I’ve been planning Charlie’s costume for a few months now. I still don’t know what Allen and I are going to be… But at least Charlie’s all set!
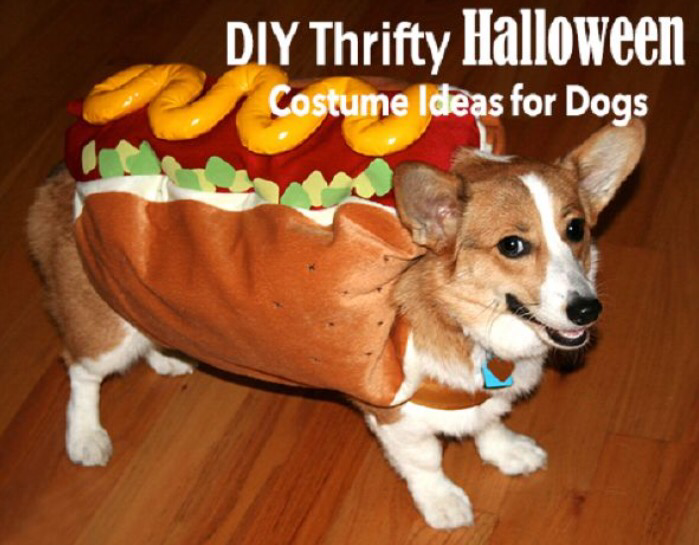
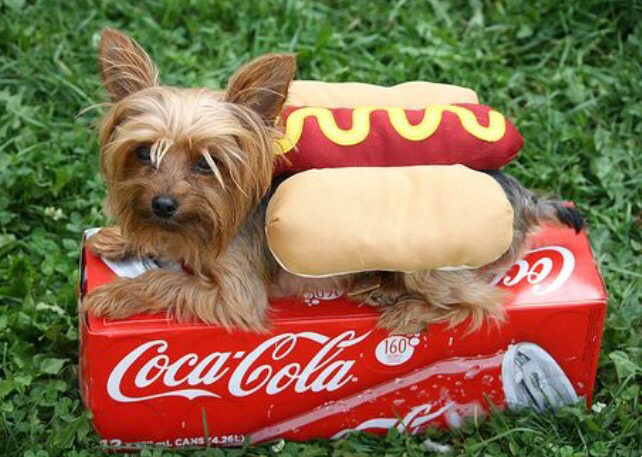
I took my inspiration from these pictures…
I think I want to add a piece of yellow yarn to Charlie’s costume… But we’ll see.
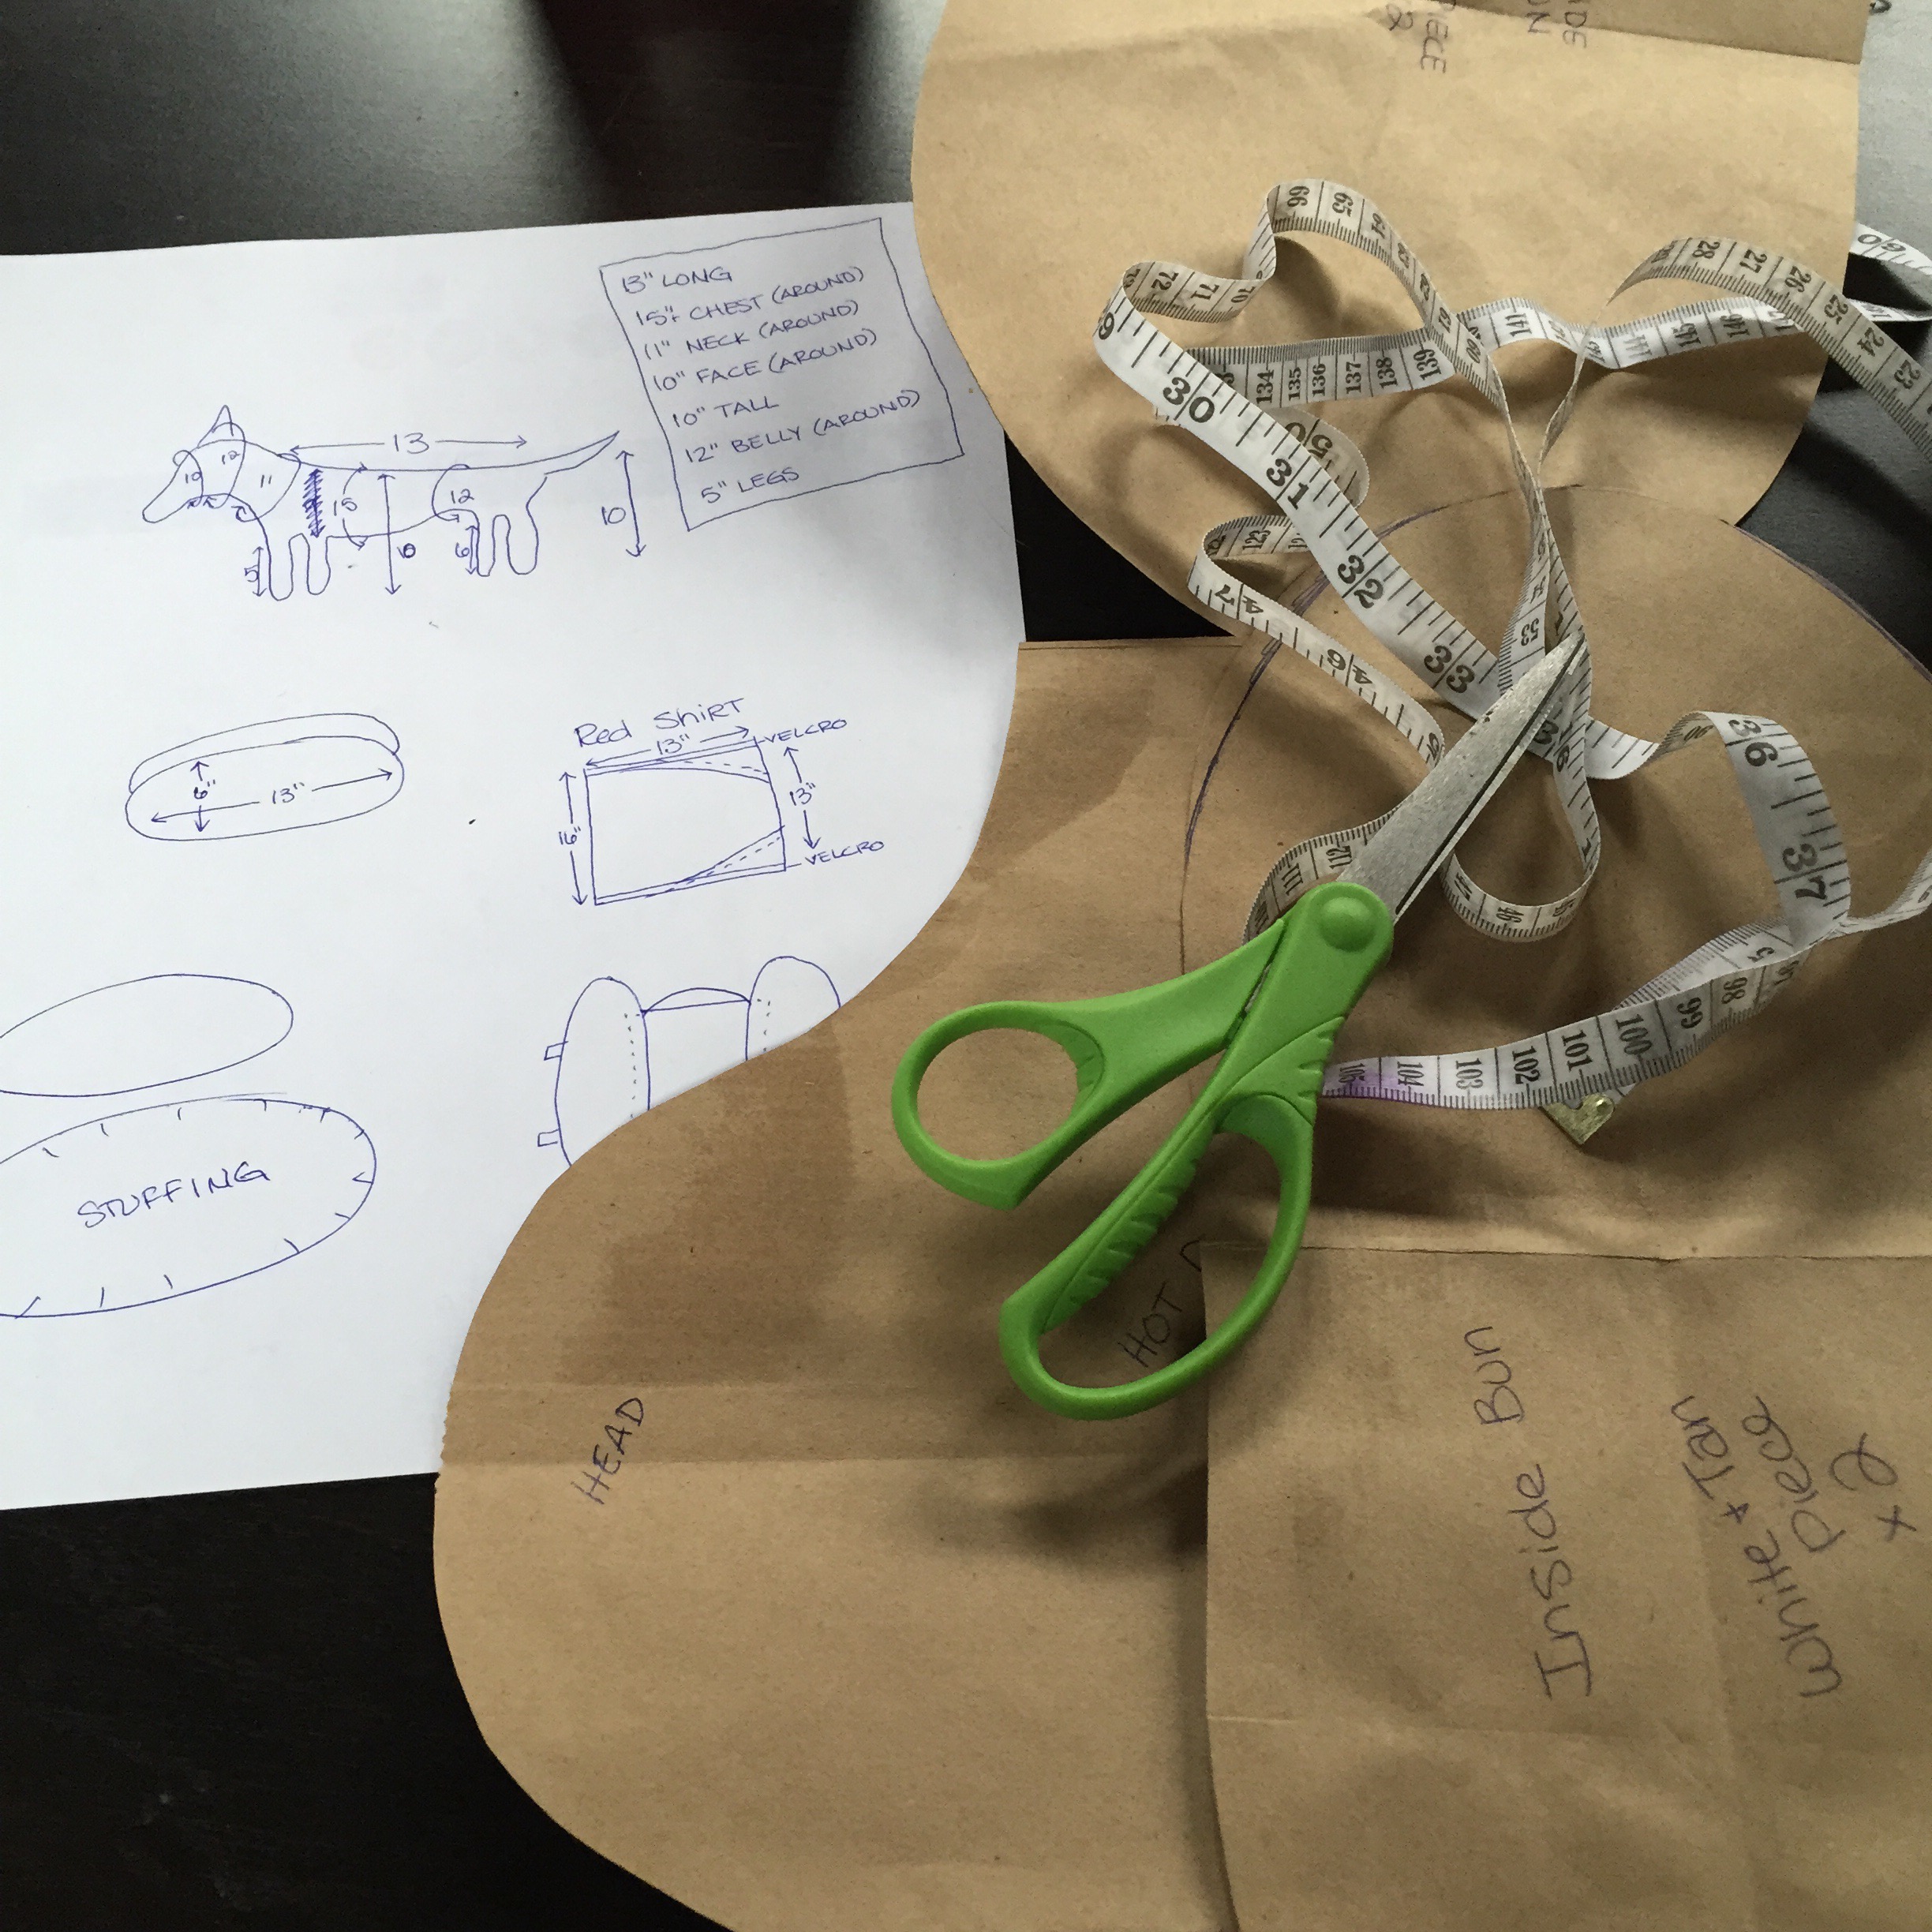
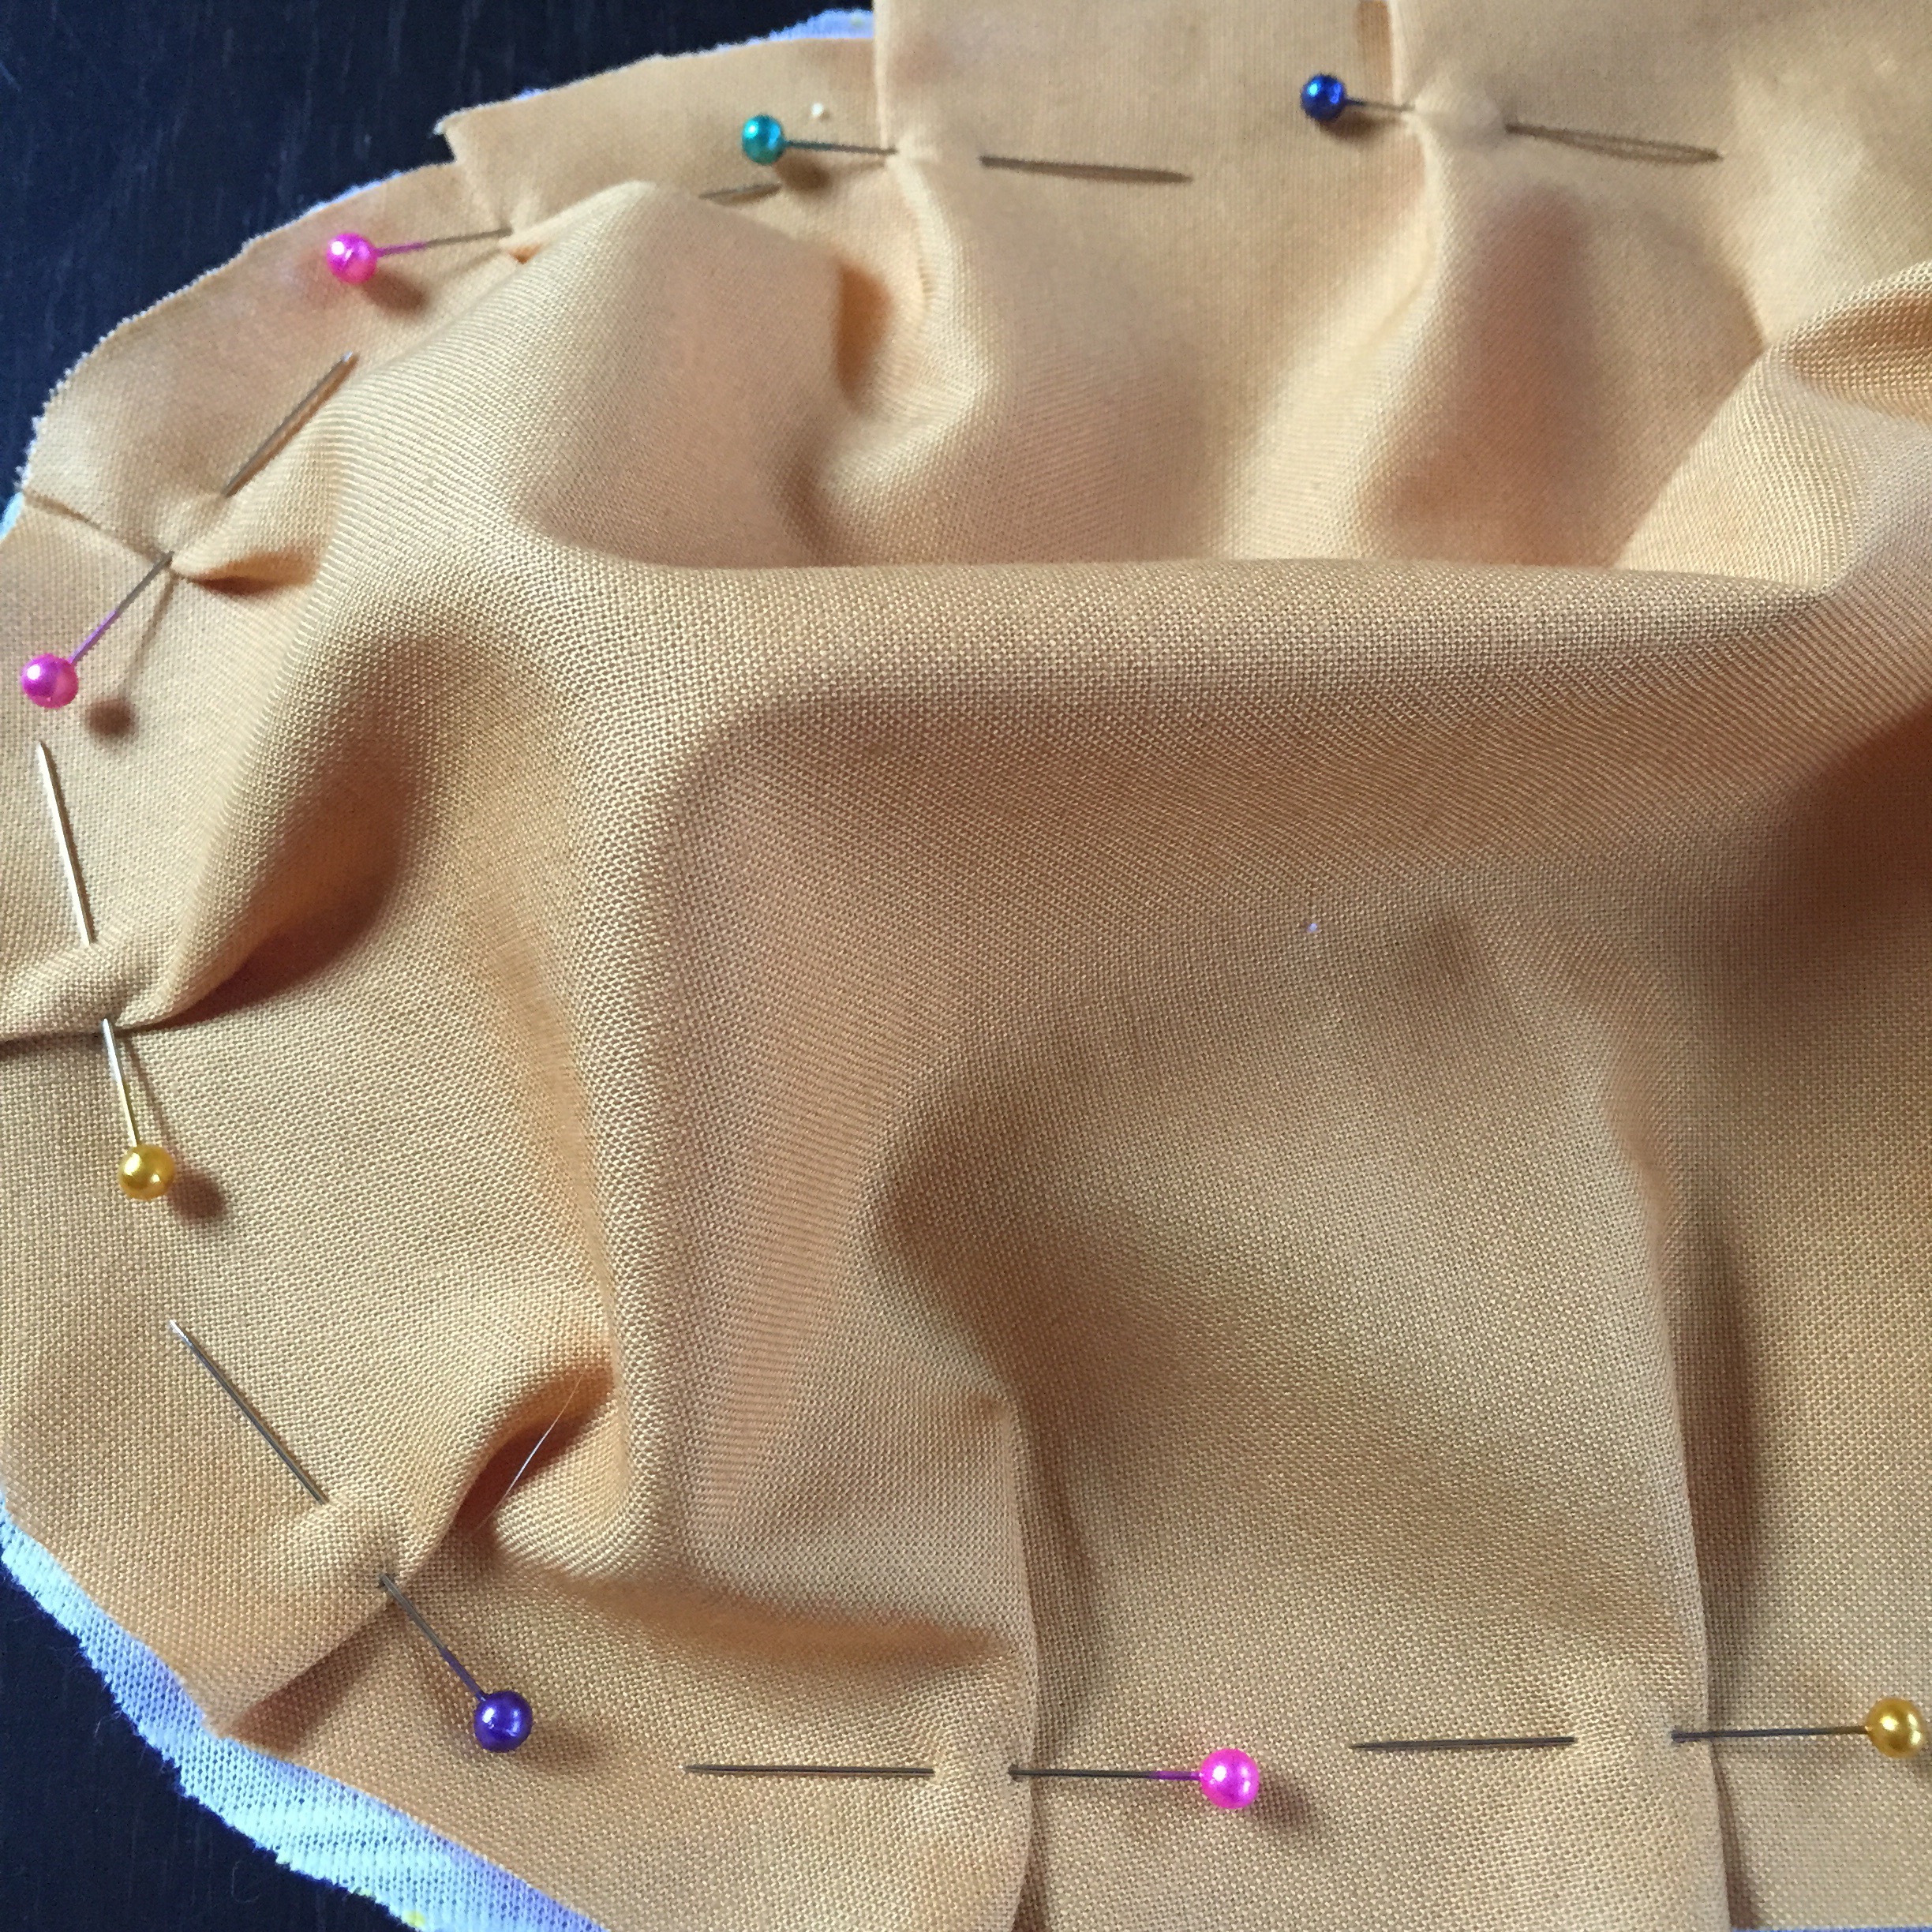
I started off by buying some yellowish/bun colored fabric and some hot dog/smoked sausage colored fabric. I already had the white jersey fabric. It has some kind of a floral pattern to it, but you can’t really tell when only a little shows. And I got a bag of stuffing for the buns. I also used scissors, needle and thread, Velcro and a sewing machine.
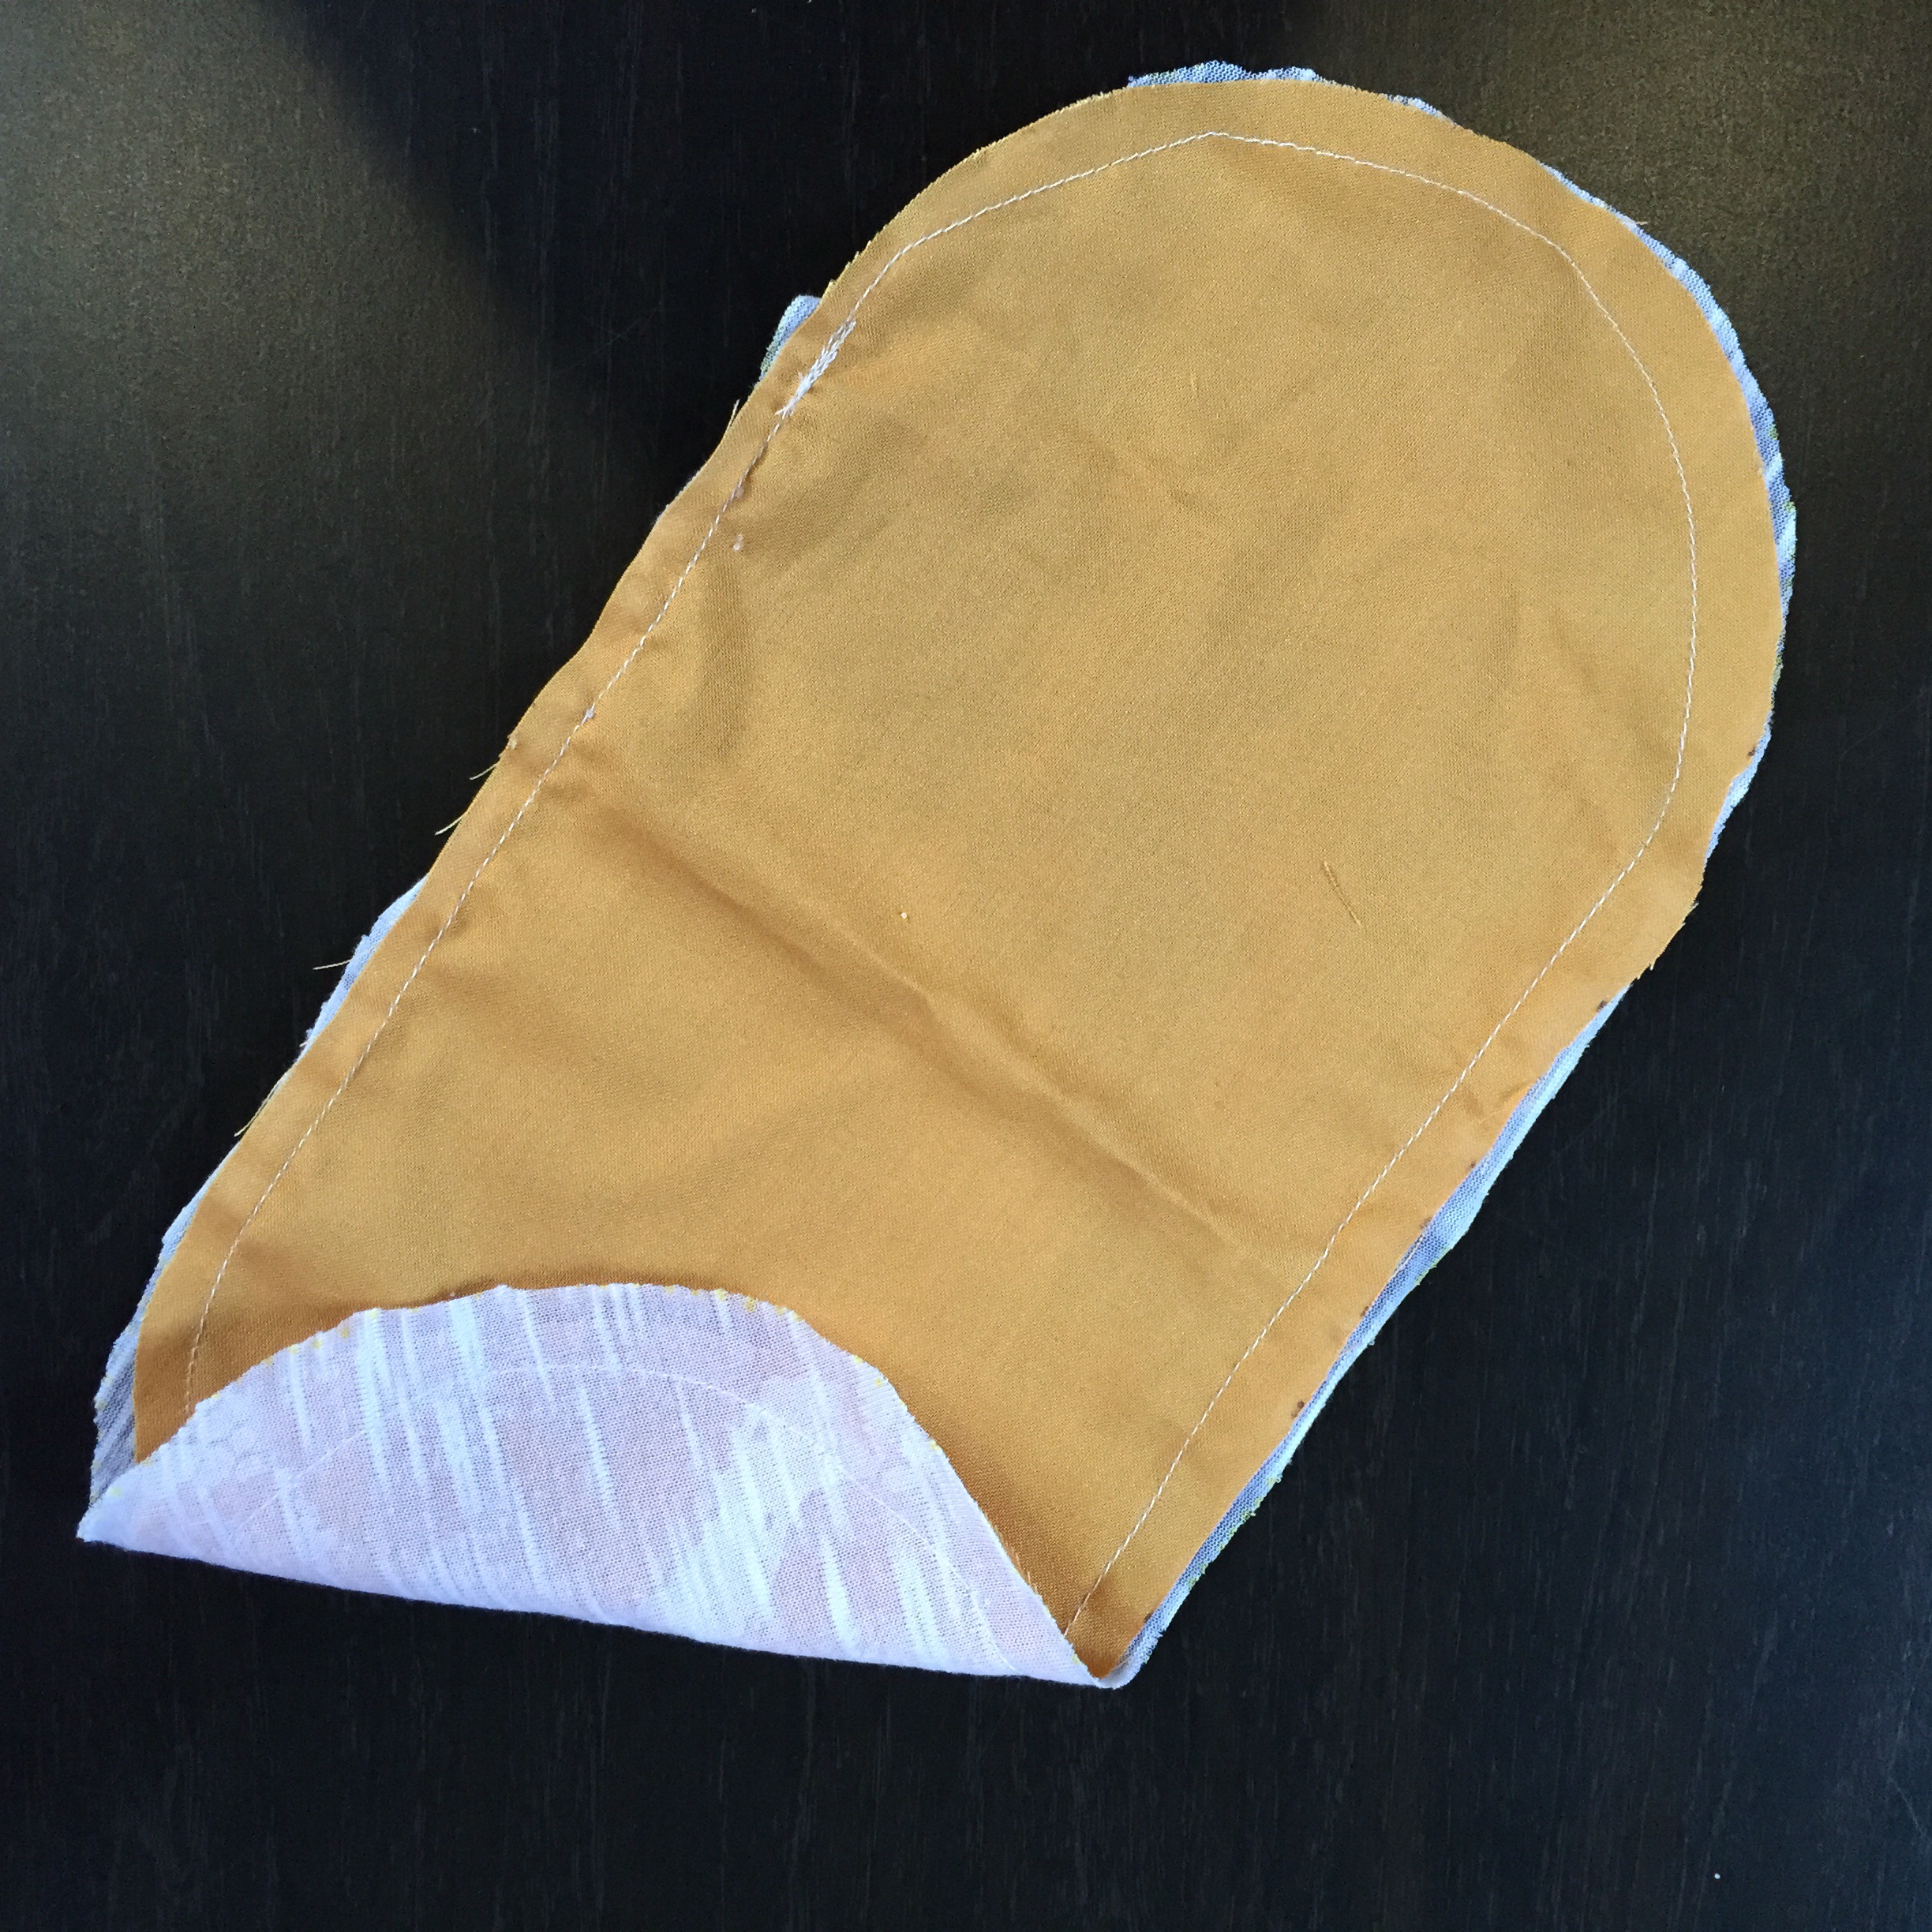
After I had all my supplies, I started planning how I would do it. I started by cutting 2 ovals from a paper bag, one a little larger than the other, so the buns would poof out like buns do. I measured Charlie of course first and decided how long and tall they needed to be. For the larger oval I cut 2 pieces of the yellow and the smaller I cut 2 yellow and 2 white, for the inside of the bun. I also cut a piece for the hot dog. I made that one almost as long as the buns then made it so it would wrap around her middle and stay there. You can see the shape in the pictures better than I can explain.


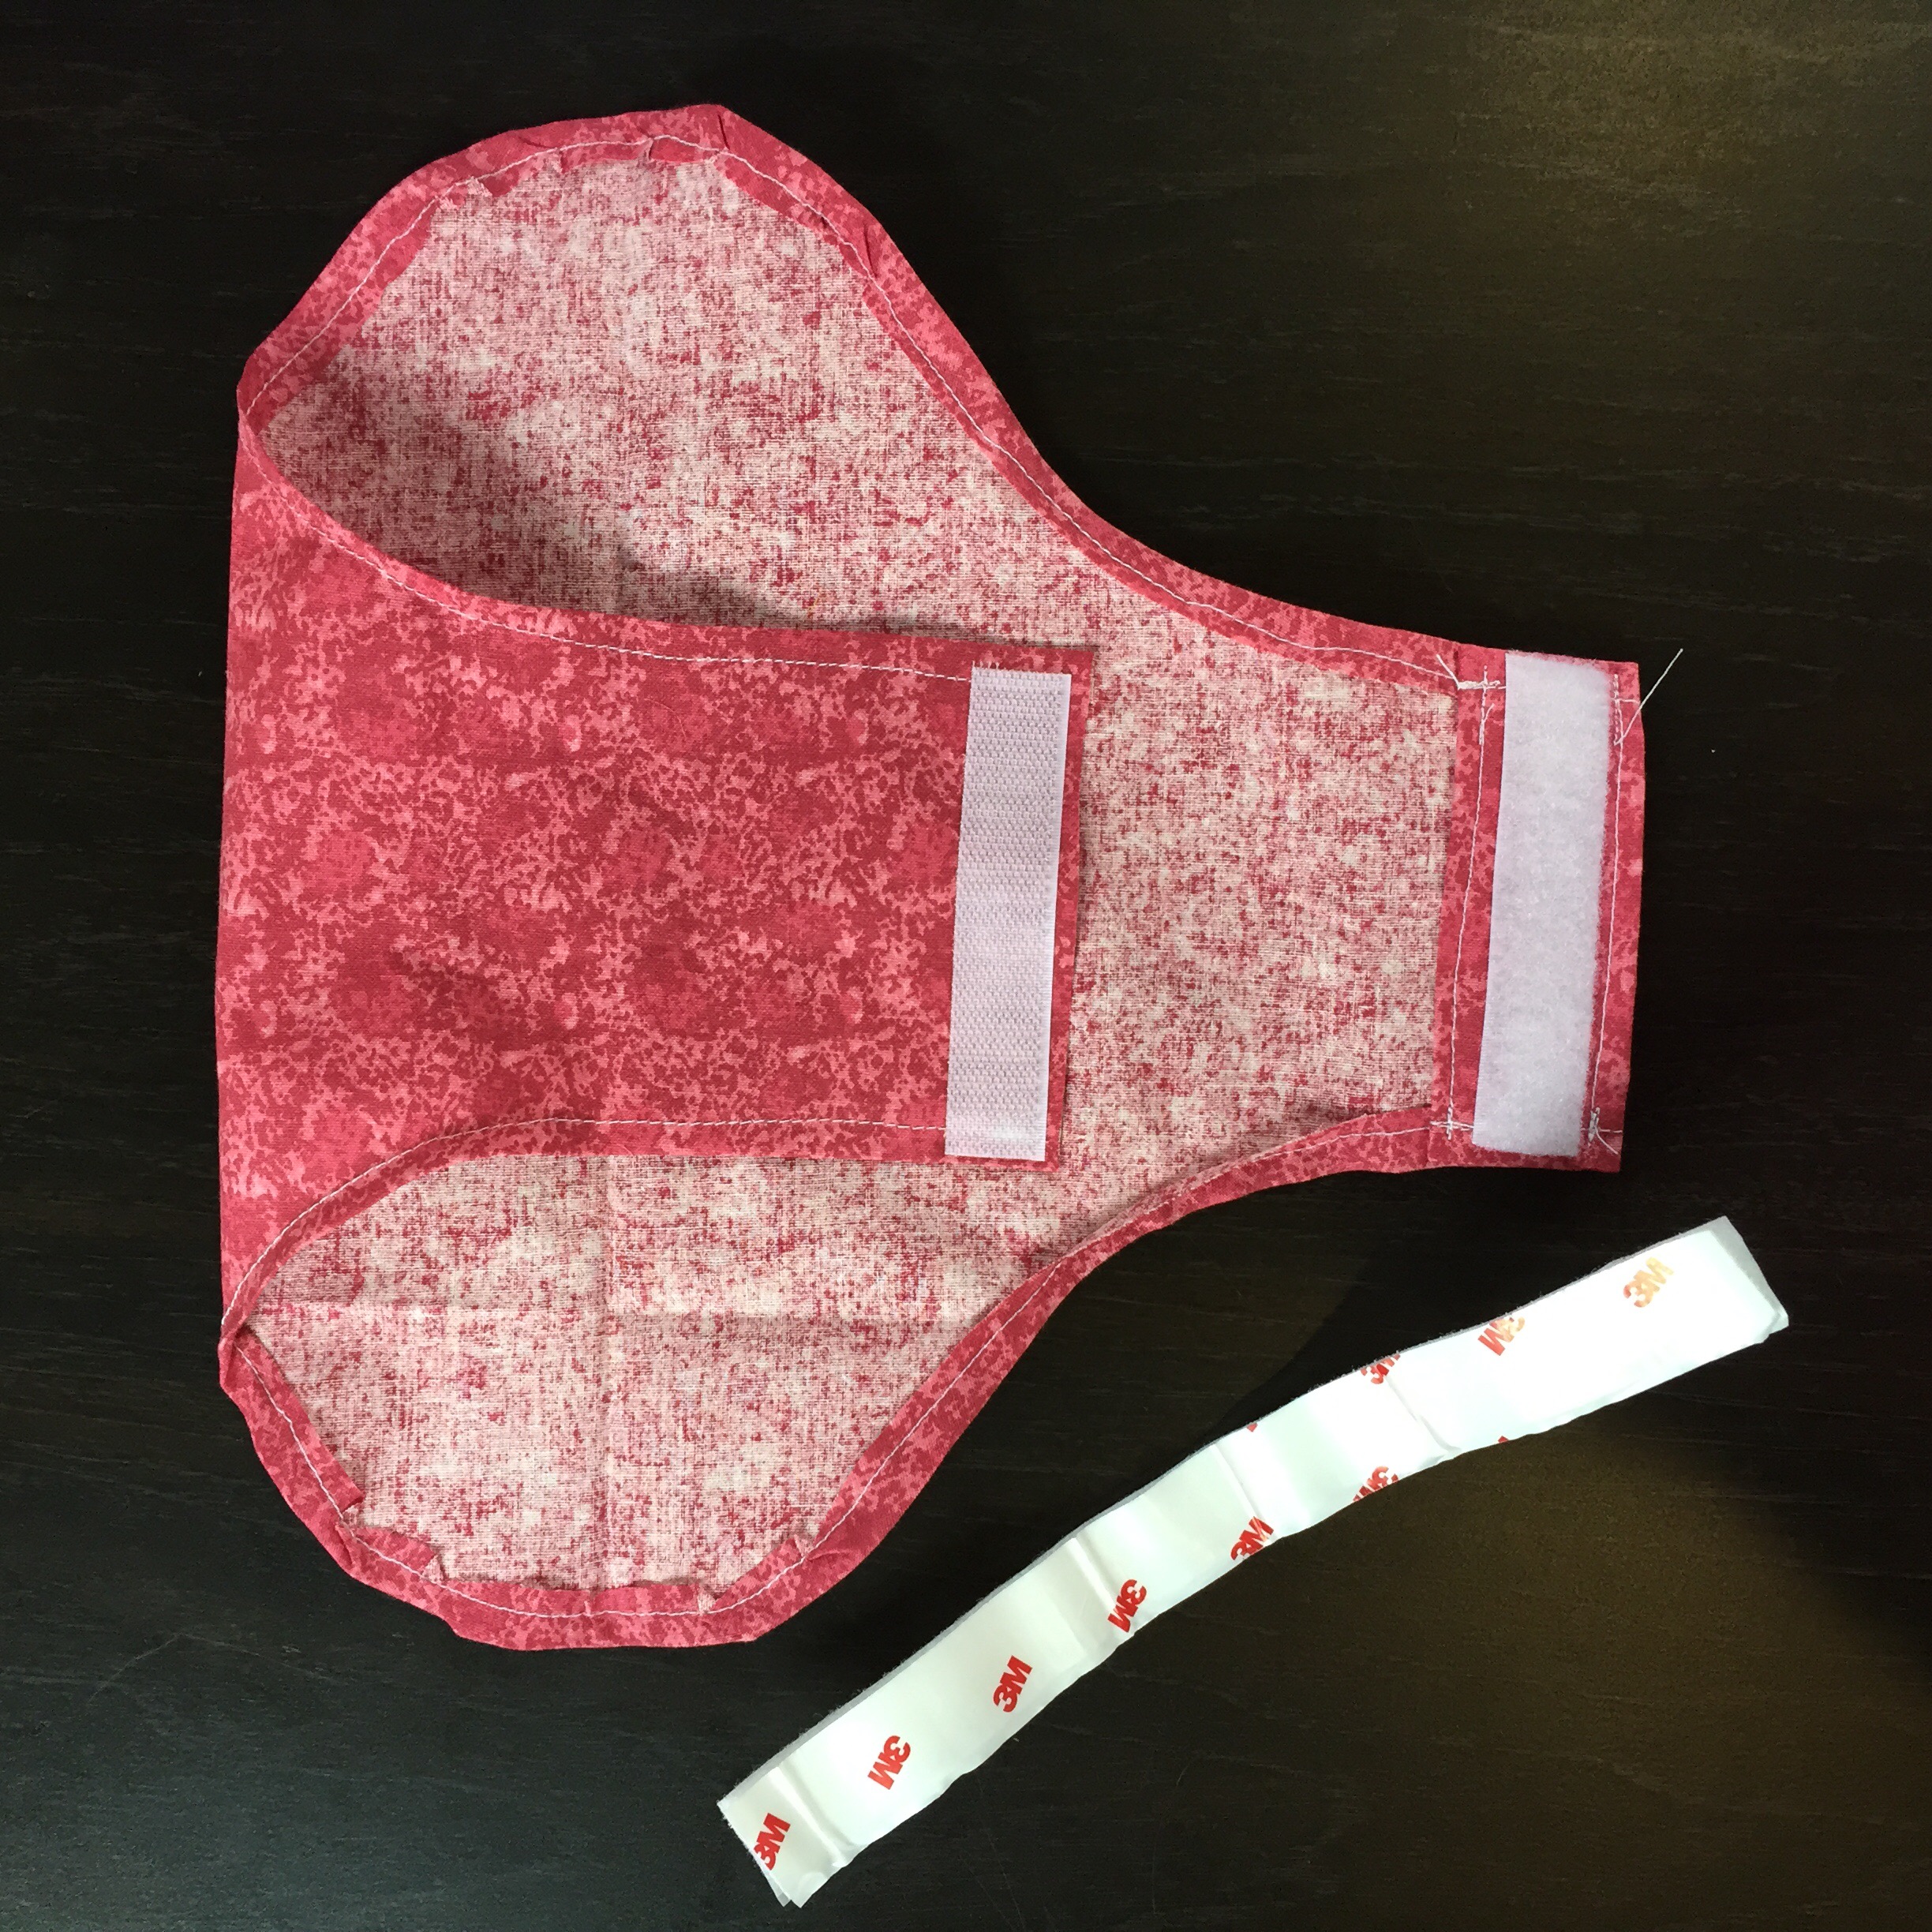
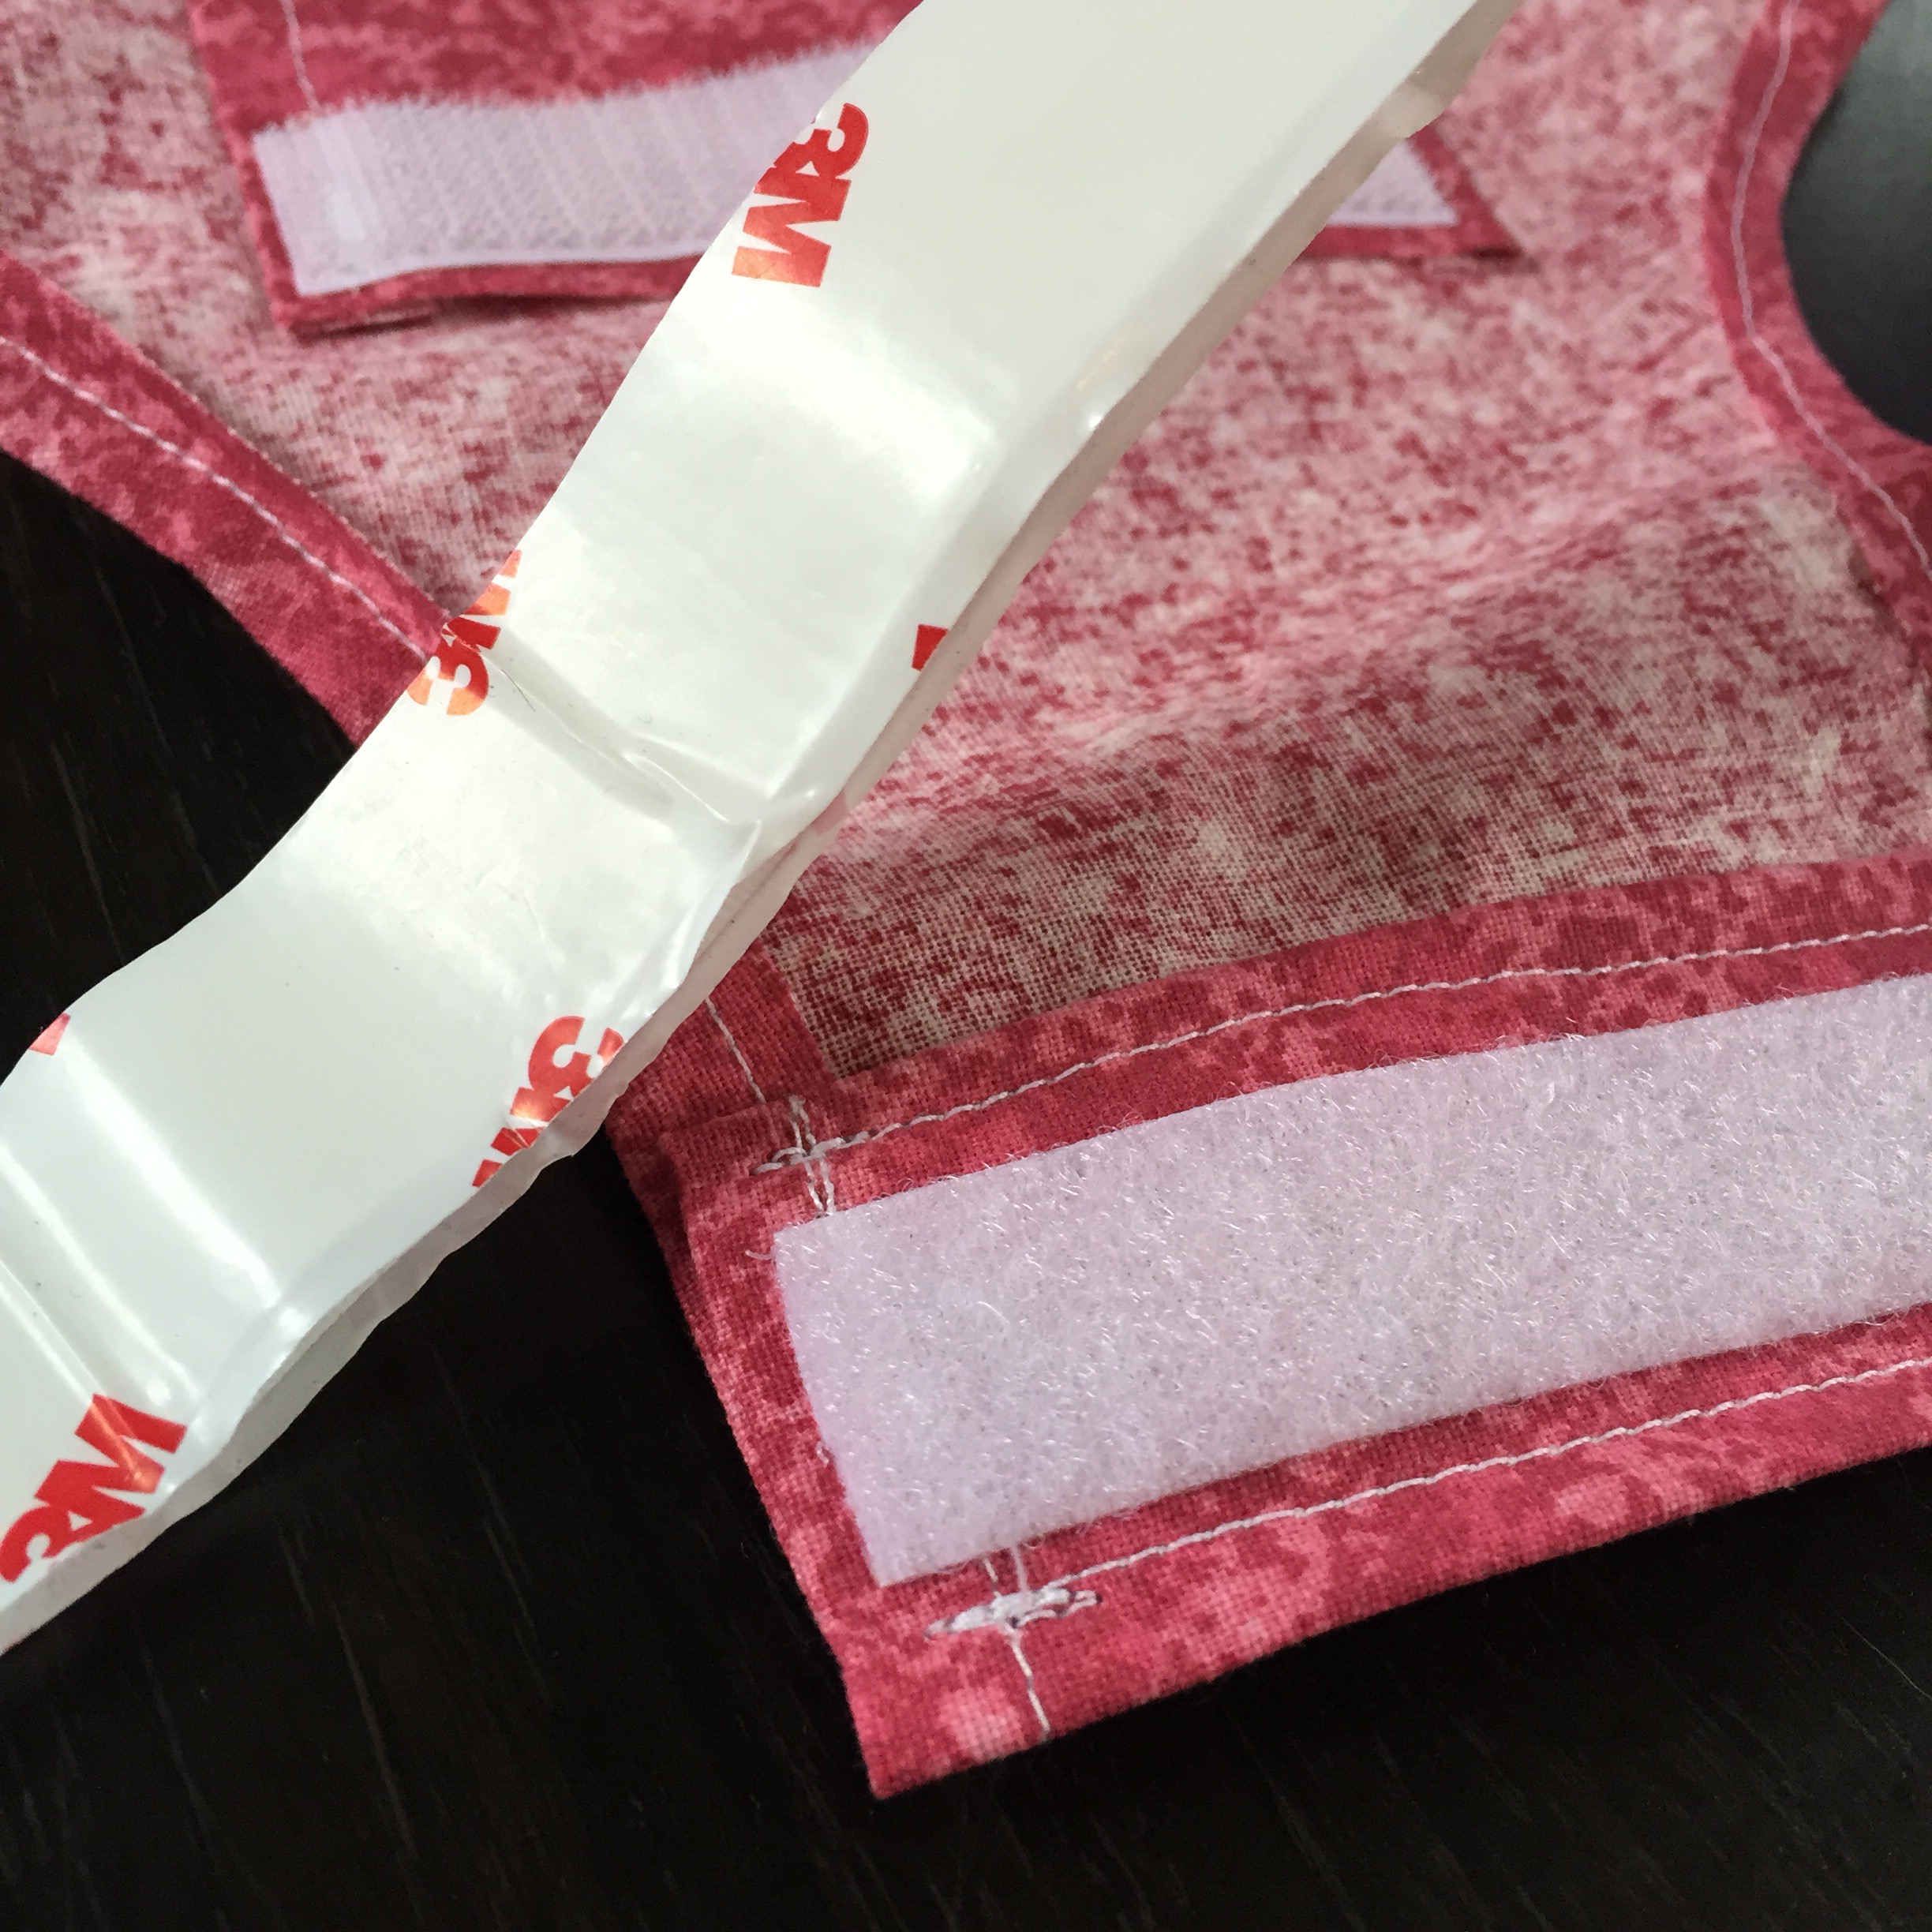
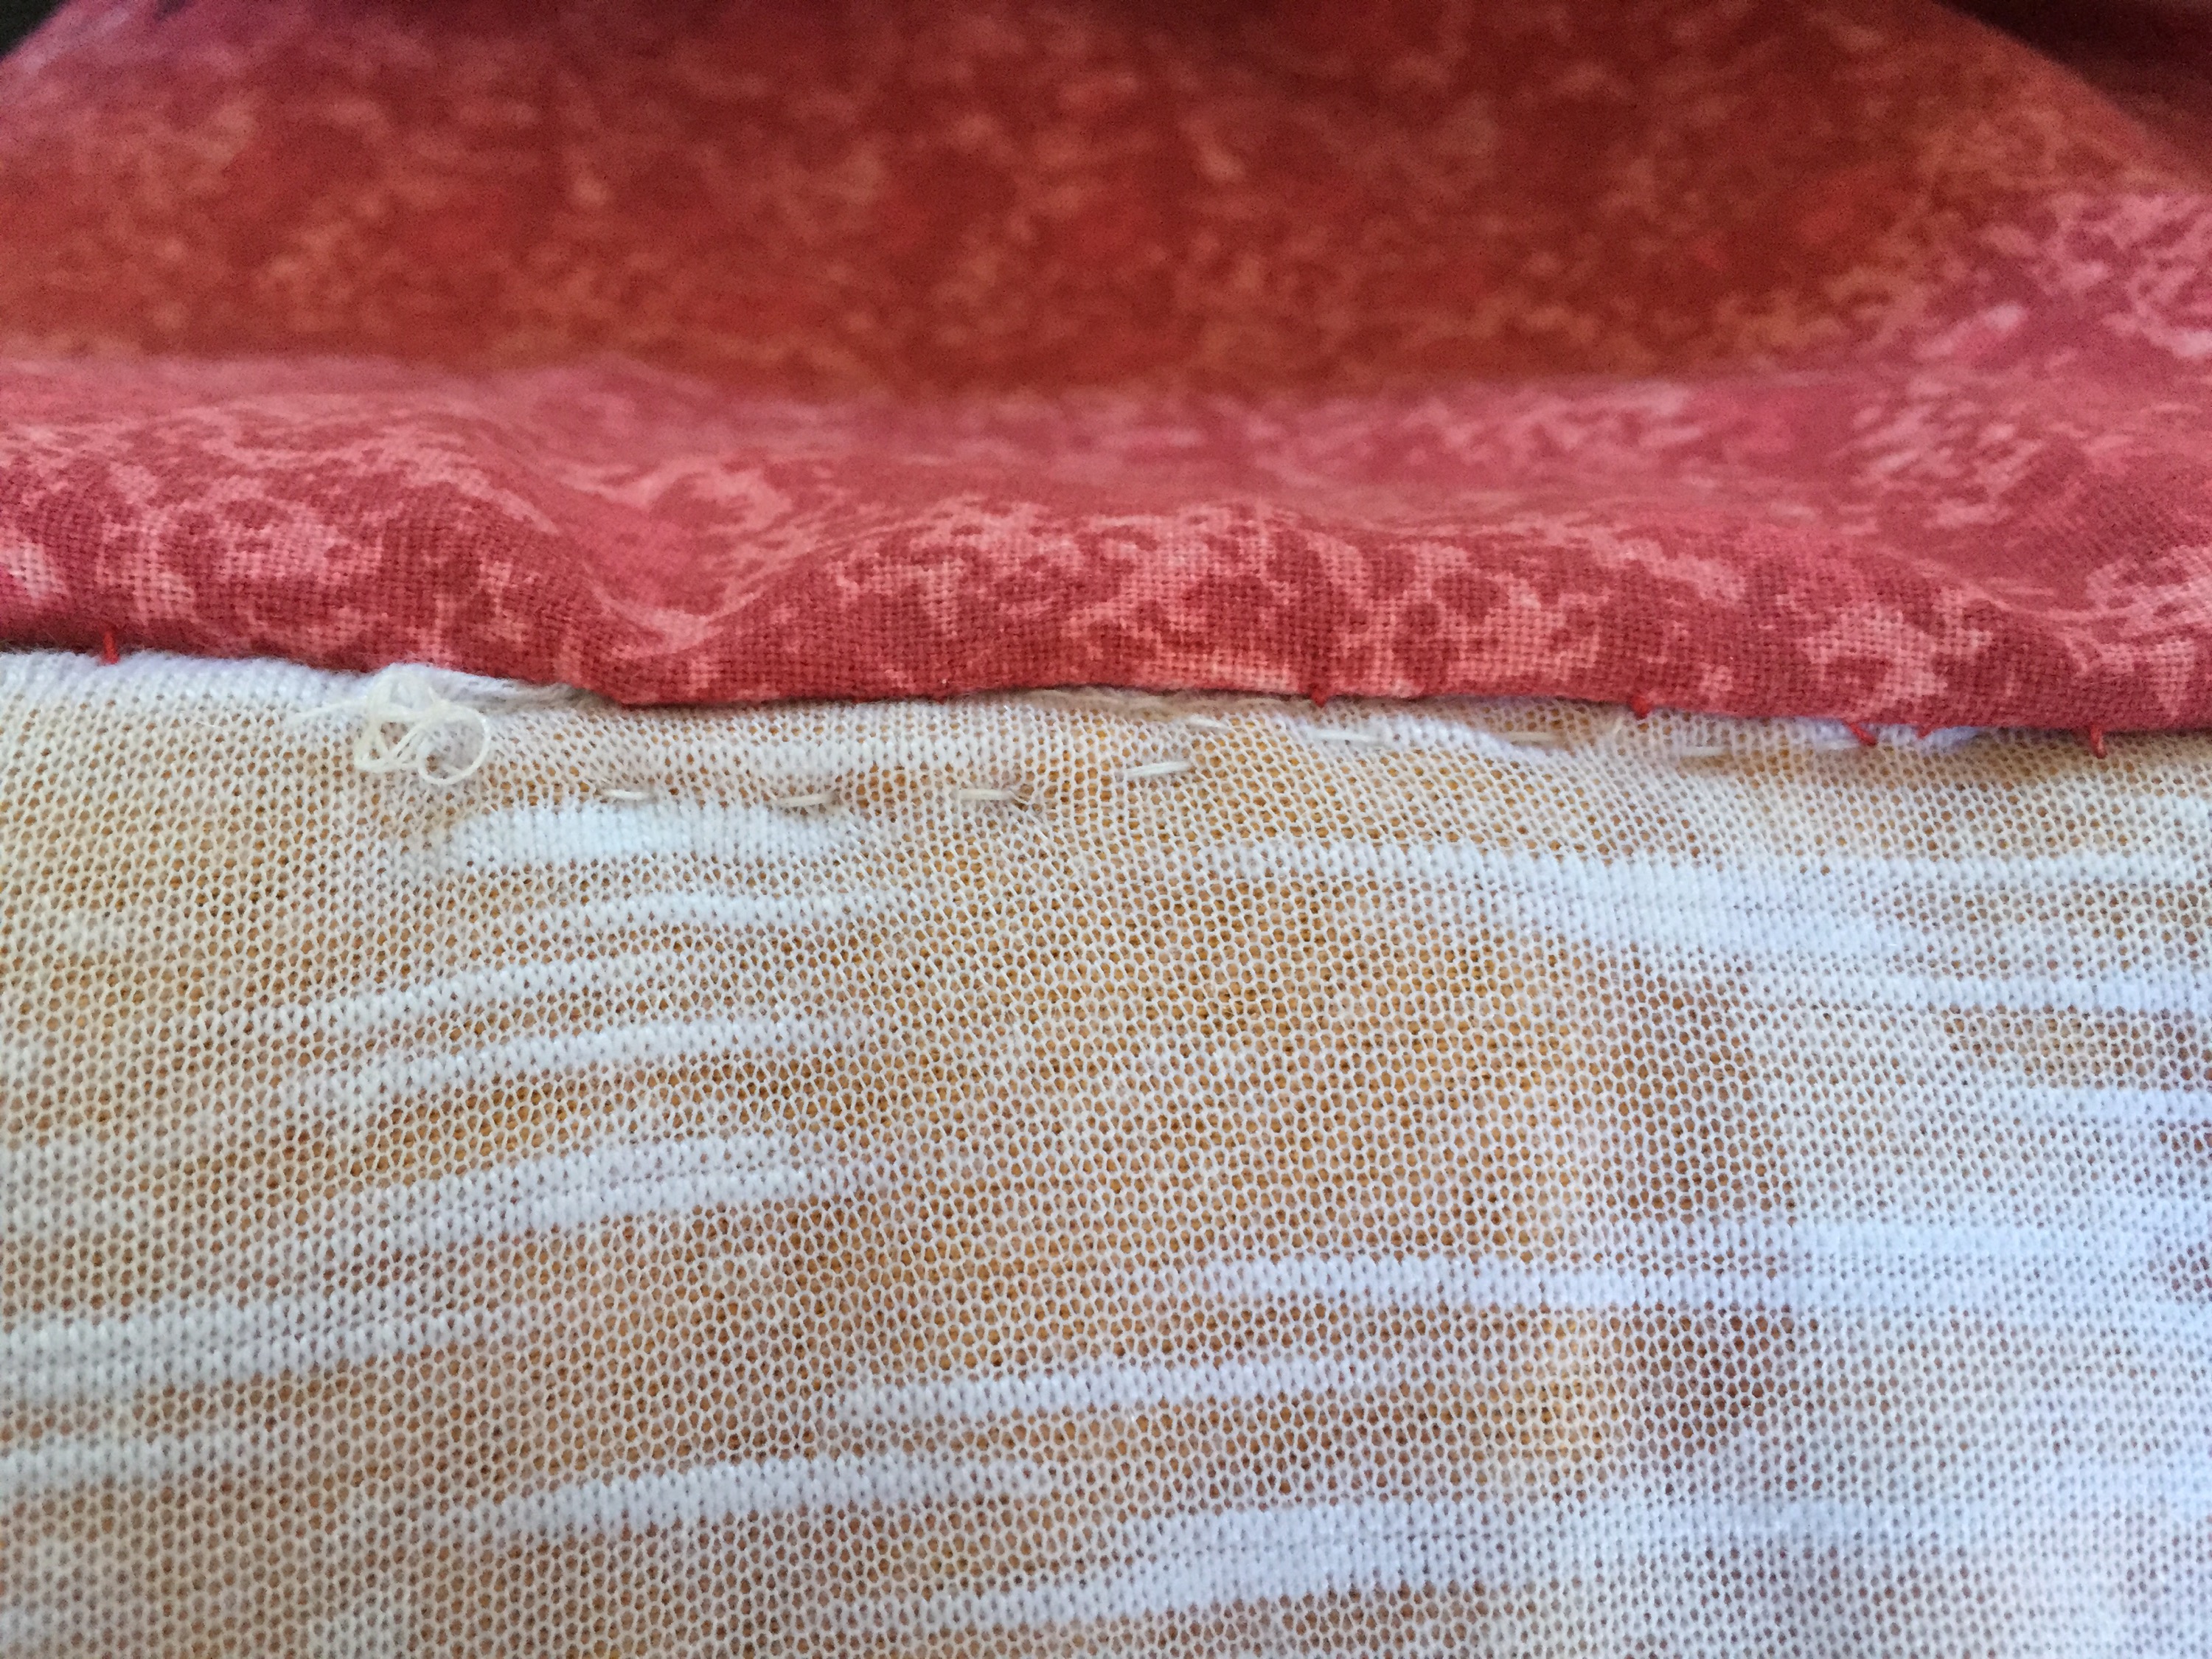
I hemmed the red piece then double checked my measurements on my model. She hates that part. Then when I knew I had it right, I added sticky Velcro to each end. I wound up pleating the back end of the hot dog piece when I was all finished so it would fit better. Charlie has a large chest and a tiny waist. (I wish I was built like that!)
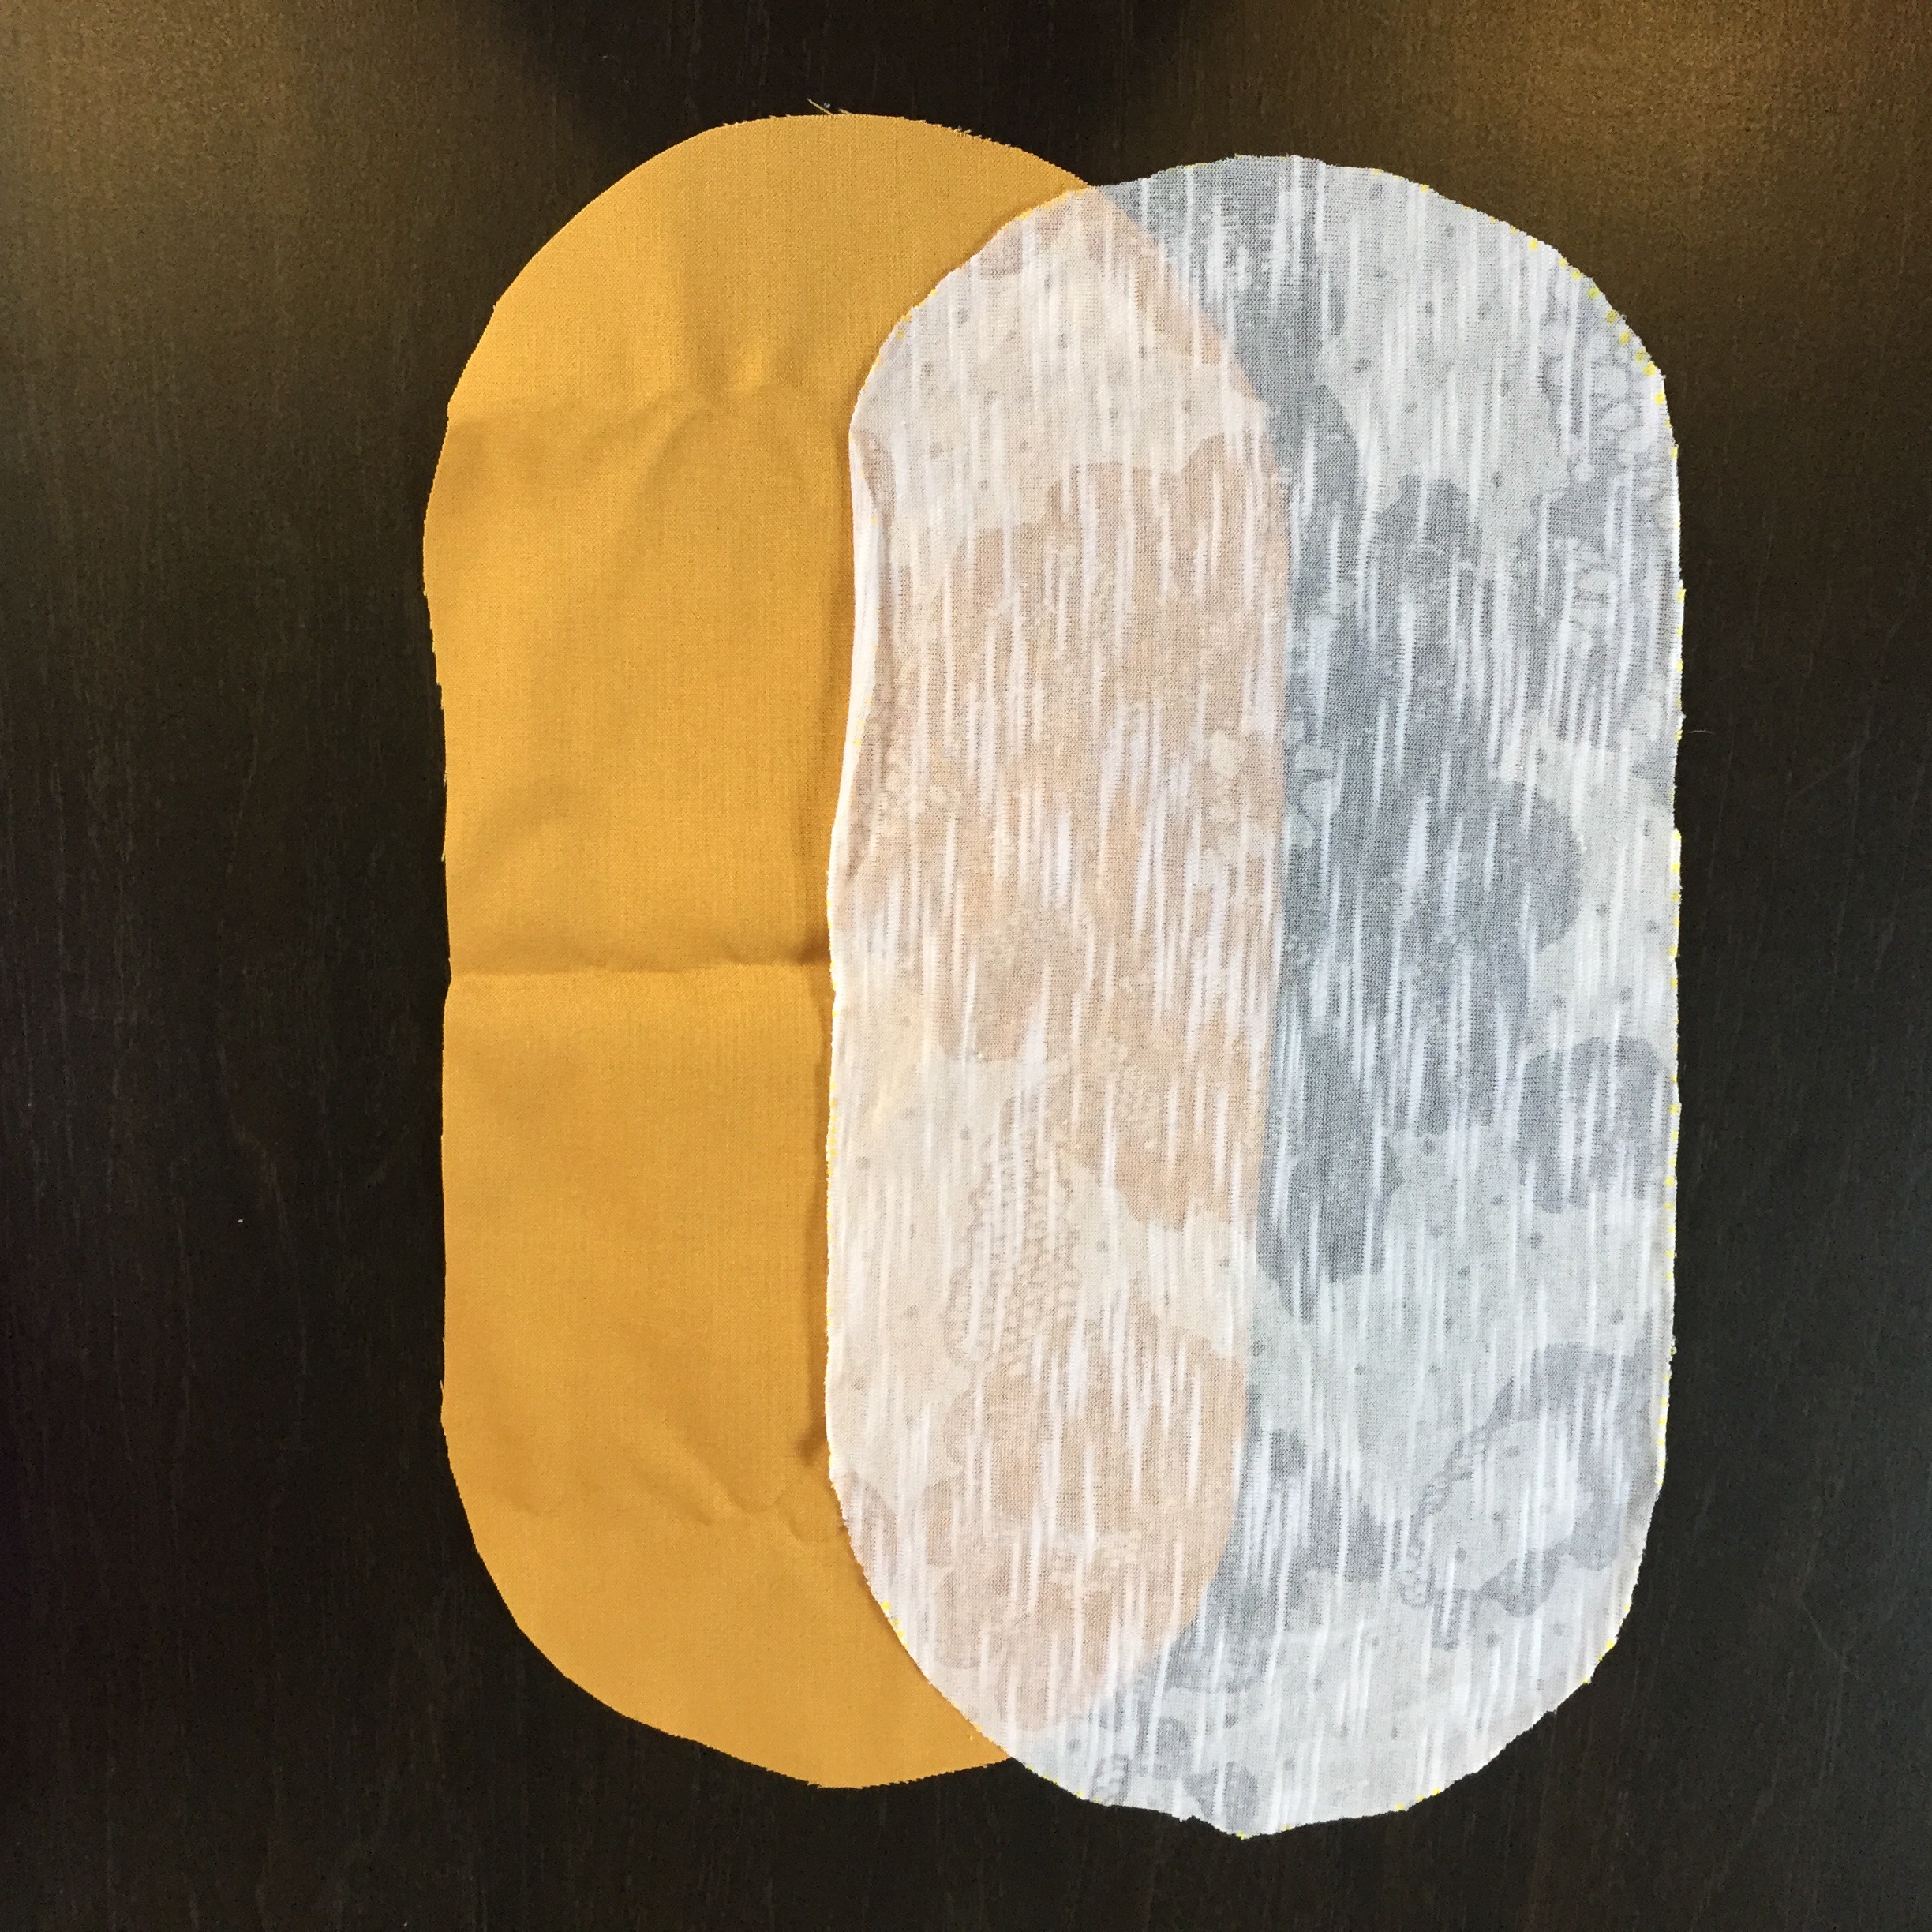
I sewed the smaller white and yellow pieces together first, then I pinned the bun pieces together like a sandwich. Yellow on each side with white in the middle. Or, right sides together, but with this fabric it didn’t matter. I started by lining up the sides and top and bottom in the middle. Then going from there, trying to evenly space the pleats.
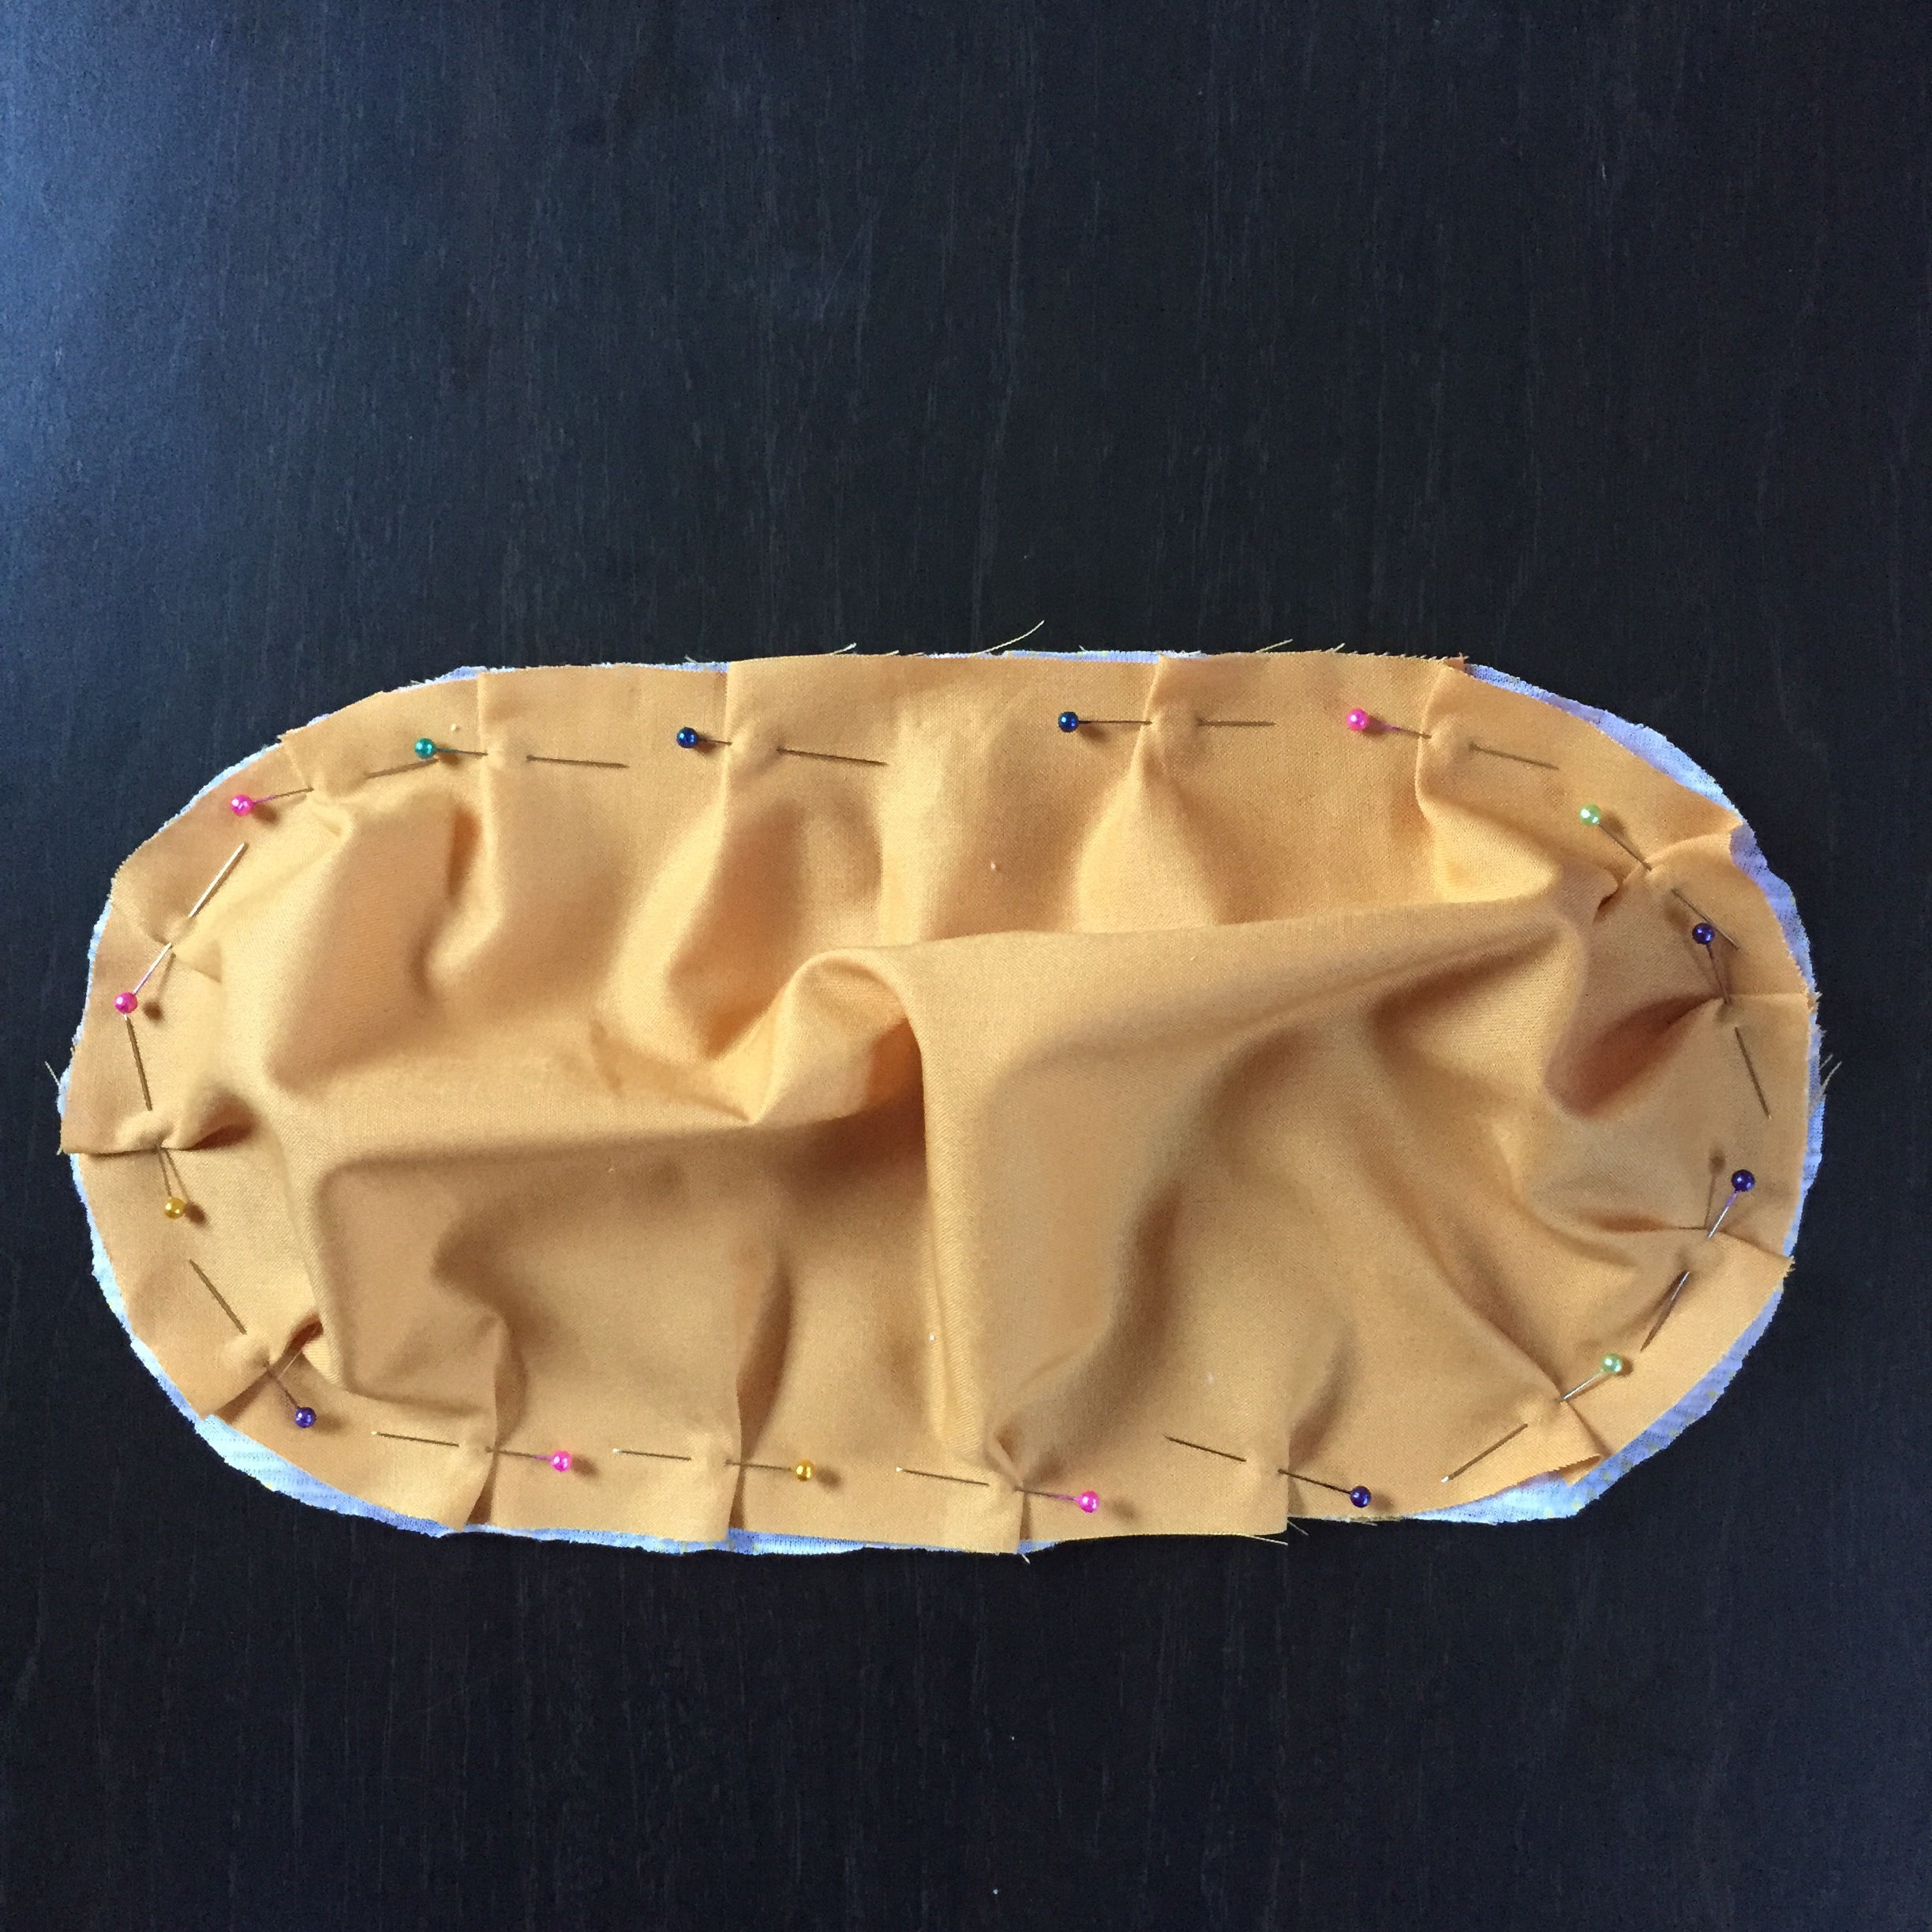
Then I sewed around the edge, removing pins as I went. Now, I probably should’ve left an opening a few inches long at the bottom so I could turn it right side out then stuff it. But, I didn’t. Total accident. But it worked out nonetheless. I had to cut a hole in the bun, I cut it on the inside, on the smaller oval so that it would be covered up by the hot dog.


The. I stuffed it. Not too full, I didn’t want it to be too heavy for my little pumpkin and hurt her back. Haha but enough so it was reasonably poofy.
I then crudely stitched that hole closed by hand then even more crudely sewed the bun to the red part. (After much measuring and trying it on Charlie and disturbing her precious nap time).
 After I had that all finished, I tried it on her. That’s when I decided to pleat the back of the hot dog piece.
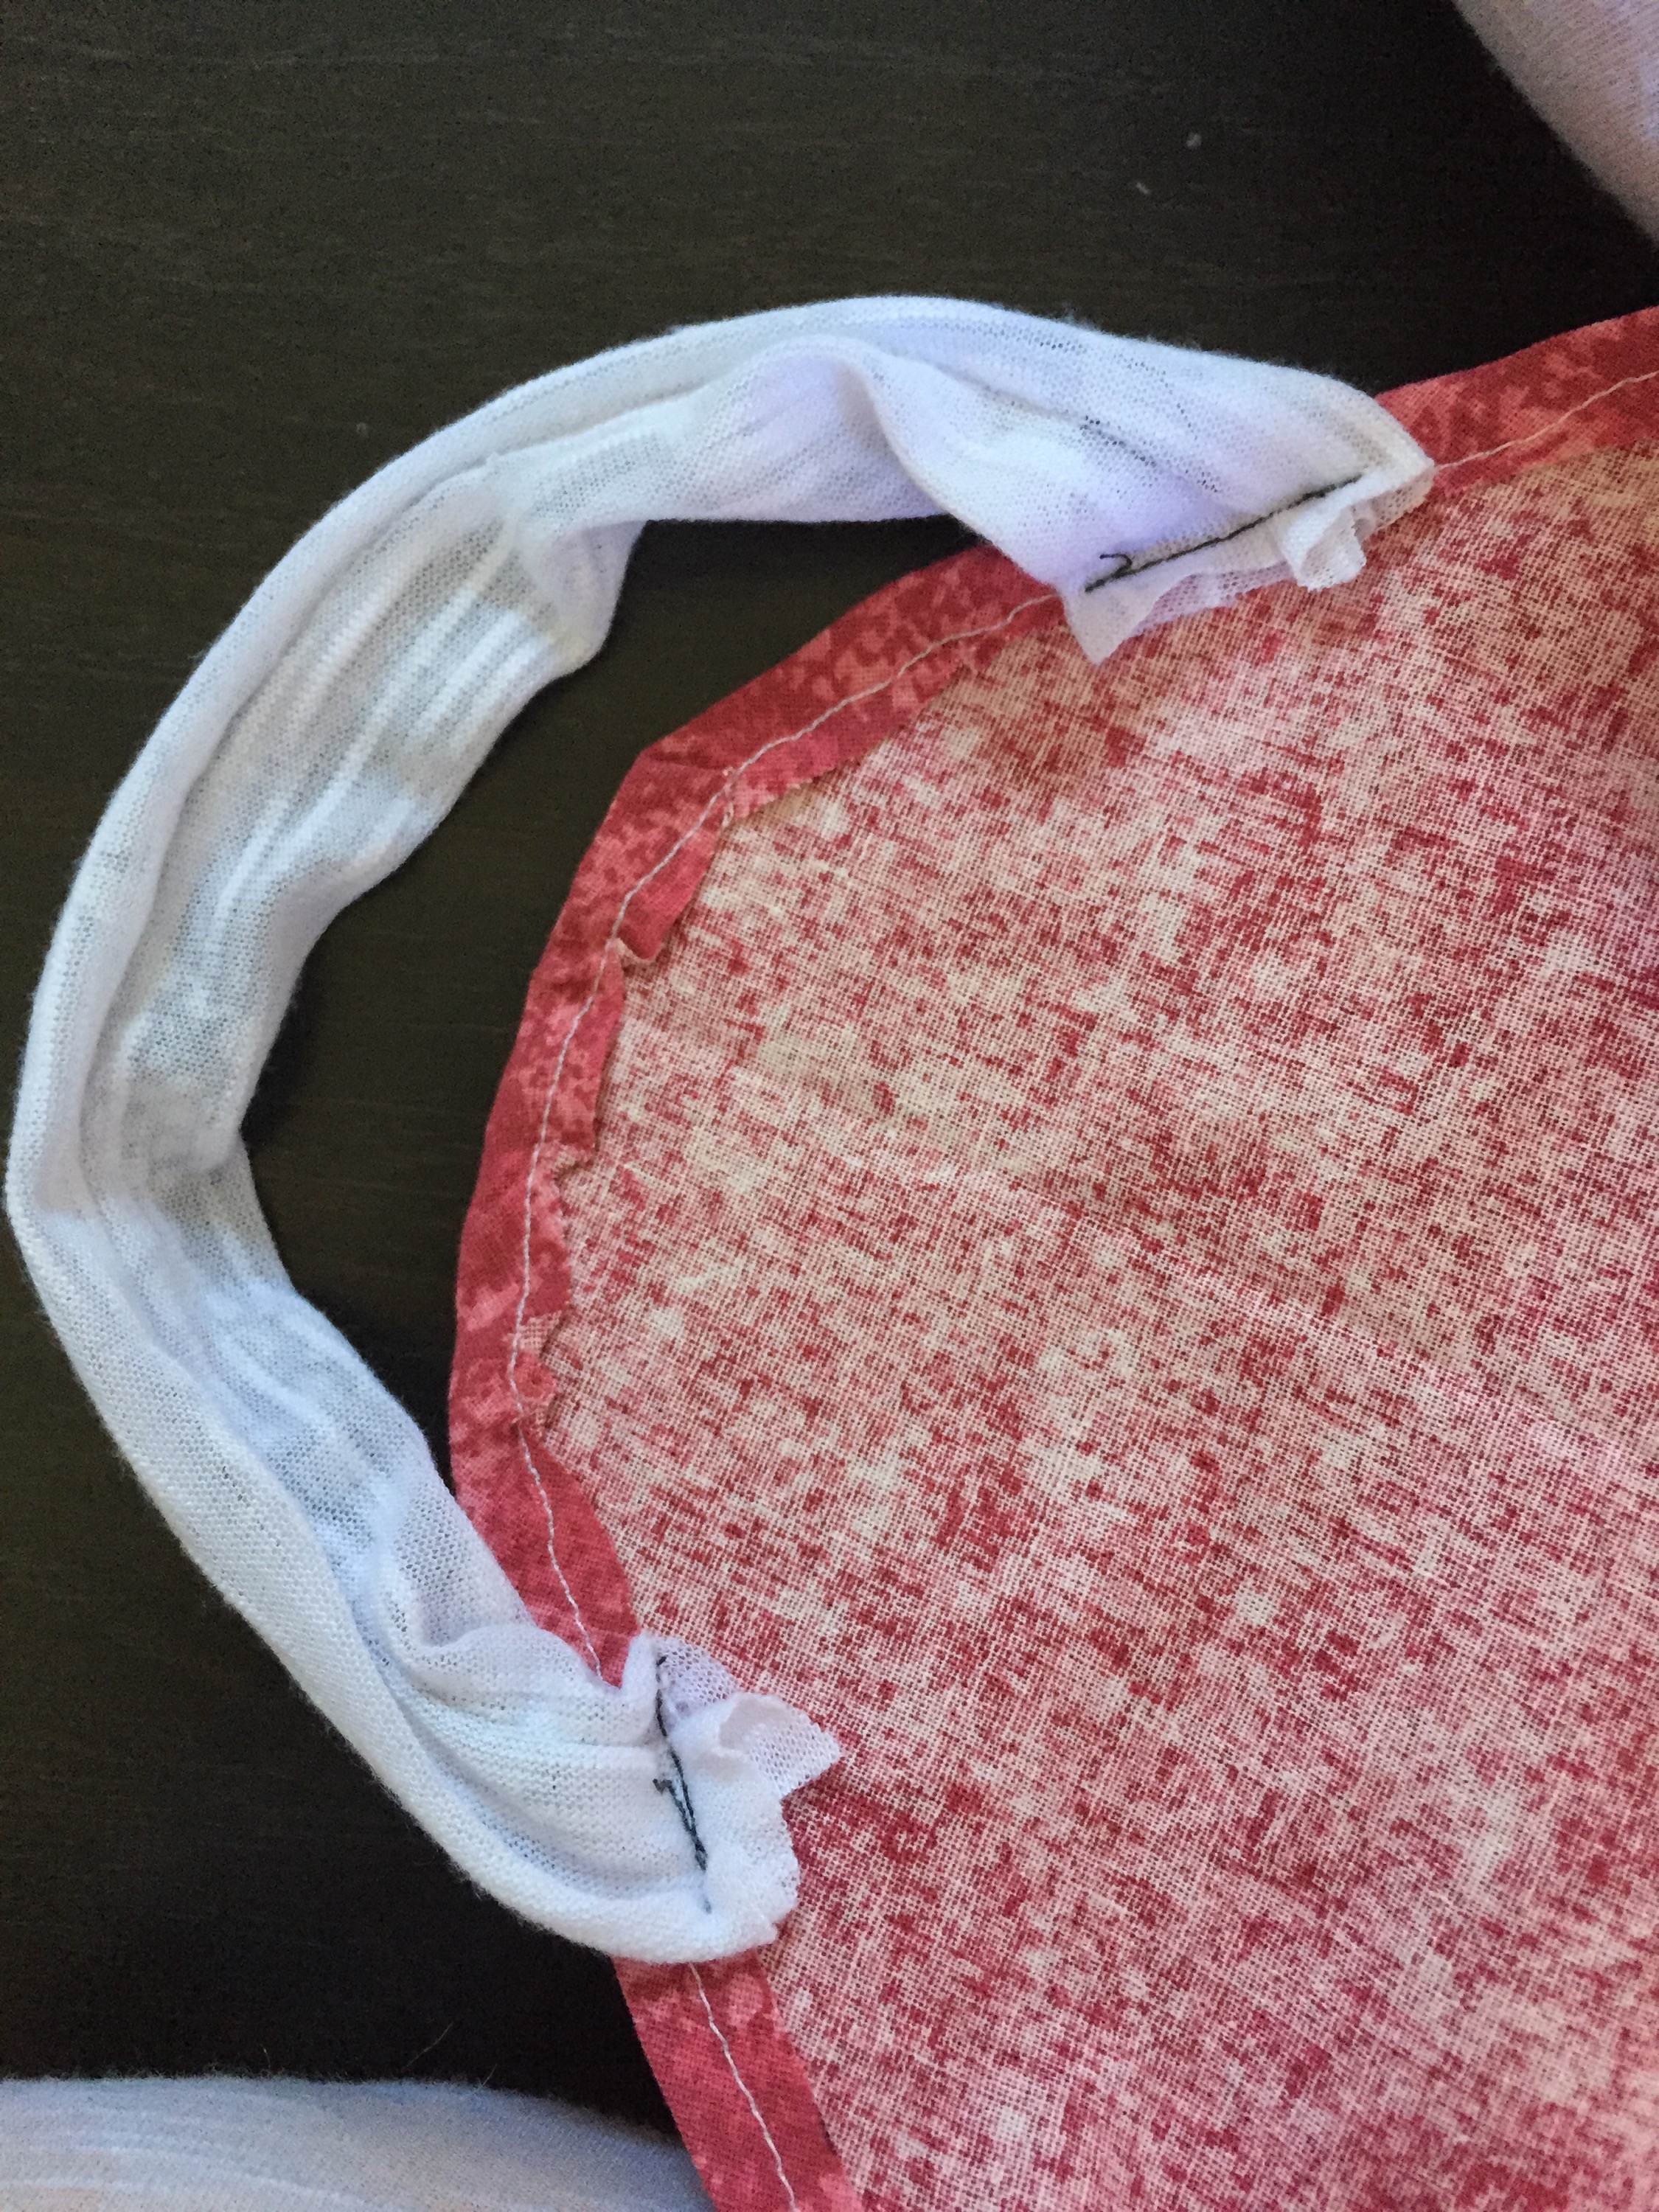
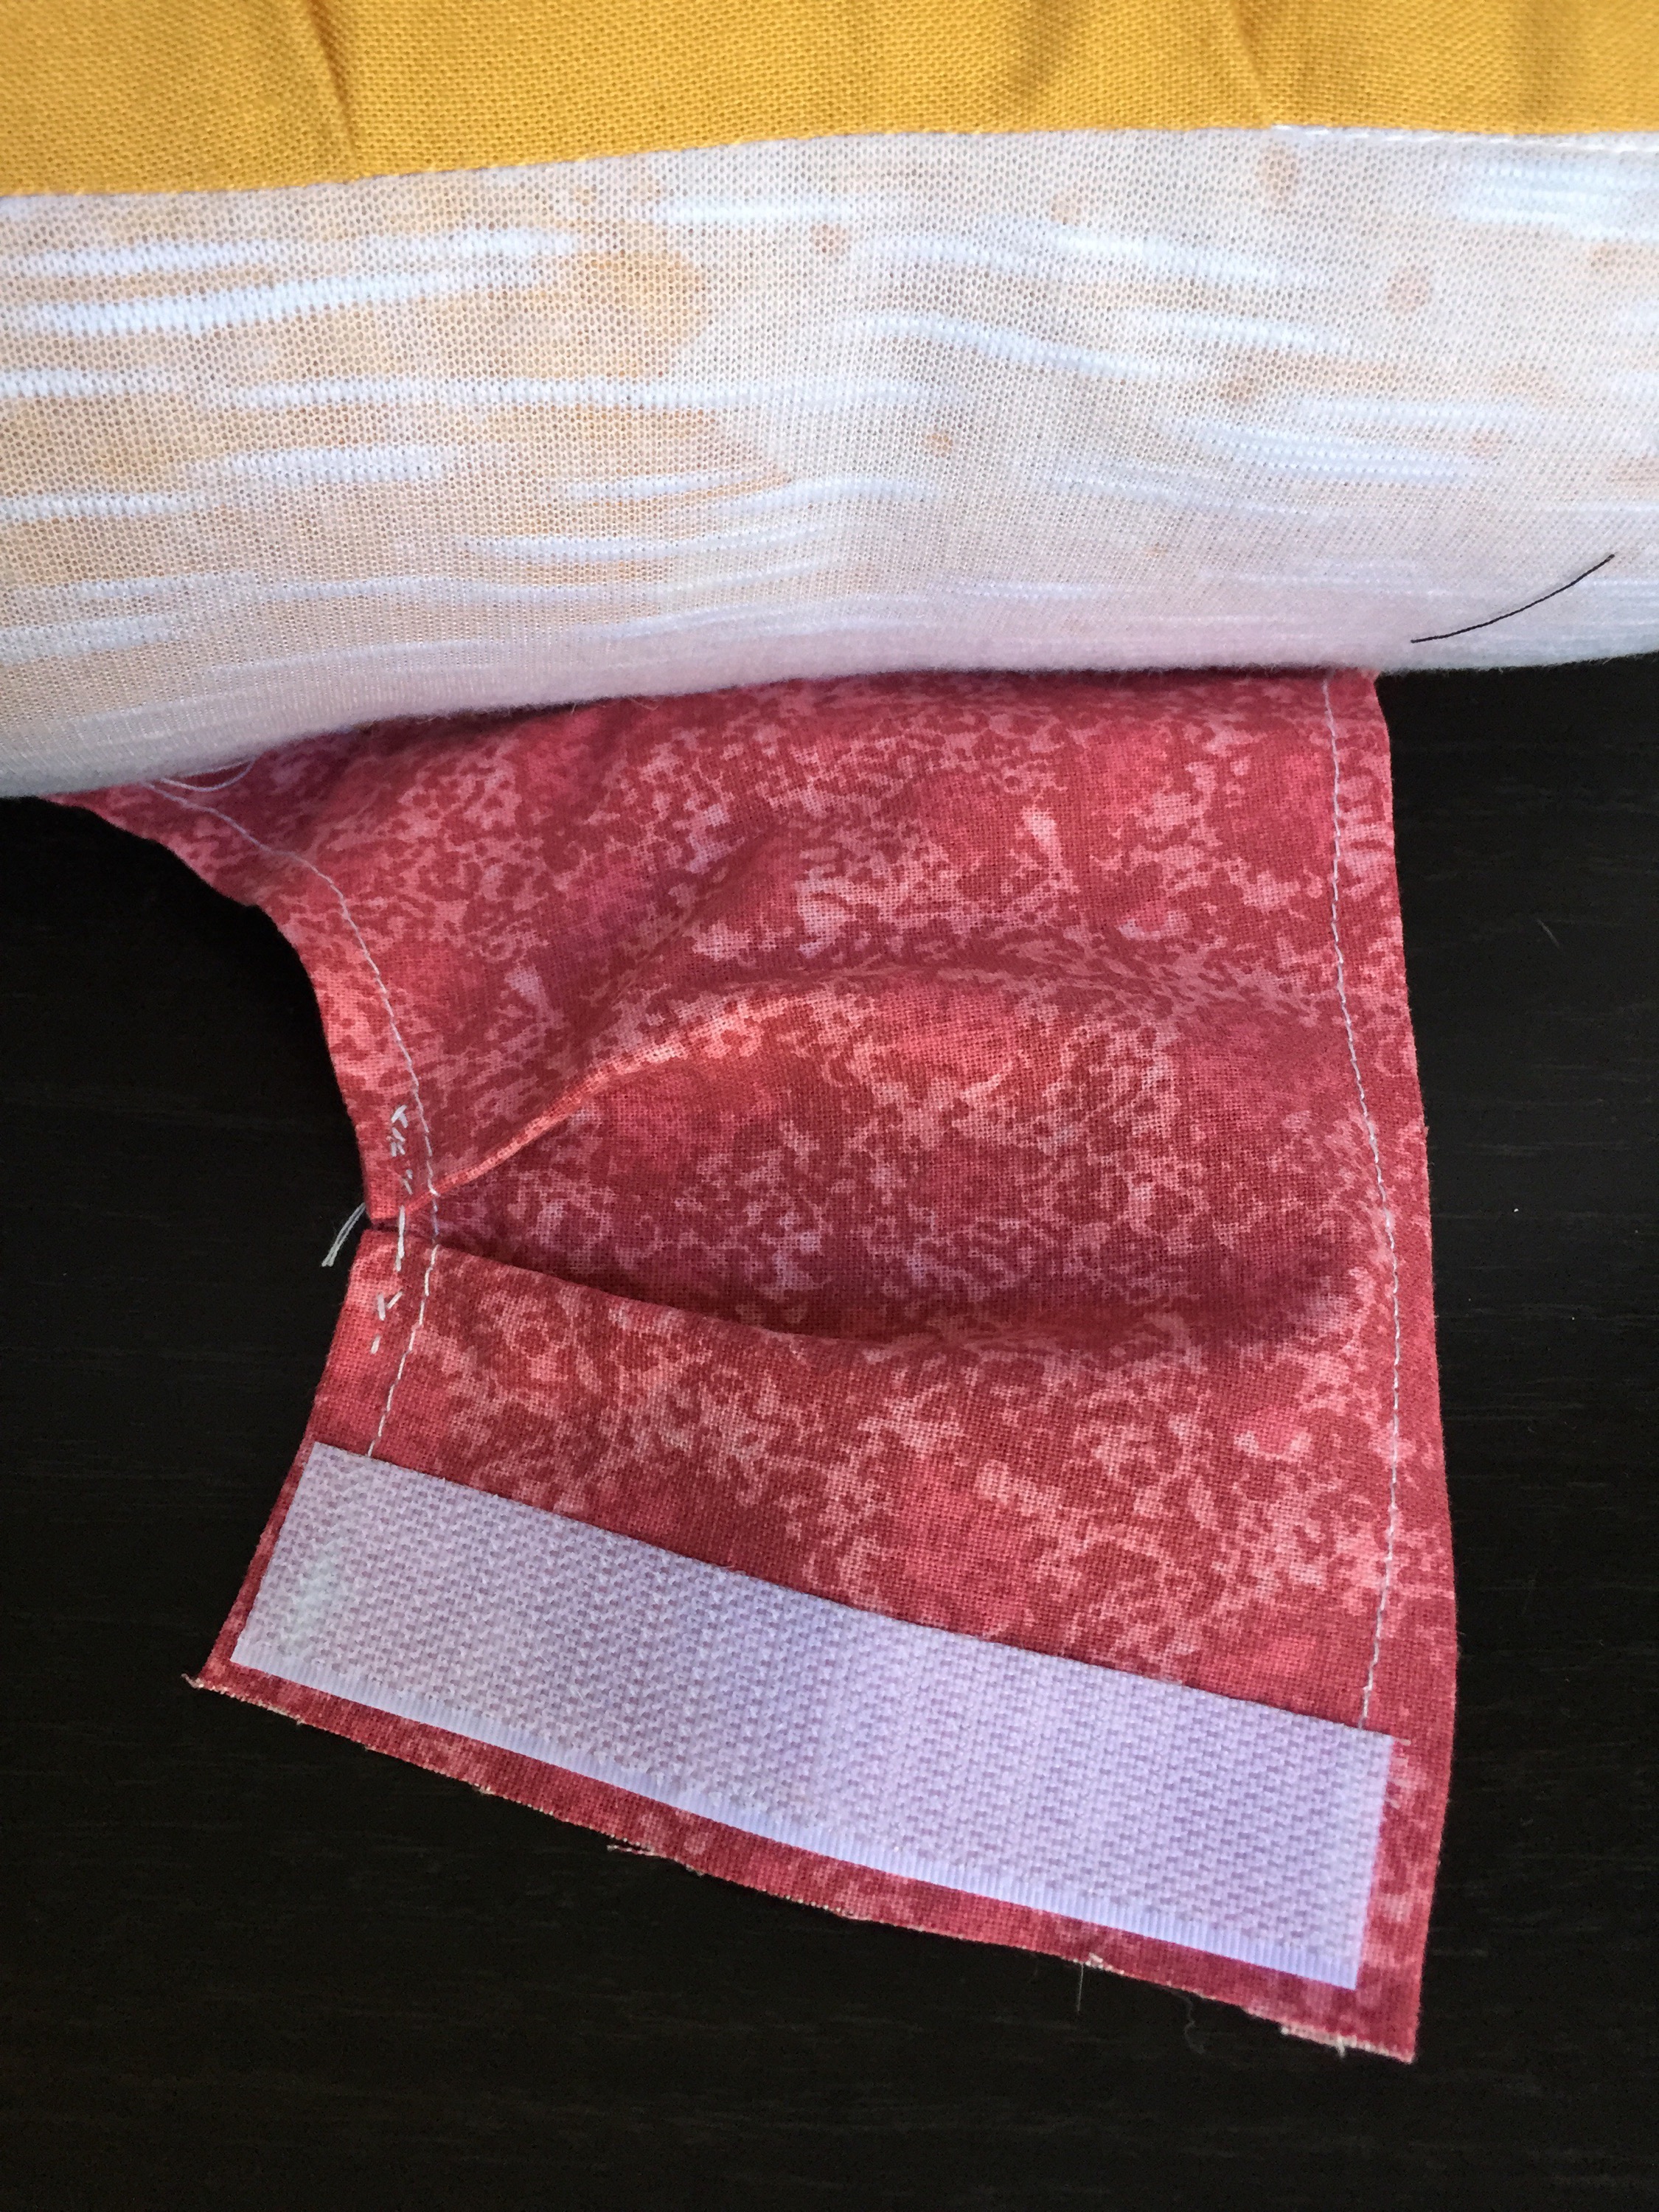 By this time she was super sick of me, but I managed to get one more measurement from the front of the hot dog, around her neck so that when she stood on her hind legs (we call this “sitting pretty” and she does it for treats only, never for free!) it wouldn’t fall down around her ankles and trip her. I cut a piece of the white fabric to that length, sewed a tube then attached it to either side of the hot dog.
FINISHED!
Charlie is a weiner! I mean a hot dog! She’s actually part weiner dog.
That reminded me of Pedro’s. It’s a campground/amusement park/rest stop on I-95 right on the border of North and Siuth Carolina. We stayed there once (after much pleading on my part why I NEEDED to see the wonder that is Pedro’s, simply because it is advertised on billboards on the side of the highway for hundreds of miles!). I love the billboards.


So…. I was just looking for a way to kind of silk screen DIY style and of course, like always, I got lost in the endless Pinterest maze and found a really cool way to fix my broken makeup. It seems like I always drop my favorite bronzer and it breaks into a million little pieces (I’ve read that book by the way, very good read). Then I’m forced to either toss it out or fight with streaky lines on my cheeks. Well I fixed the issue! I didn’t take a before pic because I was so excited and I wasn’t sure it was actually going to work. But it looks like it will! You just put some rubbing alcohol into the makeup compact and stir it around with a toothpick then spread it out and let it dry! Voilà! Super easy!
 And I DID find a way to sort of DIY a silk screen type thing. Actually an image transfer. I want to do it with my pillow covers I made… So that’ll be coming up. I’ve also started working on a Halloween costume for Charlie that’s coming along! I’m loving my new sewing machine!
