Warm Potato Bread on a Cold & Windy Day

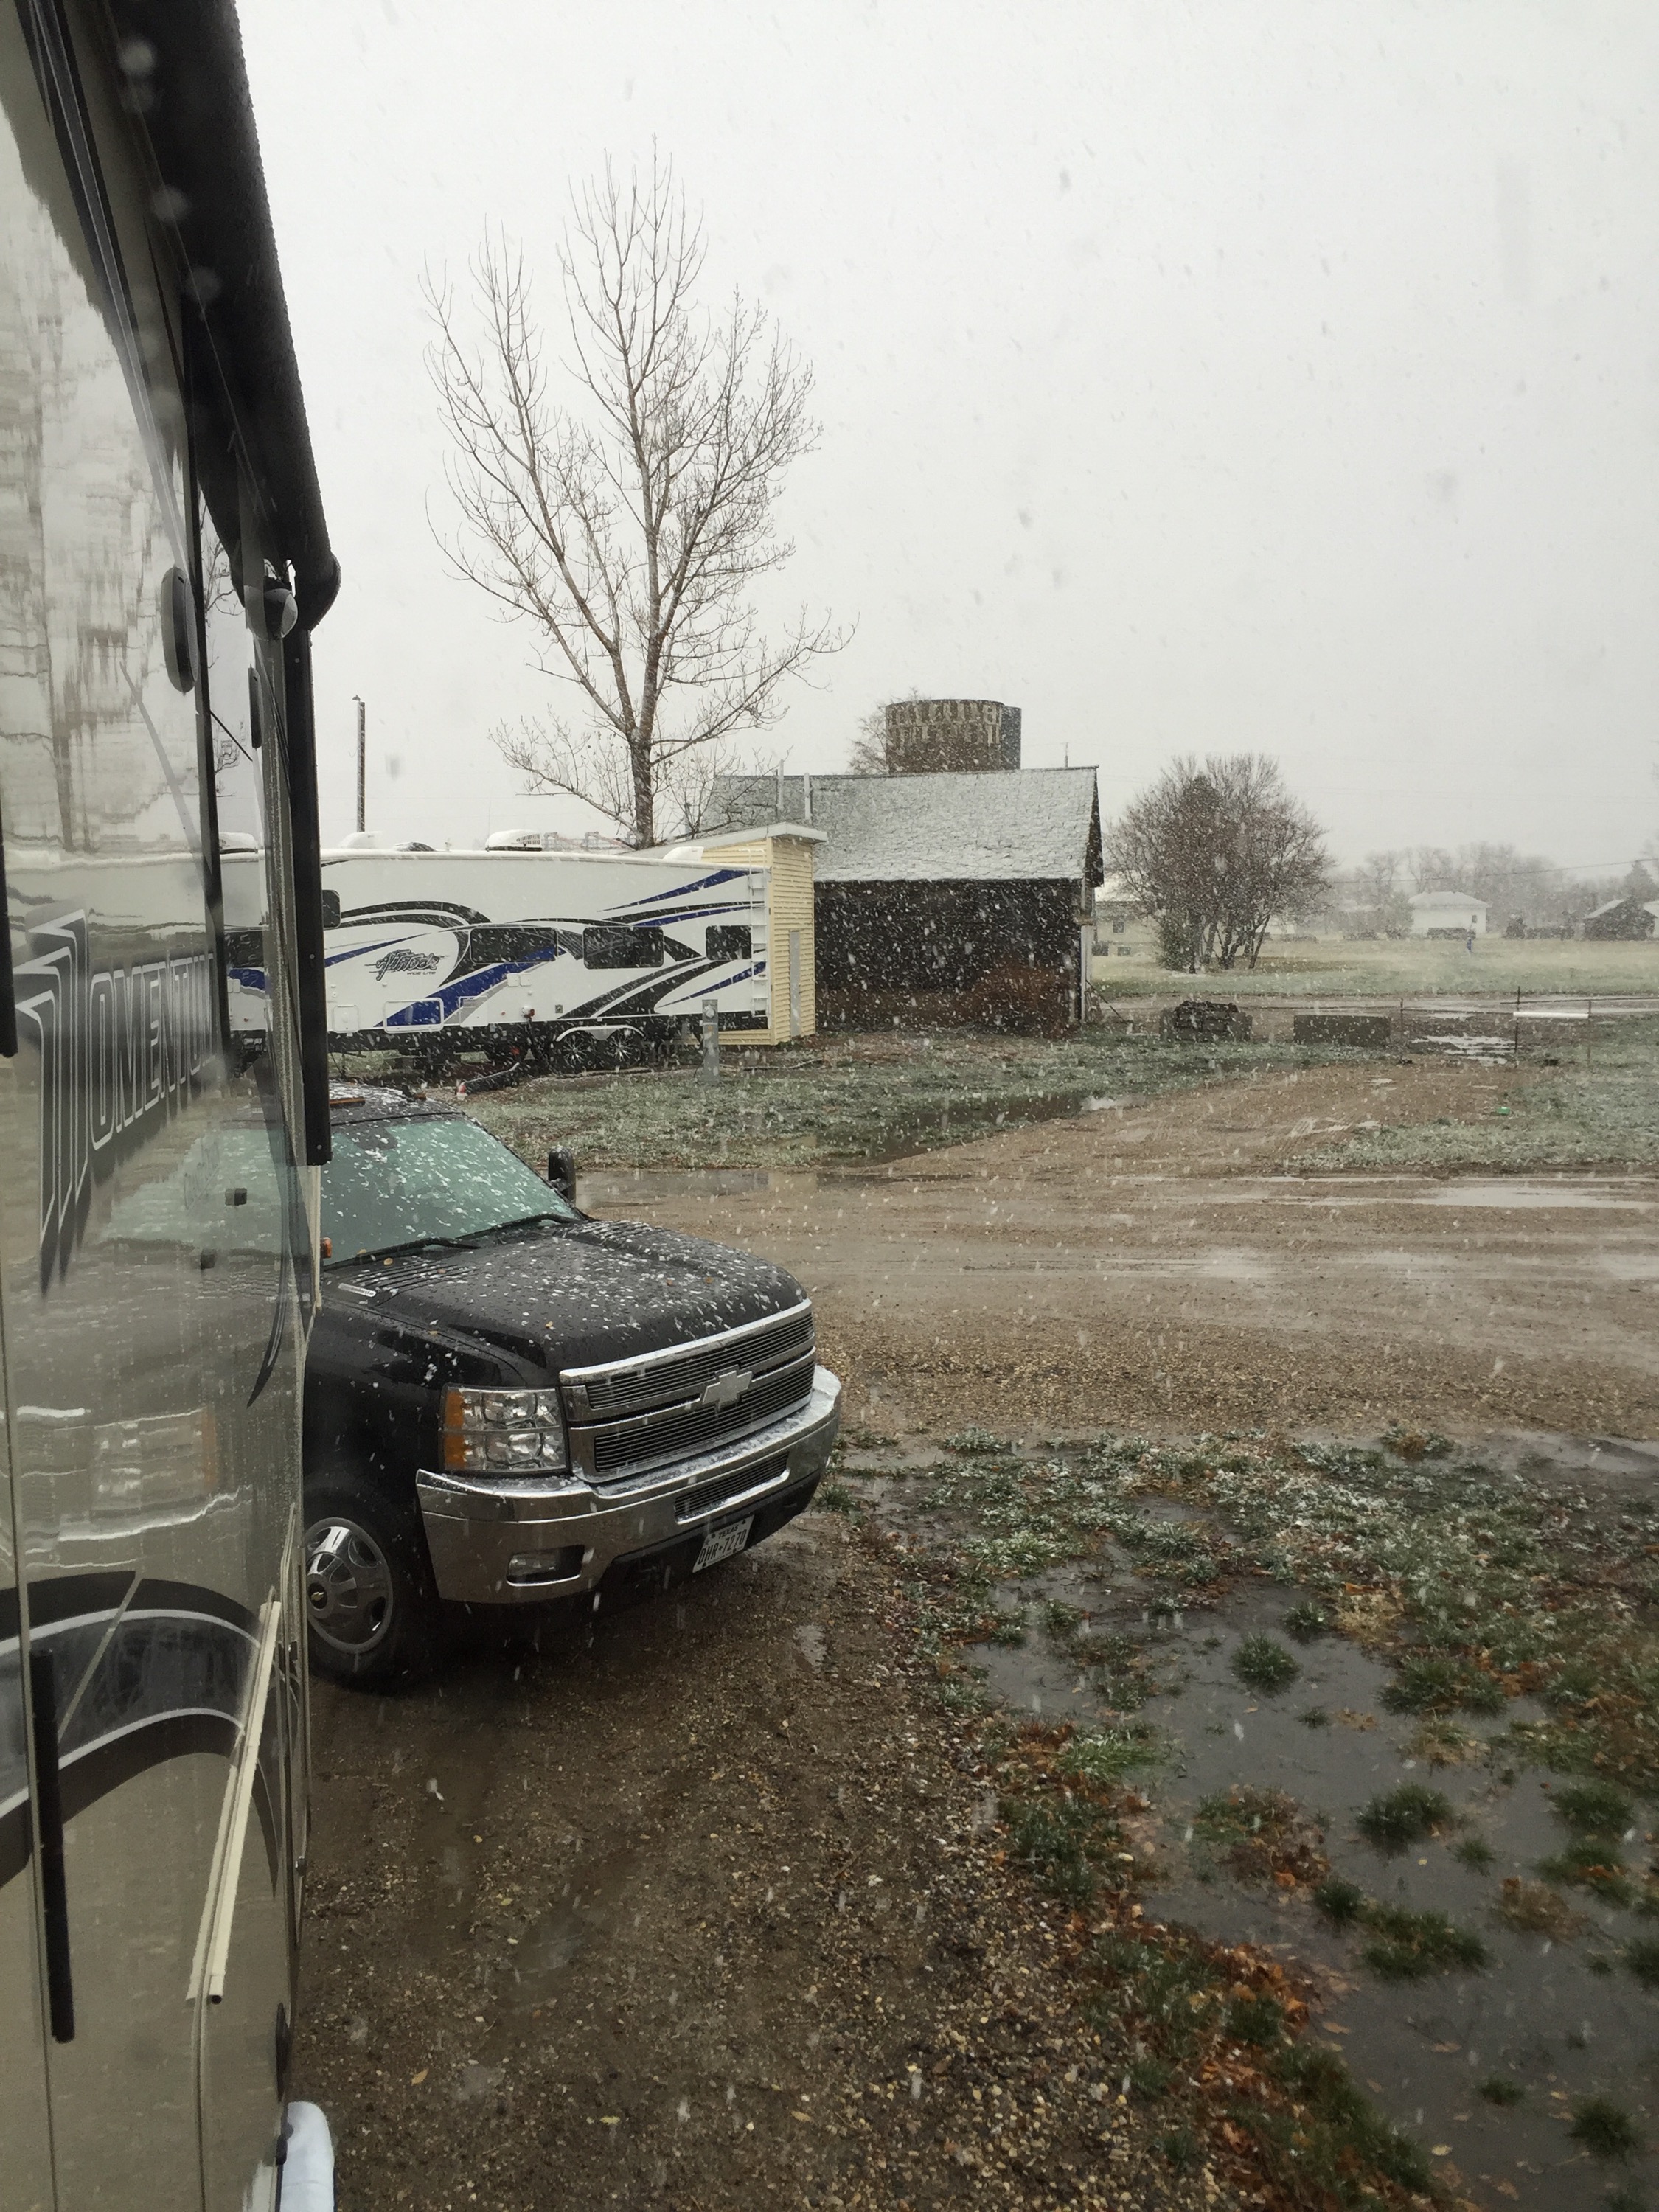
Today is a weather day for my love.

 It is NOT a day for working outside, let alone working 2,000 feet in the air! So for the first time since we got here to Hillsboro, North Dakota, he got to sleep in!

Last night we ran to Grand Forks to go to Walmart and stock up on some groceries. We had dinner at Texas Roadhouse (yum). I saved part of my steak for steak & eggs and Allen saved his ribeye bone for our little sweet bored puppy (she’s not a fan of winter, she’s a Floridian at heart like us!)

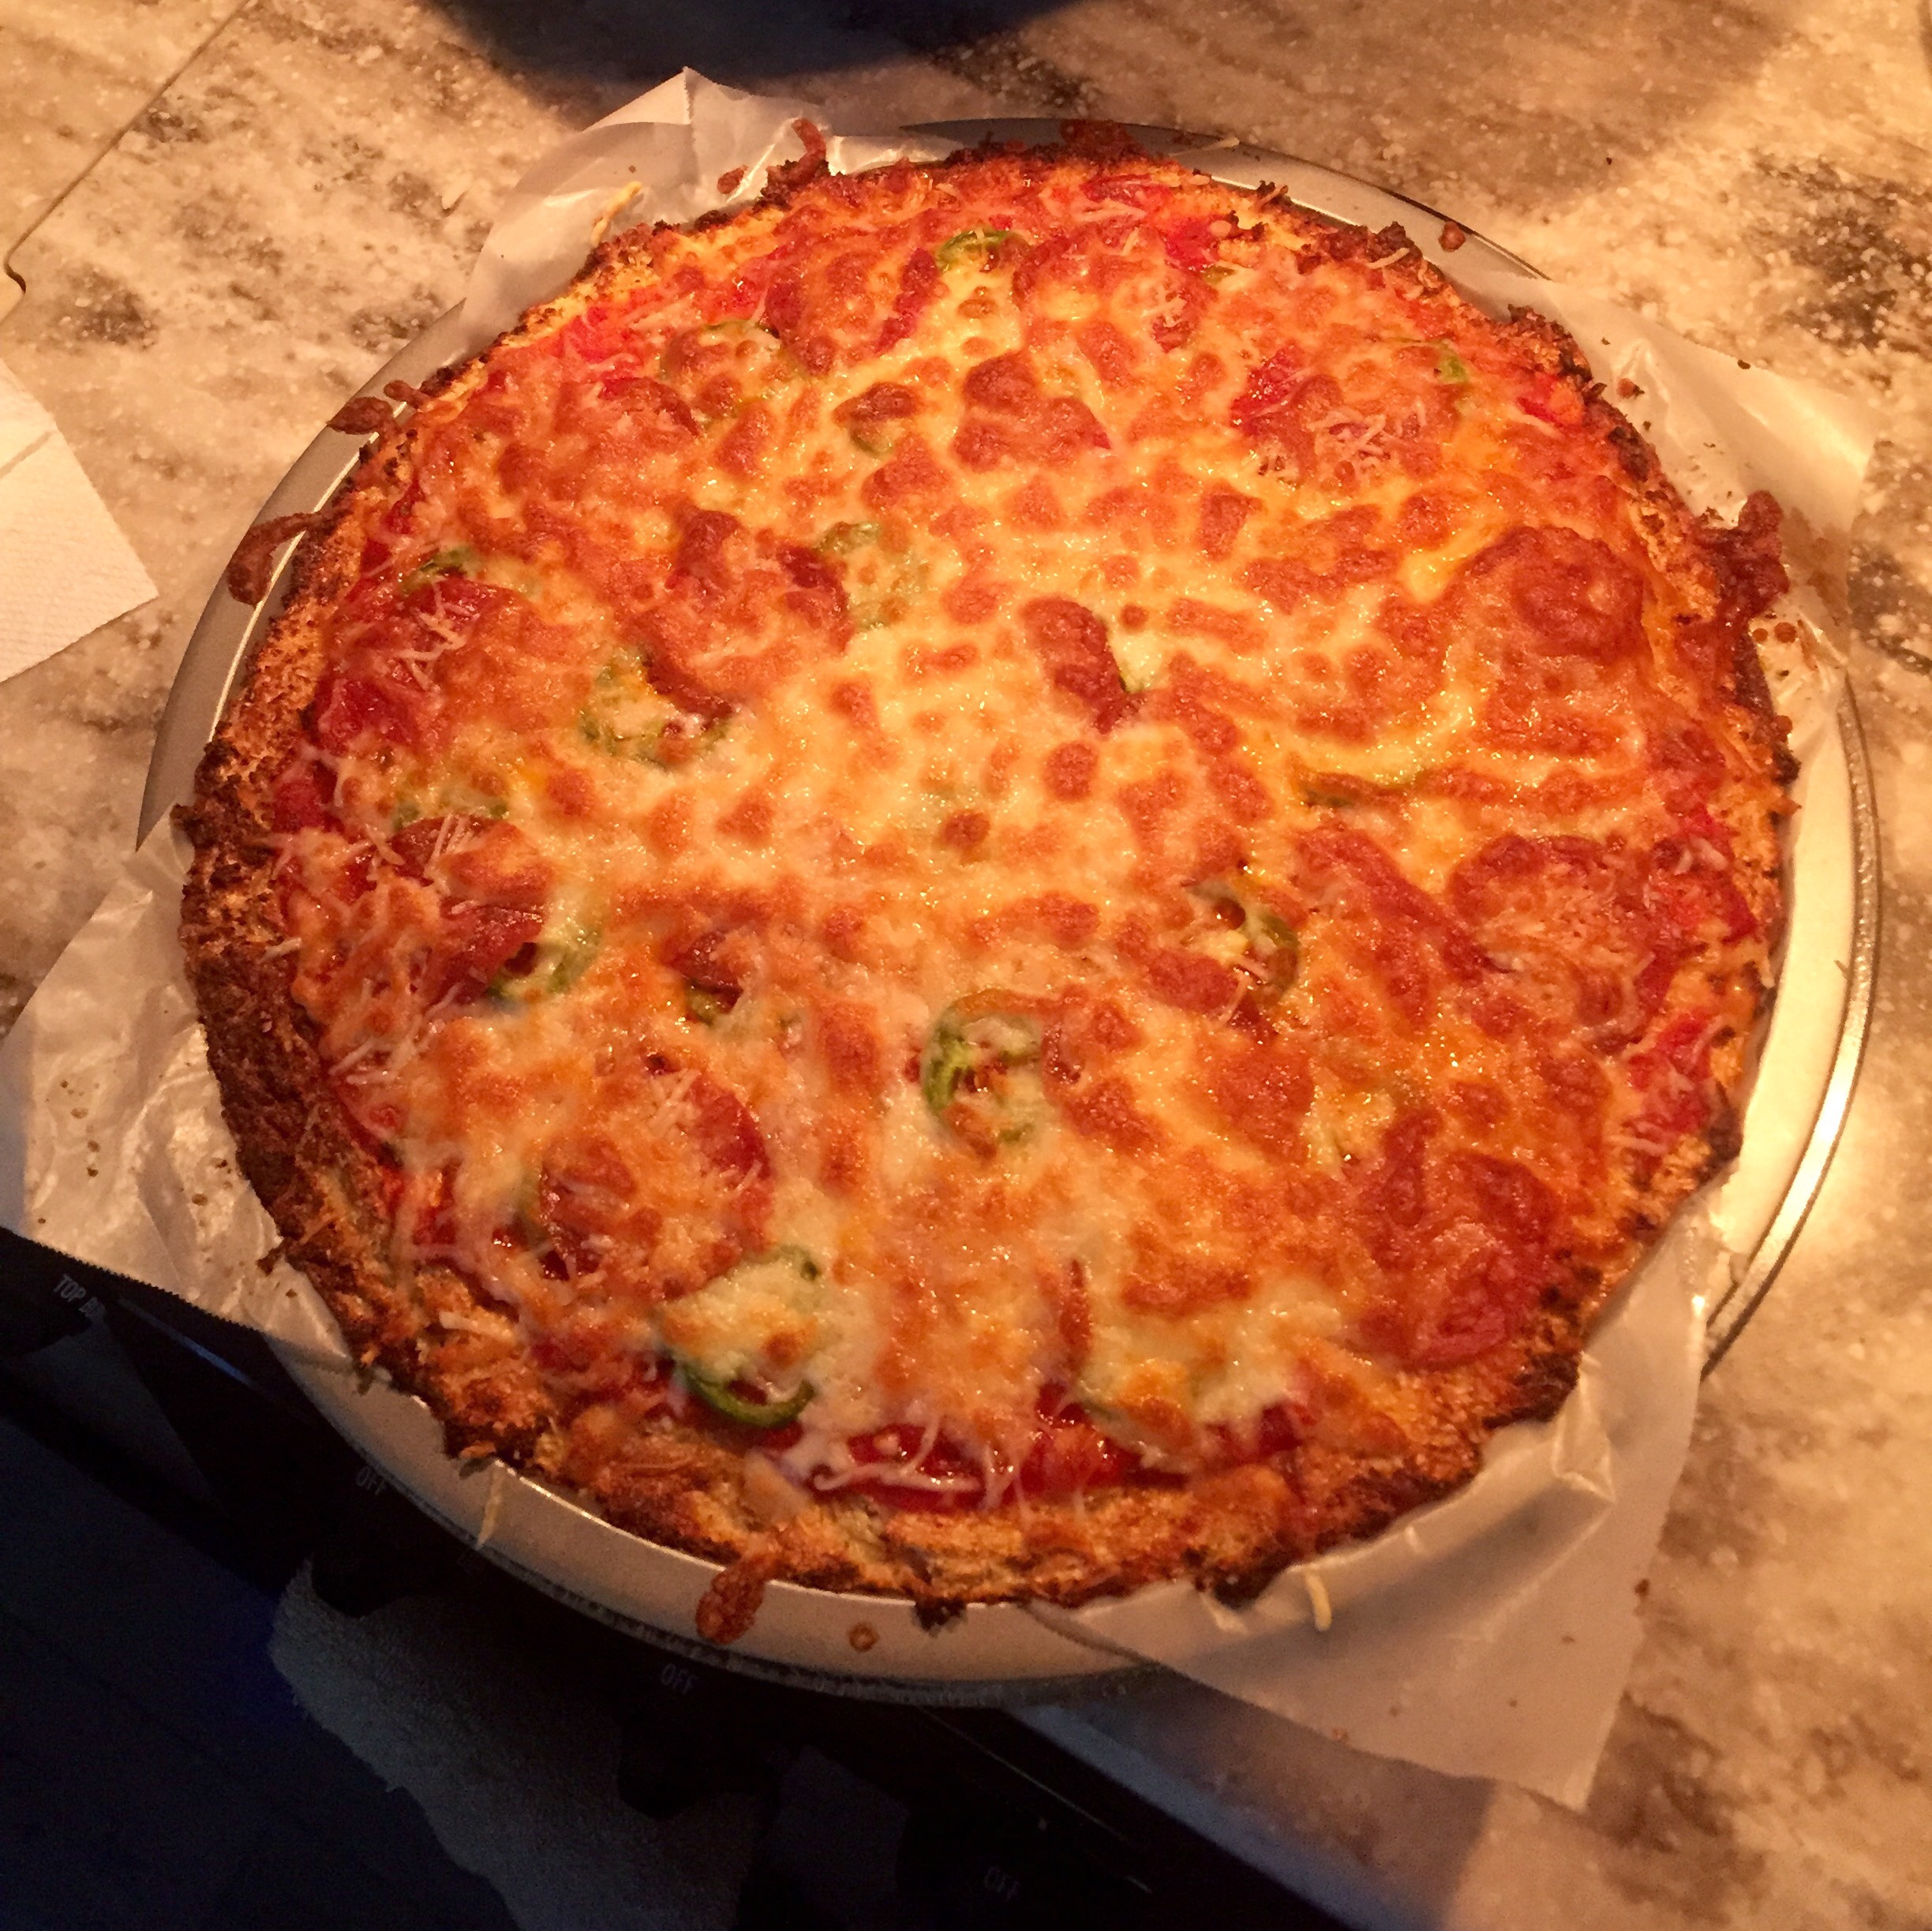
So I got up this morning and made bacon and steak & eggs. Then got ready to make some bread.

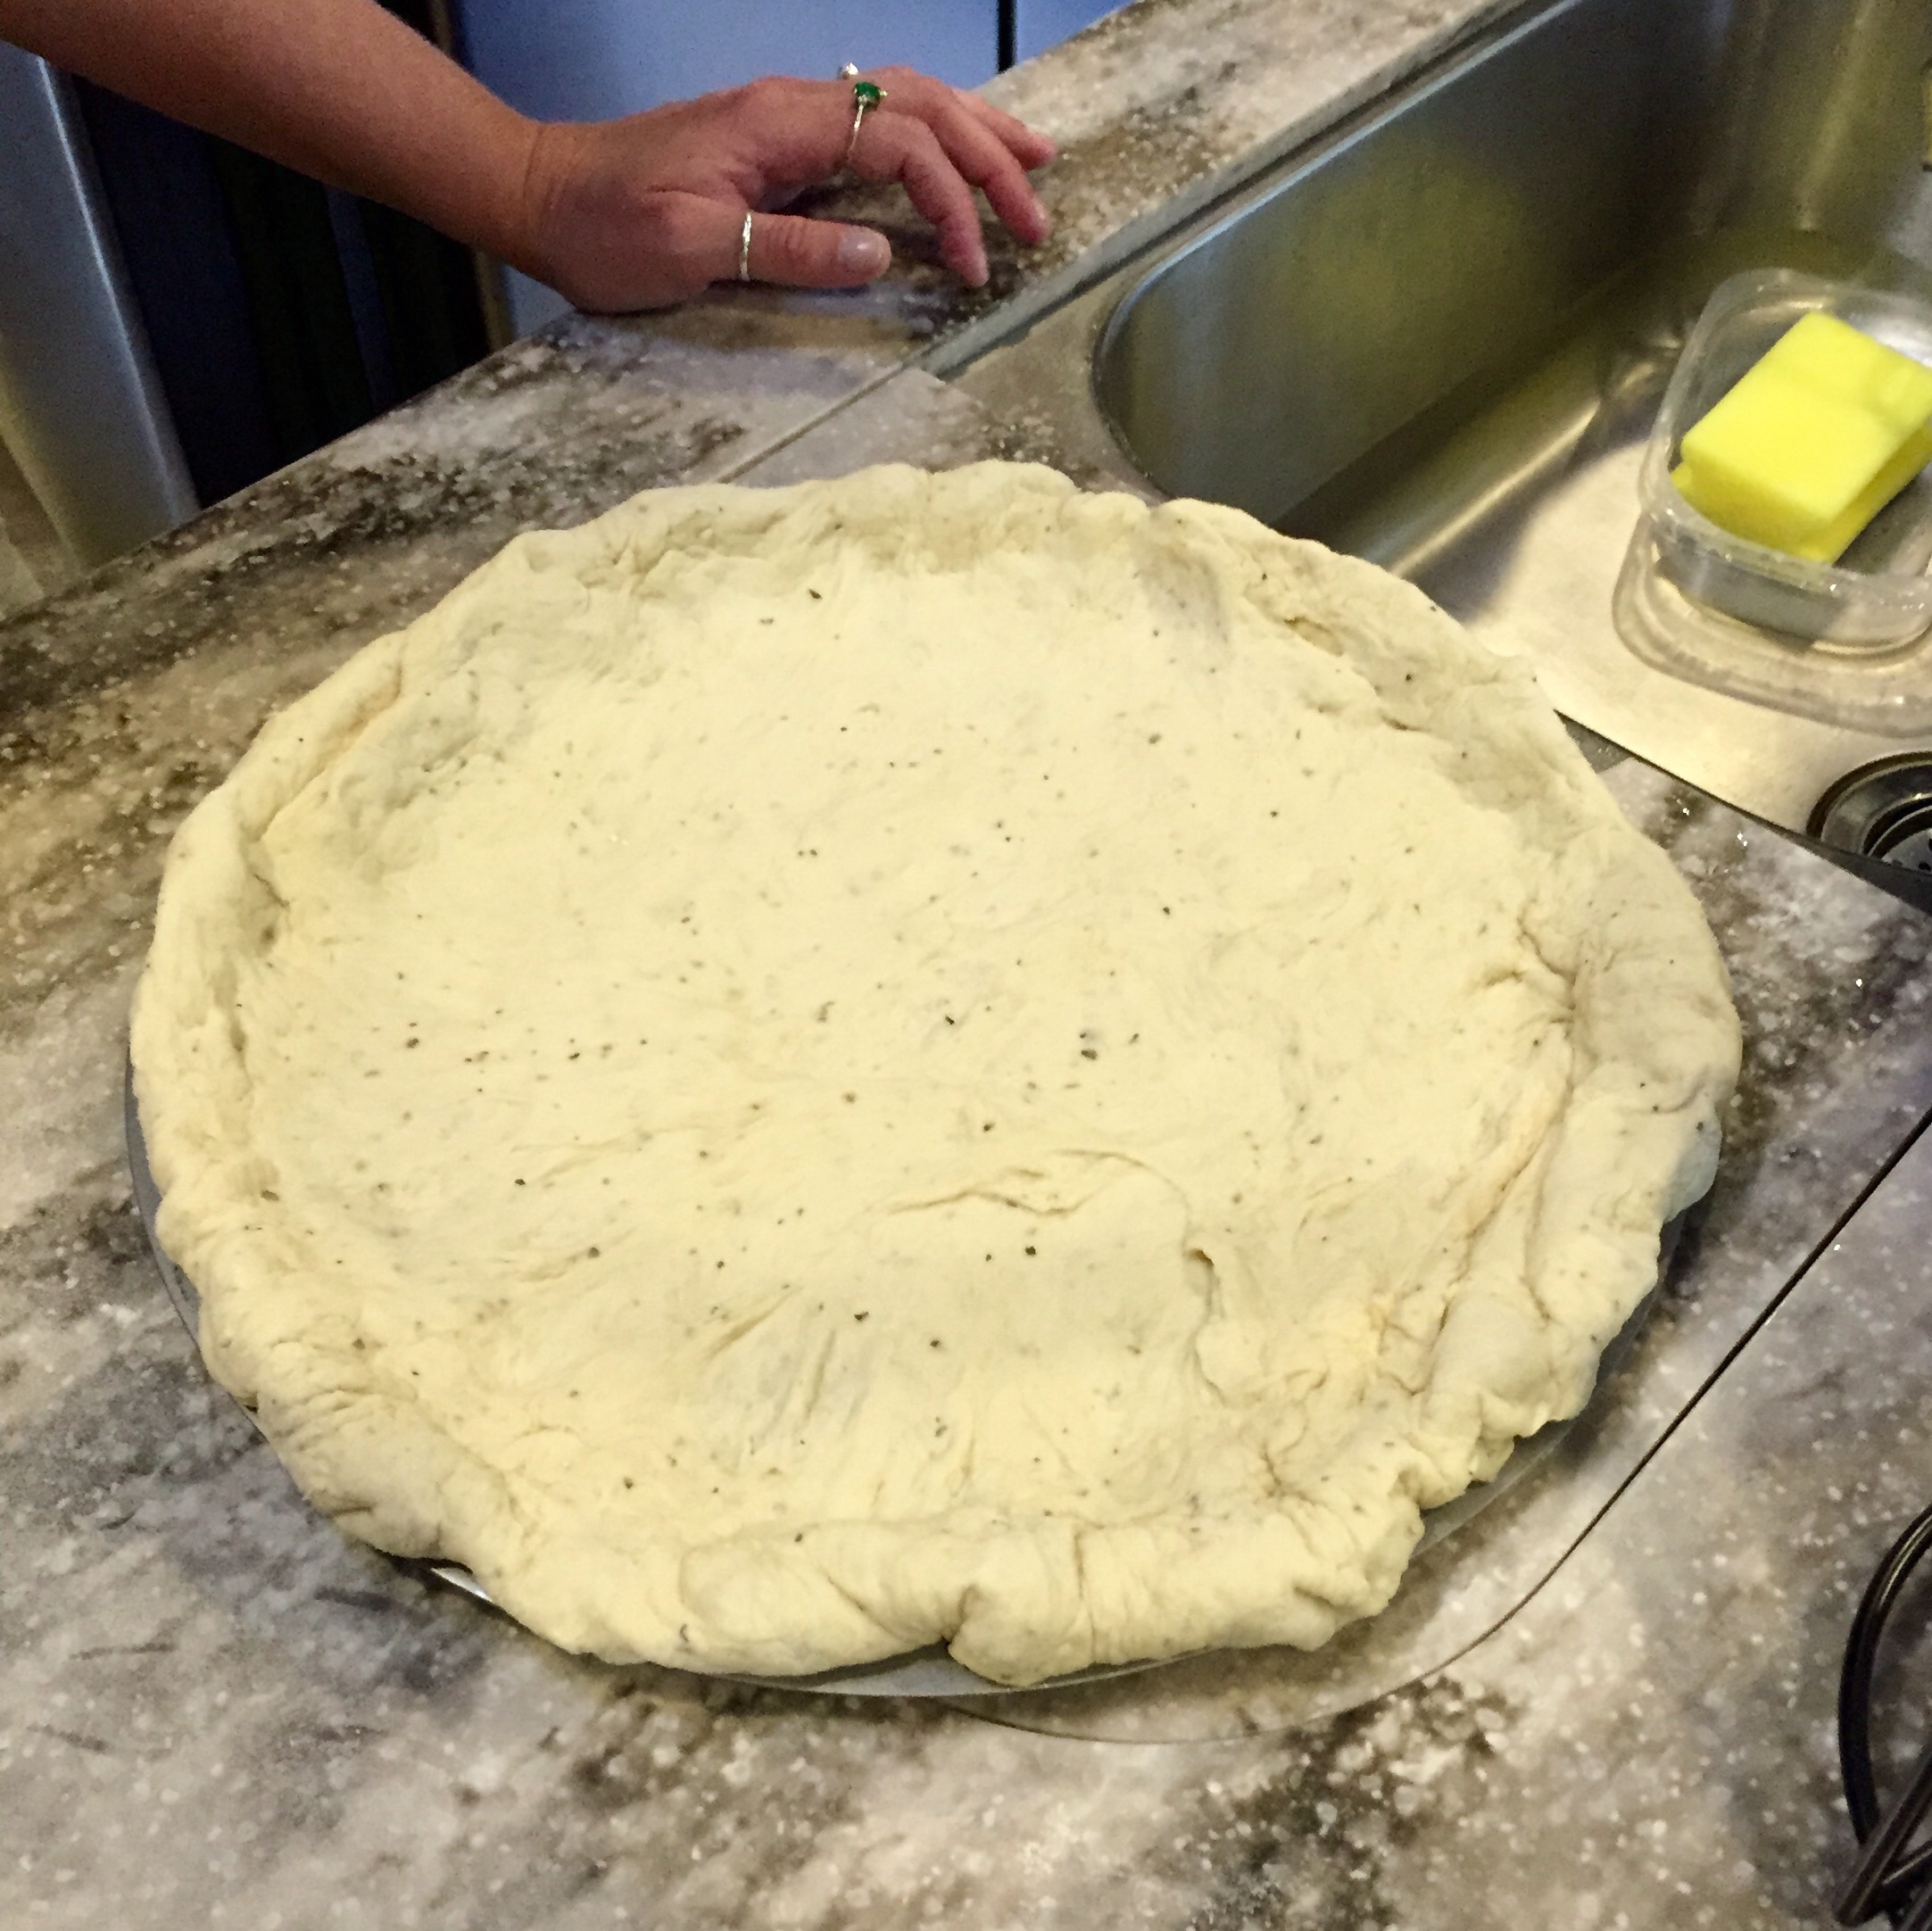
 I found a recipe for Potato Bread that uses real onion and a real potato so I thought I’d try it. I’ve been having an issue lately with my bread not rising enough. My first thought was the altitude but we aren’t very high. Now I’m thinking it’s the temperature. The bread maker’s room temperature and mine must be different! Considering we are trying to maintain a steady 64 degrees I’m not too surprised.

We keep alternating between using the fireplace & space heater, and using the furnace.  We are trying to balance saving propane, while also trying to keep the floor warm, as well as the huge cubby and the water compartment outside. Plus we are paying for electric here, so we don’t want to crazy run the meter up. But, we’ve already went through over $100 in propane in 2 weeks heating this huge camper we are fortunate enough to live in! We have our heated water hose plugged in and the tank heaters on, and the truck is plugged in.

Anyway, I’m warming my ingredients by the hearth! Trying to bring them up to my picky bread maker’s version of room temp, not my budget-conscious version!

 Charlie is happily busy with her new bone (which I will be sneaking away when she finally wants to go outside!) and Allen is napping in bed…

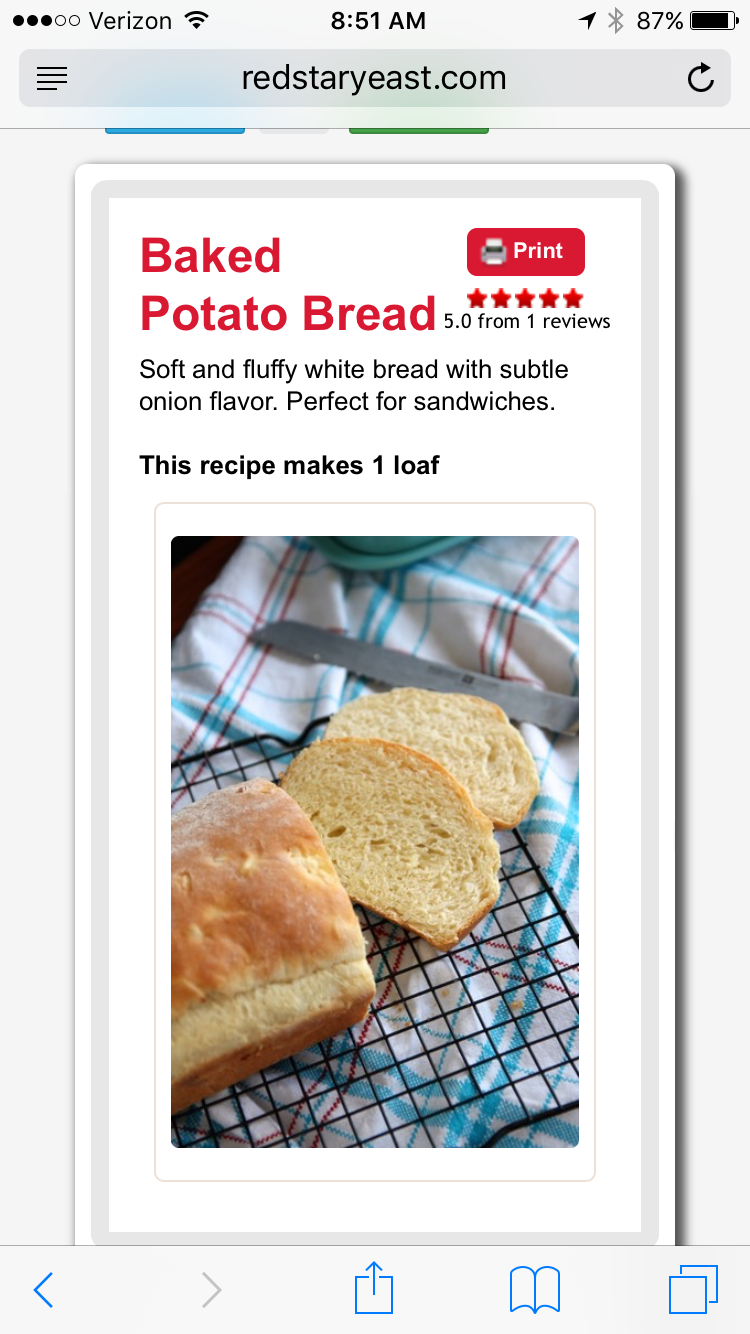
Here is the recipe for the Baked Potato Bread (From redstaryeast.com) and that Pumpernickel Rye Bread (from westbound.com) I made the other day…

Baked Potato Bread

  • 1/2 milk (@ 80 degrees)
  • 3 tbs olive oil
  • 1 egg (@ room temp)
  • 2 3/4 cup bread flour
  • 1/3 cup baked potato, mashed (I microwaved mine)
  • 1 tsp salt
  • 1 tbs sugar
  • 1 1/2 tsp yeast
  • 1/2 cup onion, finely diced (added at the nut beep)

This makes a 1 1/2 lb loaf. Basic/White cycle. Medium crust color.

Pumpernickel Rye Bread

  • 5 oz water (@ 80 degrees)
  • 1 1/2 tbs molasses (I used syrup because that’s all I had on hand)
  • 2 tbs butter
  • 1 1/2 cups bread flour
  • 1/3 cup rye flour
  • 1/3 cup whole wheat flour
  • 1 tbs unsweetened cocoa powder
  • 1 tsp salt
  • 1 1/2 tsp yeast

This makes a 1 lb loaf. White/Basic cycle. Medium crust color.

As always, if you want to browse some other bread machine recipes, you can do that here.  I’m making this to go with this Creamy Chicken & Wild Rice Soup I’m going to try tonight.  I’ll post the recipe once I find out if it’s any good! Stay warm out there! 

**Creamy Chicken & Wild Rice Soup recipe

Are we becoming “NoDaks”???

Lyle, the engineer on the tallest broadcast tower in America told Allen and the guys yesterday that they were going to turn into true NoDaks before we get out of here. Yikes! I think he means that they are going to somehow adapt to the crazy cold and windy weather that all the locals keep describing as “nice”.  That’s not the term I would use!! 480px-KVLY-TV_Mast_Tower_Wide

Yesterday I met the maintenance man for Hillsboro Campground and Motel. He moved his camper down to the insulated water spicket section. Everyone is kind of huddling together now the temps are dropping below freezing. I didn’t catch this gentleman’s name so I’ll just refer to him as Lyle #2 for now. Lyle #2 works on the beet farm then does maintenance type things for the motel and campground. He’s done this for 5 years. He’s 71. He got his first motorcycle in 2010 (a Harley that he quickly swapped for a Honda that wants to be a crotch rocket that he now loves, even has the jacket to prove it.) He had a travel trailer for thirty years until recently he traded that for a 27′ fifth wheel. He misses the travel trailer.

Lyle #2 said that he put all the “new” spots in back in September and did them all in less than 2 weeks because they had 71 campers here for the beet farm!  I can’t imagine that many campers in this park! But I could see it being nice in the summer. 
But the rush to get the spots built explains the super soft gravel and mud.  (And also the catty-wompus way the electric and water hookups are in the middle of the yards)  Lyle #2 said these 71 units were mostly class A’s with retired folks, this group is called a “Camp Force”, and they left here October 15 to head to Amazon to work for Christmas. Then they go out to California to work another farm, come back this way for potatoes then the beets again. But Lyle #2 isn’t sure if they will all be back next year because the beet farm didn’t pay the premium price and some of them didn’t even make their expenses.

I found my conversation with Lyle #2 to be very interesting. I’d never heard of a “Camp Force” before. I’ve heard of full time RVers going to work for Amazon but not necessarily traveling as a group and going from farm to farm for the different harvests. Anyhow, Lyle #2 was on his way to shut the water off in the “old” section of the park so I headed back inside with Charlie to thaw out our hands and paws! We have not become No-Daks quite yet!

 I AM really starting to like this town. I had a feeling I would before we got here. Wednesday, Allen got off early because of nasty weather, so we went over to Granny’s (the local watering hole) to see if we could find somewhere to watch the Thursday Night Football game. We wanted to avoid driving all the way to Grand Forks (35miles) in snowy weather if at all possible. Jackie is the bartender at Granny’s most of the time and she was very friendly. They have free popcorn too! But their TV’s are kind of small so we wanted to check out Reno’s also (the local sports bar). Jackie described it as a little more modern.

Reno’s was a lot newer yet not as cozy. But still, Reno was very friendly and said he would definitely have the game on for us. They also have a full menu (mostly fried appetizers and burgers) and we need to eat when we drink!

 So we headed back to Reno’s Thursday night and watched the Bengals go 8-0 for the first time in history!

 A local guy bought us some shots. Jackie showed up to chat a bit. I made a plan to take Charlie to Granny’s for the 8am Happy Hour Saturday morning (didn’t happen!) (and yes, 8-9am is Happy Hour for all the guys that work at the beet plant) and I also got the OKAY to have mail sent to Reno’s. (The campground is kind of weird for mail and they just have a box on the street that nobody checks regularly). So it turned out to be a great night. Allen was sufficiently late to work Friday while re-evaluating his life choices and Charlie woke up with her Bengals shirt half on/half off… Just goes to show our first major outing in town was a fun one!

We also stopped by Olsen Hardware, NAPA, and the lumber store looking for one of those boot brush cleaner thingies that you put outside… No luck… Our garage is seriously a mud room now! I got to run into Uniquely Yours Craft Boutique while Allen picked up an adapter for our air pump. We couldn’t reach the dually tire valves without it. I found some wooded salt and pepper shakers that I think are super cute! I was looking for metal ones, but no luck there.

 Allen is working today (Sunday) as well as yesterday since they had that weather day. But the next day off we are going to go into Grand Forks to Walmart and stock up on some food. Dale’s Food Pride (local grocery) is almost as expensive as San Francisco and I’m over that! But I guess they can charge whatever they want since they are the only place around.

Yesterday I made my first loaf of Pumpernickel Rye Bread and I think it came out really good. I do want to get some caraway though to add and I think that would boost the flavor a bit more.  I’ll wait to get Allen’s opinion before I post the recipe. But if I do it will be here, along with the Hillbilly Chili and Chili Bread I’m making today! Perfect for a chilly football Sunday… Cheers!

***Pumpernickel Rye Bread recipe

Fantastic Chili Bread!

I think I want this bread with a big bowl of chili for my last meal! It is SO good!

I made this chili bread yesterday with my Hillbilly Chili for dinner and Allen and I ate almost the whole loaf! We didn’t even bother to take the kneading paddle out, we just tore off chunks at a time…

I found the recipe on this website. It’s full of recipes for the bread machine. I’ve tried a few of them, and most work out, while some are complete failures (i.e.: Lemonade Bread!)

I was a little worried because it doesn’t call for any sugar, but beer has sugar in it… I modified the recipe a little bit to fit what I had available… Here’s what I did:

  • 3/4 cup + 2 tbs Budweiser (any beer would probably work, I actually think a darker hoppier beer would probably be delicious) *I used warm, room temp beer.
  • 1 tsp instant chicken bouillon (or, 1 cube crushed up very finely)
  • 1/4 tsp ground cayenne
  • 1/4 tsp hot chili oil (I usually find this in the Asian section with sesame oil)
  • 1 tbs olive oil
  • 1/8 tsp ground cumin (I eyeballed this because I don’t have a measuring spoon that tiny)
  • 1 1/2 tsp onion powder
  • 1 tsp chili powder
  • 1/4 tsp garlic powder
  • 1/2 tsp salt
  • 2 1/4 cups bread flour
  • 2 tsp yeast

This makes a 1lb loaf. I set my machine to the french bread setting and a medium crust color. The basic/white bread setting would probably work also.

It’s perfect to munch on by itself, it’s spicy and delicious, but even better dipped in chili. If you’re in the market to try a new chili recipe, mine is pretty fantastic! You can find that recipe here. It would actually probably be good served with gumbo too… Maybe I’ll put that on the list for next week!

I’ve been compiling my favorite bread recipes in one spot, if you want to check them out and maybe try one this weekend.

Happy Friday!

The BEST clam chowder EVER and Super Yummy Chocolate Zucchini Bread

Not together of course. That wouldn’t be so delicious. But separately=yum!

Side note: if you WANT to try chocolate covered clams, here’s a random recipe

 
Saturday Allen and I met my friend Dave for dinner at The Old Clam House. Dave and I went to the Academy of Art together about…. Oh, we’ll just say 7 years ago… And he lives in the city now.  

**Disclaimer: I took none of the pictures of The Old Clam House, just borrowed them from Google. 

   
He could not have picked a better place! The Old Clam House is the oldest restaurant in San Francisco. It started in 1861. If you’re ever hungry in the city I highly recommend it! We started with drinks of course. They have their own beer, brewed by Anchor Steam, so I had that. It was really good, a little lighter than Allen’s Lagunitas. It’s called Old Clam House Milwaukee Steam.  

 Then we had a sizzling iron platter of shrimp and mussels with butter to dip in. Dave hates that the place switched owners and they no longer serve sourdough bread, but they make this soda bread in a cast iron pot type thing that was really good (I wish I could make bread like that!) 

 Next came the, I think, world’s best clam chowder. Oh my goodness. I want a bowl for breakfast as I’m writing this. Fantastic.  

 Then I finally got to try cioppino! I’ve always wanted to but I was always a little iffy about it. It was really good! Allen liked it too. I was a TINY bit surprised he liked everything as much as I did.  

 Thank you Dave for a wonderful dinner! If you’re up for it, check out some of Dave’s paintings!

Now for the Chocolate Zucchini Bread…. 

I did take this photo!


I found the recipe here: With The Grains

I modified it a little to fit what I had and cut it in half. I love it! The closest way I can think to describe it is it’s kinda like a chocolate muffin. It’s not too sweet. But it doesn’t taste like zucchini at all. I’ll definitely make it again.  Here’s the version I made: 

  • 1 1/2 cups zucchini, shredded
  • 1 cup whole wheat flour (I sifted mine)
  • 1/2 cup unsweetened cocoa powder
  • 1 tsp cinnamon
  • 3/4 tsp baking soda
  • 1/4 tsp baking powder
  • 1/4 tsp salt
  • 2 large eggs
  • 1/4 cup melted unsalted butter
  • 1/4 cup plain 2% Greek yogurt
  • 1/2 cup sugar
  • 1 tsp vanilla extract
  • 1/2 cup dark chocolate chips
  1. Preheat oven to 350 or convection oven to 325.
  2. Place the shredded zucchini on paper towels to absorb some of the moisture while you mix everything else. 
  3. Whisk together in a large bowl: the flour, cocoa, cinnamon, baking soda, baking powder, and salt 
  4. Whisk in a medium bowl: eggs, butter, yogurt, sugar, and vanilla
  5. Pour wet into dry and stir together. (It will be thicker than cake mix, almost like a really wet bread dough)
  6. Fold in zucchini. 
  7. Pour/spoon into a parchment lined 9×5 loaf pan and top with chocolate chips. 
  8. Bake 45-55 minutes, or 60 minutes in the convection oven. (I rotated mine once)
  9. Place on a wire rack to cool. 
  10. Enjoy! And don’t forget to share with the neighbors 🙂

Bread Machine Deliciousness…

I’ve been experimenting with different recipes in my bread machine lately… (An Oster Expressbake)

Mostly because I’ve been trying to get the perfect sandwich bread for Allen’s lunches.  

It’s also been kind of dreary here in San Francisco lately. However, there’s an end in sight! From what I gather we need to be in Dallas by the first part of November… I can’t wait! The tower they were working on at Fair Park is coming down. I’m hoping we can swing through South Dakota and change our domicile on the way-even though it’s not really “on the way”).

Anyhow, back to bread: About a month ago I made this honey wheat bread that had an egg in it (my first bread using an egg) and Allen loved it. I think the egg holds it together better (for sandwiches that travel in a backpack on a motorcycle especially). Well… I can’t find that recipe again! I’ve looked in my search history and through all my scattered notes on paper throughout the house (I have plenty of those!)… Nada. So I’ve been trying different recipes looking for something that holds together well and has a nice texture and flavor. 

I finally found two that Allen says are delicious! (I wrote them down in a safe place!) First, the runner-up: 

French Countryside Bread (1LB loaf)

  • 3/4 cup + 1 tsp water
  • 2 1/4 tsp oil
  • 3/4 tsp salt
  • 2 cups bread flour
  • 3 tsp sugar
  • 1 tsp yeast (rapid rise/active dry)

Basic/White Setting; Medium Crust Color
The WINNER is moist and holds together well with less crumbs than normal and has a slight buttery flavor:

1LB Egg Bread (from Fleischmann’s)

  • 1/2 cup milk
  • 1 egg
  • 1 tbs butter/margarine (I used unsalted butter)
  • 3/4 tsp salt
  • 1 tbs sugar
  • 2 cups bread flour
  • 1 1/2 tsp yeast (rapid rise/active dry)

White/Basic Setting; Medium Crust Color
While I was perusing Fleischmann’s recipes, I came across one for Cinnamon Raisin Bread and decided to try that out. Allen, who claims not to like raisins, loved it! I’m thinking I could make it during the holidays for a little treat or breakfast toast… 

Cinnamon Raisin 1LB Loaf

  • 3/4 cup water
  • 3/4 tsp salt
  • 1 tbs butter or margarine (I used unsalted butter)
  • 2 cups bread flour
  • 4 tsp dry milk
  • 4 tsp sugar
  • 1 tsp cinnamon
  • 1 1/2 tsp yeast (rapid rise/active dry)
  • 1/2 cup raisins

Add all ingredients except raisins. 

White/Basic Setting; Medium Crust Color

Add raisins at beep, towards the end of the kneading cycle. 
Happy bread making! 

P.S. We finally got our new valve for the leveling jacks, but haven’t put it on yet. The weekends have been filled with football and we haven’t found the time quite yet (getting to the bar at 9am to watch the Bengals play has been a little rough on us!)

This New Fad: “Cold-Brewed Coffee”

When the weather is warm, there is nothing better than a big glass, or cup in my case, of iced coffee in the morning, or afternoon for that matter!

And the weather was SUPER warm last week in San Francisco! Like, abnormally hot, record-breaking, school closing heat… And being parked in an asphalt parking lot doesn’t help matters…
I saw a how-to for cold brewed coffee on a blog I follow. Then that same evening I saw a Starbucks commercial for cold brewed coffee, so I knew I had to try it. I was a little worried it wouldn’t be strong enough for my liking, but followed the instructions nonetheless (something I do very rarely).IMG_2560-0
It was super simple to make, the hardest part was remembering to do it the night before so it was ready in the morning!
I don’t have a coffee grinder. I’m not a coffee connoisseur. I drink Folgers Classic Roast on a daily basis, and enjoy a Caramel Macchiato from Starbucks on occasion. I also don’t own cheesecloth. But, the owner of the blog said it should be fine if I used a coffee filter in place of cheesecloth. (Here’s a link to the original post from Italian Home Kitchen ) And here’s what I did:
  • I put 5 big spoonfuls of coffee into the largest cup I had, which turned out to be a bartender mixing thing and actually that worked out pretty well. Then I filled it up with cold water. I put the lid on it. Then I went to bed. And slept.
  • When I woke up the next morning I got my mesh strainer out, along with a coffee filter, some wax paper, scissors, and a giant Starbucks cup. (I hang onto decent plastic cups-it saves us having to buy them, and since we don’t travel around with glass, why not?)IMG_2561-0
  • I put the strainer over the empty cup, cut a hole in the middle of the wax paper, and put the coffee filter in the open spot. Then I began the painfully slow process of straining the coffee from the coffee grounds. It was about as slow as a drip coffee maker, but when you have to stand there and watch, it feels like waiting for a pot of water to boil, or watching paint dry. Ok, maybe it’s not that bad. But I was anxious to try this new cold brewed coffee!IMG_2563
It came out super dark colored and instead of my assumption that it would be too weak, I was afraid it would be way too strong.IMG_2562
So after I got it all strained I poured it over ice and added some milk and sugar like I would with iced coffee.IMG_2564-0
Then I tasted it.
(I swished it around as if I were a coffee connoisseur)
Very good.
I’d say it’s milder than iced coffee.
It was pretty yummy.
It doesn’t have as much of an acidic taste as hot or normal brewed coffee does.
I liked it.
I had two full cups.
I’ll probably make it again.

Roasted Garbanzo Beans

I’ve roasted garbanzo beans, or chickpeas, years ago. They are a crunchy, healthy snack and you can flavor them however you want.

I saw a post about Sweet and Spicy Roasted Nuts that caught my attention and it brought back the distant memory of roasted garbanzo beans.
Then my mouth started to water. And I added garbanzo beans to my shopping list.
I was afraid to make them “sweet” because they roast so much longer than the cashews in the original post that gave me the idea. So I just went with a similar concoction to what I’ve done in the past.
IMG_2585-2
Instead of an actual oven, I used our convection microwave. It occurred to me that the reason I haven’t made these in FOREVER is because I haven’t had access to an “oven” that will cook things for long periods of time.  The camper oven is small and heats from the bottom, so it’s a little difficult to use. It’s definitely something you need to adjust to and account for!
Here’s the general recipe I followed:
***Full disclosure: I never measure ingredients (unless I’m using my bread maker). I eyeball and account for my preference of how I want the dish to taste. Sometimes I will use my palm or pinch with my fingers, but it’s nothing I could communicate in an actual measurement. So I say, just go with what you think will taste good. Or measure.
  • 2 cans of garbanzo beans, drained, rinsed, dried
  • olive oil
  • kosher salt
  • cumin
  • chili powder
  • cayenne pepper
Rinse the beans then drain them. I spread them on a paper towels then roll them around a bit to dry them off. I also pick out the little “skins” that fall off. I drizzled them with olive oil then sprinkled them with seasoning.
IMG_2578-0

The wine is only for my sanity, not a part of the recipe!

I roasted them in the convection oven on 375 degrees for about 40 minutes total, I stirred them around twice.
In a regular oven you would do 400 degrees for 30-40 minutes.
I like mine crunchy, so inevitably some of them will get a little burnt. I like those little guys too.
IMG_2582-0
Just to be totally honest, I love these, but Allen thinks they are disgusting.  But then again, he uses that word to describe a lot of things. It drives me nuts. And he knows it.
IMG_2590
He has described as disgusting the following things that come to mind:
  • wine
  • roasted garlic
  • ground turkey (he will eat an entire serving and more of spaghetti or chili or “sausage” though)
  • my toothpaste

Anyway, if you’re in the market for a spicy, crunchy snack, and you’re not as crazy as my boyfriend, I say give these little guys a try!

Cheers to football Sunday!

IMG_2600

Homemade Pizza

Ever since we got the new camper with a convection microwave, I’ve been wanting to make homemade pizza. 

My first attempt at cauliflower pizza did not turn out so well. The directions said to steam and drain the cauliflower, getting rid of the excess moisture, before grating it and maxing it with cheese and egg and shaping it like a pizza crust. I skipped the steaming and draining part so the “crust” never got crispy enough to hold together. I still want to try it again…  


After that didn’t work, and I got the Breadmaker, I decided to make actual pizza dough. This time it came out super delicious! I think the only thing I will do differently next time is bake the crust on its own with no toppings for ten minutes or so beforehand, so it gets a little more done without the cheese and toppings getting too brown.  


pepperoni, jalapenos, bell peppers and onions

  
And by the way, Allen took his very first blog photos for this post! 😉 Good job babe! 

Here is the recipe I used for the dough:

1.5 pounds: 1/2tsp salt, 3cups all-purpose flour, 1-1/2tsp active dry yeast, 1cup water, 2tbs EVOO, and I added about a tbs of Italian seasoning 

  1. Measure all ingredients into bread pan. 
  2. Select the dough cycle on the breadmaker. 
  3. Pat dough into a 12″ round pizza pan. 
  4. Preheat oven to 400• (I did the convection oven to 375• because you always go 25• lower than the recipe calls for. 
  5. Spread sauce and toppings over dough. 
  6. Bake 15-20 minutes. (I went 30 because the convection oven seems to take longer.)

***As I mentioned before, next time I will bake the crust on its own for about 10minutes THEN add the toppings. OR I could bake it in the regular oven. Since camper ovens are so small, they tend to burn the bottom of everything, since that’s where the heat comes from. We usually try to avoid using it altogether.  But that might be perfect for pizza!

On another note about the camper oven: we discovered in the old camper, before we had a convection oven in our lives, that if you cover the oven rack with aluminum foil, it helps to distribute the heat a little more evenly, but it also takes longer for things to cook.